Physical Address
304 North Cardinal St.
Dorchester Center, MA 02124
Physical Address
304 North Cardinal St.
Dorchester Center, MA 02124

WARNING: Water and electricity create serious hazards. If your dehumidifier is leaking or overflowing, unplug it immediately. Water damage can destroy flooring and create electrical shock risks.
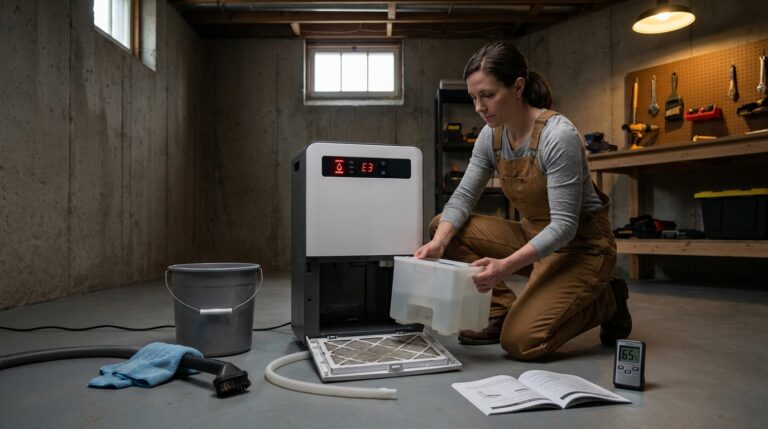
Your dehumidifier should automatically stop running when the water bucket fills to capacity. When it keeps running instead, you face overflow, water damage, and potentially dangerous electrical conditions. I have fixed over two dozen dehumidifiers with this exact problem, and the solutions are often simpler than manufacturers suggest.
Dehumidifier not shutting off when full typically stems from three core issues: a stuck float switch, a defective sensor assembly, or a failed control board. Most homeowners can diagnose and fix the first two problems themselves in under an hour. This guide walks you through each possibility with clear, safe troubleshooting steps that save you from costly service calls or unnecessary replacements.
Understanding normal dehumidifier operation helps identify when auto-shutoff failure occurs. Most units collect 30-70 pints of water daily depending on humidity levels. The auto shutoff safety mechanism exists precisely because that volume can cause significant damage if released onto your floor.
Here is the fastest way to address a dehumidifier that refuses to shut off when full.
30-Second Reset: Unplug the unit, wait 30 seconds, then plug it back in. This resets the control board and often resolves temporary sensor glitches. Test by running the unit until the bucket should trigger shutoff.
Three Main Causes:
If the reset does not work, proceed to the detailed troubleshooting sections below. Each includes safety warnings, required tools, and step-by-step instructions.
Understanding your dehumidifier’s safety system helps you diagnose problems faster. The auto shutoff relies on a simple but effective detection system that monitors water levels in the collection bucket.
Most portable dehumidifiers use a float switch mechanism inside the water bucket area. A small plastic float rests on the water surface inside the bucket or collection tray. As water level rises, the float rises with it. At maximum capacity, the float activates a microswitch that signals the control board to shut down the compressor and fan.
The float switch operates purely mechanically, making it both reliable and prone to physical problems. Debris, mineral buildup, or physical damage can prevent proper movement. The normal water collection rates stress this mechanism constantly, which explains why it fails frequently.
Some modern dehumidifiers, particularly premium models from GE and Frigidaire, use electronic sensor assemblies instead of mechanical floats. These sensors detect bucket presence and water level through magnetic or pressure-sensitive technology. They offer fewer moving parts but introduce electronic failure points.
The sensor assembly connects directly to the control board. When it malfunctions, the control board receives incorrect signals about bucket status. This can cause the unit to run continuously or display false “bucket full” warnings when the bucket is actually empty.
The control board serves as the brain of your dehumidifier. It processes signals from the float switch or sensor assembly and controls the compressor, fan, and indicator lights. A failed control board can ignore correct signals from functioning sensors, causing the unit to run regardless of water level.
Control board failures often stem from power surges, moisture infiltration, or age-related component degradation. They represent the most expensive failure mode to repair.
Five distinct problems cause dehumidifiers to run continuously despite full buckets. Each requires different diagnostic steps and repair approaches.
The float switch sticks when debris jams the mechanism, mineral deposits build up, or the float cracks and binds against housing. This prevents the float from rising with water level, so the microswitch never activates.
Symptoms include water overflowing from the bucket area and continuous compressor operation even when the bucket visibly contains water. You may notice the bucket full light never illuminates despite an overflowing bucket.
Fixing a stuck float switch typically requires cleaning or minor adjustment. Remove the bucket and inspect the float mechanism. Clean any visible debris, ensure the float moves freely, and check that the microswitch clicks when you manually lift the float.
Electronic sensor assemblies fail when internal components degrade or connections corrode. The sensor may send constant “bucket empty” signals regardless of actual water level, or fail to detect bucket insertion entirely.
Symptoms include erratic bucket full light behavior, the unit running without a bucket installed, or failure to resume operation after emptying a partially filled bucket. The sensor assembly typically costs $15-30 and requires basic disassembly to replace.
Control board failure represents the most serious and expensive problem. The board may receive correct signals from the float switch or sensor but fail to process them, or it may have a stuck relay that keeps the compressor powered regardless of shutoff commands.
Test for a stuck relay by unplugging the unit, waiting ten minutes, then plugging it back in. If the compressor starts immediately without pressing any buttons, the relay is likely stuck closed. Control boards cost $80-150 and often make replacement more economical than repair.
Improper bucket insertion prevents the float switch from engaging the shutoff mechanism. Many dehumidifiers require precise bucket positioning to activate safety interlocks. A bucket inserted crookedly or incompletely may allow operation while preventing proper float movement.
Symptoms include intermittent shutoff behavior and problems that resolve temporarily when you remove and reinsert the bucket. Check for bent metal tabs, cracked bucket guides, or debris preventing full bucket insertion.
Some users accidentally activate continuous mode, which overrides the auto shutoff function. This mode exists for applications with direct drainage or pump systems where bucket overflow cannot occur. When activated on bucket-dependent units, the dehumidifier runs indefinitely regardless of water level.
Check your control panel for continuous mode indicators, often labeled “Non-Stop,” “Constant,” or showing a continuous loop icon. Deactivating this mode typically restores normal auto shutoff behavior immediately.
Follow these diagnostic steps in order to identify the specific cause of your dehumidifier’s failure to shut off. Each step builds on the previous one, eliminating possibilities systematically.
First, confirm the dehumidifier actually has a problem rather than a misunderstanding about normal operation. Some units run the fan continuously even when the compressor shuts off due to full bucket detection.
Place your hand on the unit’s back where the compressor is located. If you feel vibration and the air exhaust is cold, the compressor is running. If only room-temperature air blows and no vibration occurs, the compressor has shut off correctly but the fan continues running. This is normal behavior for many units.
If the compressor truly runs continuously, perform this diagnostic test. Unplug the dehumidifier and wait exactly ten minutes. This allows capacitors to discharge and relays to reset.
Plug the unit back in without pressing any buttons. If the compressor starts immediately, you likely have a stuck relay on the control board. This requires board replacement or professional repair.
Remove the water bucket completely. Locate the float switch assembly, typically a small plastic arm or cylinder in the bucket well area. Gently lift the float with your finger and listen for a clicking sound. This indicates the microswitch is functioning.
If the float does not move freely, clean the mechanism with warm water and mild detergent. Remove mineral deposits with white vinegar applied to a cotton swab. Ensure the float returns to its resting position smoothly when released.
For electronic sensor models, inspect the sensor located where the bucket contacts the unit. Look for corrosion on metal contacts, cracked plastic housings, or loose wire connections. Clean contacts with a pencil eraser or fine sandpaper.
Remove the bucket and check if the unit stops running entirely. On most models, removing the bucket should trigger immediate shutdown. If the unit continues running without a bucket, the sensor assembly has failed.
Control board inspection requires removing the dehumidifier’s outer casing. Unplug the unit before disassembly. Look for burned components, bulging capacitors, or corrosion on the circuit board.
If you see obvious damage, replacement is your only option. Testing control boards requires a multimeter and electrical knowledge beyond most DIY repairers. Consider this step the boundary between DIY and professional service.
Inspect the water bucket for cracks, especially in the float area. Check that the bucket sits level when inserted and that no foreign objects obstruct proper seating. Look for bent metal tabs or damaged guides in the bucket well.
Remove the bucket and reinstall it firmly, ensuring it clicks into place. Test the unit and observe whether proper insertion restores normal shutoff behavior. If problems persist, proceed to other common dehumidifier problems for additional troubleshooting.
Different manufacturers use varying float switch designs and sensor placements. These brand-specific tips address the most common failure modes for popular dehumidifier lines.
GE dehumidifiers frequently suffer from continuous mode confusion. Check the control panel for the “Non-Stop” setting, which overrides auto shutoff entirely. Press the mode button until the indicator disappears.
GE units also use a specific reset sequence that differs from generic unplugging. Hold the power button for five seconds while the unit is unplugged, then plug it in while continuing to hold the button for another five seconds. This forces a complete control board reset.
Frigidaire dehumidifiers commonly develop bent metal tabs in the bucket well area. The little metal tab in the back right corner often bends downward, preventing full bucket insertion. You must pull the tab outward and reseat it in the top slot.
Frigidaire sensor assemblies are particularly susceptible to corrosion. Remove the back cover and locate the sensor near the bucket contact point. Clean any green or white corrosion from metal contacts with electrical contact cleaner.
Hisense 70-pint models (DH-70KP1SLE and similar) have a documented microswitch issue inside the main housing. The microswitch gets stuck in the closed position and fails to detect bucket removal or water level.
The permanent fix requires removing the back cover and locating the microswitch near the bucket area. The switch has a small plunger that sticks. Poke the plunger from the back side with a small screwdriver to free it. Many users report this fixes the problem permanently without part replacement.
Whirlpool units rely heavily on proper bucket seating. The bucket full light stays on constantly if the bucket is not inserted correctly. Remove the bucket completely, check for debris in the seating area, and reinstall with firm pressure until you hear an audible click.
Whirlpool dehumidifiers also feature a humidistat reset procedure. Unplug the unit, press and hold the humidity down button, then plug the unit in while holding the button. Continue holding for ten seconds, then release.
Reset procedures vary by manufacturer and problem type. Try these methods in order when troubleshooting dehumidifier not shutting off when full.
Unplug the dehumidifier from the electrical outlet. Wait 30 seconds minimum to allow the control board capacitors to discharge. Plug the unit back in and power it on normally. Test by allowing it to run until the bucket should trigger shutoff.
For suspected stuck relays, unplug the unit and wait ten full minutes. This extended period allows thermal relays to cool and release. Plug the unit back in and observe whether the compressor starts immediately. Immediate startup indicates relay replacement is needed.
Some dehumidifiers offer factory reset combinations. Common methods include holding the power button for ten seconds while plugging in the unit, or pressing specific button combinations on the control panel. Consult your owner’s manual for model-specific reset instructions.
If you lack the manual, search online using your exact model number and “factory reset” to find the correct procedure. Resetting restores all settings to factory defaults and often resolves software-related sensor interpretation issues.
Deciding whether to repair or replace your dehumidifier depends on repair costs, unit age, and efficiency considerations. This comparison helps you make an informed financial decision.
DIY repairs cost significantly less than professional service but require time and basic technical skill. Float switch cleaning costs nothing but time. Replacing a sensor assembly costs $15-30 for the part plus 30-60 minutes labor.
Control board replacement costs $80-150 for parts alone. At this price point, replacement becomes attractive unless you have a high-end unit. Most DIY repairs require only basic hand tools you likely already own.
Professional appliance repair services charge $75-150 for the service call alone. Labor runs $50-100 per hour, with most dehumidifier repairs taking 1-2 hours. Parts add $15-150 depending on the failed component.
Total professional repair costs range from $140 for simple float switch replacement to $400 for control board replacement. These costs make professional repair uneconomical for most dehumidifiers under $300 original purchase price.
New dehumidifiers range from $150 for basic 30-pint models to $400 for high-capacity 70-pint units with pump systems. Consider upgrading to a dehumidifier with pump drainage to avoid future bucket overflow issues entirely.
Replacement makes sense when repair costs exceed 50% of replacement cost, or when your unit is over five years old. New units offer improved energy efficiency and updated safety features that older models lack. Browse replacement dehumidifiers if repair is not viable.
| Problem | DIY Cost | Pro Cost | Recommendation |
|---|---|---|---|
| Stuck float switch | Free | $140-175 | DIY repair |
| Sensor assembly | $15-30 | $140-200 | DIY repair |
| Control board | $80-150 | $200-400 | Replace unit |
| Multiple issues | $100+ | $300+ | Replace unit |
A dehumidifier not shutting off when full creates immediate safety risks. Water and electricity do not mix safely, and overflow can cause thousands in property damage within hours.
Always unplug the dehumidifier before any inspection or repair involving water components. Even if the unit appears off, capacitors store electrical charge that can cause shock. Wait ten minutes after unplugging before touching internal components.
If your dehumidifier has been leaking or overflowing, check the power cord and plug for moisture before reconnecting. Wet electrical connections create fire hazards. Allow all components to dry completely before powering the unit again.
Seventy pints of water weighs nearly 60 pounds. When released onto your floor from a full bucket overflow, this volume saturates carpets, warps hardwood, and damages subflooring. Basements with dehumidifiers face particular risk since they often have concrete floors that allow water to spread unnoticed.
Mold growth begins within 24-48 hours of water saturation. A dehumidifier overflowing overnight creates perfect conditions for mold colonization in drywall, carpet padding, and baseboards. The device meant to prevent moisture damage becomes the cause.
While troubleshooting your dehumidifier, place a large plastic container or secondary drain pan beneath the unit. This catches any overflow while you identify and fix the root cause. Check the bucket every few hours during testing periods.
Consider running the unit only when you are present to monitor it until you confirm the repair succeeded. Never leave a malfunctioning dehumidifier running unattended overnight or while away from home.
Document any water damage immediately with photos if your dehumidifier overflows. Most homeowners insurance policies cover sudden appliance failures but require prompt reporting. Save receipts for any professional cleanup services.
Check your dehumidifier warranty before attempting repairs. Many units carry one to two-year warranties covering defects in materials and workmanship. Opening the unit may void warranty coverage, so contact the manufacturer first if your unit is still under warranty protection.
Regular maintenance prevents the dehumidifier not shutting off when full problem from recurring. Follow this schedule to keep your unit operating safely and efficiently.
Once yearly, perform thorough maintenance to extend dehumidifier life and prevent failures. Remove the outer casing following manufacturer instructions. Clean all internal components with compressed air and a soft brush.
Check all wire connections for corrosion or looseness. Apply dielectric grease to electrical contacts to prevent future corrosion. Lubricate any moving parts in the float mechanism with silicone spray designed for plastic components.
Inspect the refrigeration system for ice buildup or damage. Dehumidifier freezing issues often relate to maintenance neglect and can compound shutoff problems by adding ice weight to the bucket mechanism.
Yes, dehumidifiers help COPD patients by reducing airborne mold spores, dust mites, and other irritants that thrive in high humidity. However, maintain humidity between 40-50% because air that is too dry can also irritate airways. Monitor both humidity levels and your symptoms. Consult your pulmonologist about optimal indoor humidity for your specific condition.
Yes, properly functioning dehumidifiers automatically turn off when the water bucket reaches capacity. The float switch or sensor assembly detects full capacity and signals the control board to stop the compressor and fan. If your dehumidifier keeps running when full, the float switch may be stuck, the sensor may be defective, or continuous mode may be activated.
Your dehumidifier stays on constantly due to one of three reasons: continuous mode is activated, the float switch is stuck and cannot detect full water levels, or the humidistat is set lower than current room humidity. Check your control panel for continuous mode indicators first. If disabled and the unit still runs constantly, inspect the float mechanism for debris or damage.
Yes, dehumidifiers can cause sore throats if they reduce humidity below 30%. Dry air irritates mucous membranes in the throat and nasal passages. Set your dehumidifier to maintain 40-50% humidity for optimal comfort. If you experience persistent sore throats while running a dehumidifier, increase the humidity setting or run the unit for shorter periods.
Your dehumidifier fails to shut off when full because the float switch is stuck, the sensor assembly is defective, or the control board has failed. The float switch most commonly jams due to debris or mineral buildup. Clean the float mechanism with warm water and vinegar. If cleaning does not work, test the sensor assembly with a multimeter or replace it. Control board failure requires professional diagnosis.
Yes, a properly functioning dehumidifier stops automatically when the bucket is full. The auto shutoff safety feature prevents overflow and water damage. The float switch rises with water level and triggers a microswitch at capacity, signaling the control board to shut down operation. If your unit does not stop when full, troubleshoot the float switch, sensor, and control board in that order.
Dehumidifier not shutting off when full creates serious water damage and safety risks that demand immediate attention. Most cases resolve through simple DIY fixes like cleaning a stuck float switch or resetting the control board. Follow the troubleshooting steps in this guide systematically, starting with the free 30-second reset and proceeding through visual inspection and component testing.
Brand-specific issues affect GE, Frigidaire, Hisense, and Whirlpool units differently, so consult the relevant section for your model. When repair costs exceed half the price of a new unit, replacement becomes the smarter financial choice. Regular preventive maintenance prevents this problem from recurring and extends your dehumidifier’s useful life.
Never ignore a dehumidifier that runs continuously. The device meant to protect your home from moisture damage can destroy it instead if left unaddressed. Take action today using the diagnostic steps above, and restore safe, automatic operation to your dehumidifier.