Physical Address
304 North Cardinal St.
Dorchester Center, MA 02124
Physical Address
304 North Cardinal St.
Dorchester Center, MA 02124

A fridge leaking water is one of the most common appliance problems homeowners face. The good news is that most refrigerator leaks stem from a handful of fixable causes, and many can be resolved with simple DIY solutions that take under an hour. Our team has helped dozens of homeowners troubleshoot these issues over the years, and we’ve learned exactly what works.
Before diving into repairs, always unplug your refrigerator to avoid electrical shock. Understanding your refrigerator power consumption helps you safely disconnect the unit. Safety comes first when dealing with water and electricity in close proximity.
In this guide, you’ll learn how to identify why your fridge is leaking, fix it yourself with step-by-step instructions, know when to call a professional, and prevent future leaks from happening. We’ve organized everything by leak location and cause to help you find answers quickly.
Most refrigerator leaks fall into one of six categories. Understanding which one matches your situation is the first step toward fixing the problem permanently. We’ve organized these by how commonly they occur based on our experience and repair data.
The defrost drain is the number one culprit behind fridge leaking issues. During normal operation, your refrigerator runs automatic defrost cycles that melt frost from the evaporator coils. This water flows down a small drain hole, through a tube, and into a drain pan where it evaporates.
When food particles, ice, or debris clog this drain, water has nowhere to go. It backs up and eventually spills out, pooling inside your fridge or leaking onto the floor. You’ll typically notice water collecting under the crisper drawers or at the bottom of the freezer compartment.
Clearing a blocked defrost drain is surprisingly straightforward. Our team has found that using a turkey baster filled with hot water works better than any specialized tool. The hot water melts ice blockages while the suction action dislodges stubborn debris. This technique, popular in DIY forums, saves you from calling a technician for a 10-minute fix.
Locating the drain hole varies slightly by brand, but it’s usually at the back of the freezer compartment, near the bottom. Look for a small circular opening about the diameter of a pencil. Some models have a cover or panel you’ll need to remove first.
A worn or damaged door seal creates gaps that let warm, humid air enter your refrigerator. This air condenses on cold surfaces, producing excess moisture that can leak out. Over time, the constant moisture exposure can also damage surrounding cabinets and flooring.
Inspect your door gaskets by running your hand along the seal while the door is closed. You should feel slight resistance all the way around. If you find gaps, cracks, tears, or areas where the seal feels loose, you’ve found your leak source.
The dollar bill test offers a quick verification method. Close a dollar bill in the door and try to pull it out. If it slides out easily without resistance, your seal needs replacement. Repeat this test at multiple points around the door frame.
Replacing a door seal is one of the easier DIY repairs you can tackle. Most seals simply pull away from a mounting groove and press back into place. The entire job typically takes 15 minutes and costs between $30 and $80 depending on your refrigerator model.
The drain pan sits underneath your refrigerator, catching water from the defrost drain so it can evaporate naturally. When this pan cracks, overflows, or sits improperly, water leaks onto your floor rather than evaporating.
Finding the drain pan requires accessing the bottom of your refrigerator. Pull the unit away from the wall and remove the front or rear bottom panel. The pan is typically a plastic tray positioned directly under the defrost drain tube.
Inspect the pan for cracks, especially along edges and corners where stress concentrates. Even hairline fractures can cause significant leaking over time. Also verify that the pan sits level and that the drain tube actually extends into it rather than beside it.
Replacement drain pans cost $15 to $40 and install in minutes. Some homeowners successfully repair small cracks with aquarium-safe silicone sealant as a temporary fix. However, replacement is the safer long-term solution for a fridge leaking water.
Refrigerators with ice makers or water dispensers have additional leak sources to consider. The water supply line connecting your fridge to household plumbing can develop leaks at connection points, especially if installed with worn compression fittings.
Check behind the refrigerator where the water line enters. Look for moisture, mineral deposits, or corrosion around fittings. Even tiny drips accumulate into noticeable puddles over days. Tightening connections often resolves these issues without replacing parts.
The water inlet valve inside your refrigerator can also fail. This valve opens to fill the ice maker and closes afterward. When the valve doesn’t seal completely, water continues dripping into the ice maker or dispenser area, eventually overflowing.
Frozen water lines create pressure buildup that causes leaks at weak points. If your ice maker stopped working around the same time leaking started, suspect a frozen line. Thawing the line with a hair dryer on low heat often restores normal function.
When your freezer compartment leaks into the refrigerator section below, the defrost drain is almost certainly blocked. Freezers produce more frost than refrigerator compartments, so drain clogs manifest here first before affecting the main compartment.
You’ll notice water collecting in the bottom of the refrigerator, often under the vegetable drawers. The water may appear frozen in the freezer but liquid in the fridge section. This temperature difference confirms the drain blockage diagnosis.
Some refrigerator models use a single drain system serving both compartments. Others have separate drains that join before reaching the drain pan. Understanding your specific configuration helps you locate the exact blockage point during repair.
The fix follows the same turkey baster method described earlier, though you may need to clear the drain from the freezer side. Remove freezer contents and shelving to gain full access to the drain hole location.
High humidity levels in your home force your refrigerator to work harder, producing excess condensation. Summer months often see increased leak complaints for this reason. Running a dehumidifier near the kitchen can reduce this moisture load significantly.
Frost buildup from frequent door openings or storing hot food creates extra water during defrost cycles. Adjusting your habits reduces this source of excess moisture. Let hot foods cool before refrigerating, and minimize how long doors stay open.
An unlevel refrigerator affects drainage patterns, causing water to pool in wrong places rather than flowing toward the drain. Check level with a carpenter’s level placed on the refrigerator floor. Adjust the leveling feet until the unit sits perfectly horizontal.
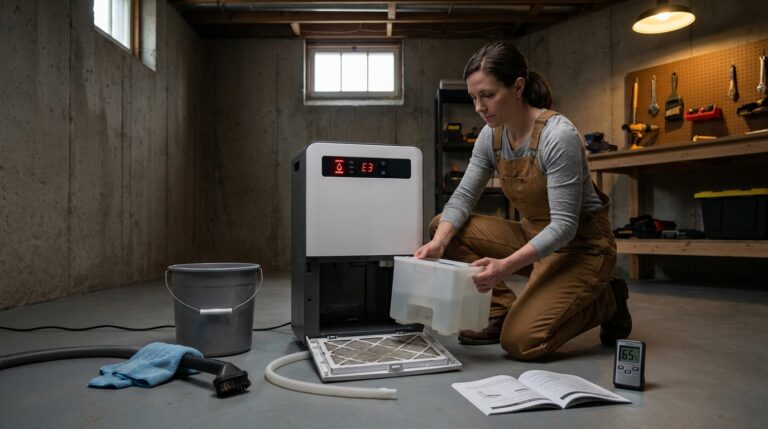
Now that you’ve identified the likely cause, let’s walk through the actual repair process. Most fixes require only basic tools you probably already own. Set aside 30 to 60 minutes for your first repair attempt.
Gather these items before starting: a turkey baster or large syringe, warm water, mild dish soap, a soft cloth or sponge, a pipe cleaner or flexible wire, a screwdriver set, and a flashlight. For door seal replacement, you’ll also need the replacement gasket specific to your model.
A turkey baster proves surprisingly effective for drain clearing tasks. The combination of hot water delivery and suction action clears blockages better than straightened coat hangers or compressed air. Forum users consistently recommend this method over specialized plumbing tools.
Keep towels handy for water cleanup and a shallow pan to catch any water that drains out during repairs. Working on a tiled floor rather than carpet makes cleanup easier if spills occur.
Start by unplugging the refrigerator and removing all food from the affected compartment. You’ll need clear access to the drain hole location, which varies by model but typically sits at the back near the bottom. Remove any covers or panels blocking access.
Fill your turkey baster with hot (not boiling) water from the tap. Squirt the water directly into the drain hole with firm pressure. The heat melts ice blockages while the force dislodges debris. You’ll hear water flowing freely when the blockage clears.
Repeat this process 5 to 10 times, sucking water back out and squirting fresh hot water in. The suction action pulls debris upward while fresh water pushes it downward. This dual-action cleaning proves more effective than one-direction flushing.
For stubborn blockages, insert a flexible pipe cleaner or wire into the drain while flushing with hot water. Gently probe to break up hardened debris without damaging the drain tube. Once water flows freely into the drain pan below, you’ve succeeded.
Finish by wiping down the area with a mild soap solution to remove any remaining debris. Replace panels, restore power, and monitor for leaks over the next 24 hours. Most defrost drain repairs hold permanently after proper clearing.
Order a replacement gasket using your refrigerator’s model number found on a sticker inside the unit. Generic seals rarely fit properly, so the exact match matters. Most manufacturers sell replacement seals through their websites or appliance parts retailers.
Begin by pulling the old seal away from the mounting track. Most modern seals simply press into a groove around the door edge without screws or adhesives. Work slowly around the perimeter, pulling firmly but not so hard that you damage the door panel.
Clean the mounting groove thoroughly with warm soapy water to remove food residue and mold. Any debris left behind prevents the new seal from seating properly. Dry the groove completely before installing the replacement.
Start installing the new seal at one corner, pressing it firmly into the mounting groove. Work your way around the door, ensuring the seal sits evenly without twists or stretches. The seal should fit snugly without gaps or loose sections.
Close the refrigerator door and verify that the seal contacts the frame evenly all around. Check for light leaks by closing the door on a flashlight facing outward. If you see light escaping, adjust the seal position until contact is uniform.
Pull the refrigerator away from the wall and unplug it. Remove the rear access panel or front kick plate depending on your model’s design. The drain pan typically sits on the floor or mounts to the compressor area underneath.
Carefully slide the pan out and inspect it under good lighting. Look for cracks, especially at corners and along the rim. Fill the pan with water and watch for drips indicating hidden fractures. Even tiny cracks cause ongoing leaks that worsen over time.
If the pan is intact but overflowing, check that the defrost drain tube actually extends into the pan. Sometimes tubes become dislodged or were never properly positioned during installation. The tube should reach at least halfway into the pan depth.
Replacement pans slide into the same position as the old one. Some models secure with screws or clips while others simply sit in place. Verify that the pan sits level and that the drain tube terminates inside it before restoring power.
Turn off the water supply to your refrigerator before inspecting lines. The shutoff valve typically sits behind the refrigerator or under the nearby sink. Close it completely to prevent water flow during your inspection.
Pull the refrigerator out and examine the water line from the wall connection to the refrigerator inlet. Look for moisture, mineral deposits indicating slow leaks, or physical damage to the tubing. Braided stainless steel lines last longer than plastic but can still fail at connection points.
Tighten any loose fittings using an adjustable wrench. Don’t overtighten, as this can crack plastic fittings or strip threads. Turn the water supply back on briefly and check for leaks before pushing the refrigerator back into position.
For internal valve leaks, you may need professional service unless you’re comfortable working with refrigerator internals. These valves require precise installation to prevent both leaks and flooding. Consider this repair boundary based on your comfort level.
Some refrigerator leaks require professional expertise. Knowing when to call saves you time, prevents further damage, and ensures safety. Here’s how to recognize situations beyond typical DIY scope.
Refrigerant leaks present serious concerns that demand professional handling. If you notice an oily residue around the compressor area or smell a chemical odor near your refrigerator, stop investigating and call a technician. Refrigerant requires licensed professionals to handle safely.
Electrical components showing water damage need professional evaluation. If water has contacted the compressor, control board, or wiring connections, electrical shorts become a real fire hazard. We address this specific concern in our FAQ section about fire hazards.
Internal leaks within the sealed system or evaporator coils require specialized equipment to diagnose and repair. These components sit behind panels that aren’t designed for homeowner access. Attempting repairs here voids warranties and risks serious damage.
Cost considerations often drive the repair versus replacement debate. Generally, repairs costing less than 40% of a new refrigerator’s price make financial sense. For a $1,500 refrigerator, that means repairs under $600 are worthwhile.
Age matters significantly in this calculation. Refrigerators over 12 years old face increasing breakdown frequency regardless of the current repair. If your unit is approaching this age range, replacement might prove more economical long-term. Consider exploring French door refrigerator options or counter-depth refrigerators if replacement seems wise.
Frequency of previous repairs also guides this decision. A refrigerator that’s needed multiple repairs in the past two years will likely continue having problems. At some point, reliability concerns outweigh pure cost calculations.
Energy efficiency improvements in newer models provide ongoing savings that offset replacement costs. Modern refrigerators use significantly less electricity than units from even five years ago. Factor utility savings into your total cost analysis.
Look for technicians certified by the refrigerator manufacturer when possible. Authorized service providers receive training specific to your brand and use genuine replacement parts. This expertise matters for complex diagnostics.
Verify licensing and insurance before hiring any appliance repair service. Technicians working with refrigerants need EPA Section 608 certification. General liability insurance protects your home if damage occurs during service calls.
Request written estimates that separate labor from parts costs. This transparency helps you evaluate whether the repair makes financial sense. Be wary of quotes that seem significantly lower than competitors, as they may indicate corners being cut.
Preventing leaks saves you from repeat repairs and water damage headaches. A simple maintenance routine takes just minutes monthly but prevents hours of cleanup and repair work later.
Monthly tasks include wiping down door gaskets with mild soapy water to remove food residue. Check the seal contact by closing the door on a piece of paper. If it pulls out easily, your seal needs adjustment or replacement.
Quarterly maintenance involves visually inspecting the drain pan and water line connections. Look for moisture, mineral buildup, or corrosion before small issues become big leaks. Catching problems early prevents floor damage.
Annually, clear the defrost drain preventively even if you haven’t noticed leaking. A turkey baster flush with hot water removes developing blockages before they cause problems. This five-minute task prevents the most common leak cause entirely.
Close refrigerator doors firmly and completely. Partial closing creates gaps that let warm air enter, causing excess condensation. Listen for the seal suction sound that indicates proper closure.
Let hot foods cool to room temperature before refrigerating. Hot food raises internal temperatures and creates steam that condenses on cold surfaces. This excess moisture stresses the drainage system.
Keep refrigerator and freezer compartments reasonably full. Empty space fills with air that creates temperature fluctuations when doors open. Moderate loading helps maintain stable temperatures and reduces frost buildup.
Monitor your refrigerator’s temperature with an appliance thermometer. The FDA recommends keeping refrigerators at or below 40 degrees Fahrenheit. Freezers should maintain zero degrees. Temperatures too low waste energy and create excess frost.
Summer humidity increases condensation loads on your refrigerator. Running kitchen exhaust fans while cooking and using a dehumidifier if your home exceeds 60% relative humidity reduces strain on the appliance.
Winter dryness can cause door seals to shrink and crack. Inspect seals more frequently during heating season when indoor air becomes especially dry. A thin coating of petroleum jelly on the seal helps maintain flexibility.
During extended vacations, remove perishables and adjust temperatures slightly higher to reduce cycling frequency. This prevents issues that develop when refrigerators sit unused with stagnant air and developing odors.
Water leaking from underneath your refrigerator usually indicates a cracked drain pan, blocked defrost drain, or loose water line connection. The drain pan catches water from defrost cycles and may overflow or leak if damaged. Check the pan by pulling the refrigerator away from the wall and removing the rear access panel or front kick plate. If the pan is intact but overflowing, the defrost drain may be blocked, causing excess water accumulation.
Most refrigerator leaks are inconvenient but not immediately dangerous. However, water near electrical components creates shock and fire hazards that require immediate attention. Refrigerant leaks pose health risks and need professional handling. Water damage to flooring and cabinets can become expensive if left unaddressed. For electrical safety, unplug the refrigerator immediately if you notice water near outlets, cords, or the compressor area.
Serious leaks show these warning signs: oily residue indicating refrigerant loss, water contacting electrical components, continuous rapid dripping that suggests a supply line break, brown or discolored liquid suggesting rust or contamination, and leaks accompanied by unusual noises from the compressor. If you notice any of these signs, unplug the refrigerator and call a professional technician immediately rather than attempting DIY repairs.
Yes, most refrigerator leaks can be fixed successfully by homeowners or technicians. Blocked defrost drains, damaged door seals, and cracked drain pans are common causes with straightforward DIY solutions. The turkey baster method for clearing drains takes 10 minutes and requires no special tools. Water line leaks and inlet valve problems may need professional service depending on your comfort level with plumbing work.
For the fastest fix, first identify the leak source. If water pools under crisper drawers, use a turkey baster to flush hot water down the defrost drain hole at the back of the compartment. Repeat 5 to 10 times until water flows freely. For leaks under the refrigerator, check the drain pan for cracks and verify the water line connections are tight. These quick checks resolve approximately 70% of refrigerator leaks within 30 minutes.
A leaking refrigerator can become a fire hazard when water contacts electrical components. The compressor, control boards, and wiring connections sit near areas where leaks occur. Water creates short circuits that spark and potentially ignite nearby materials. If you notice water near the compressor or electrical outlets, unplug the refrigerator immediately and call a professional. Never attempt repairs on wet electrical components yourself.
A blocked defrost drain causes approximately 60% of refrigerator leaks. During normal operation, frost melts off the evaporator coils and flows down a small drain hole into a pan below. When food particles, ice, or debris clog this drain, water backs up and leaks into the refrigerator compartment or onto the floor. Clearing this drain with hot water and a turkey baster resolves the majority of leak complaints quickly and easily.
A fridge leaking water frustrates homeowners, but understanding the common causes puts you in control of the situation. The blocked defrost drain that causes most leaks resolves in minutes with a turkey baster and hot water. Door seal replacements and drain pan fixes require minimal tools and basic mechanical skills.
We’ve walked through identifying leak sources, implementing DIY solutions, recognizing when professional help makes sense, and preventing future problems through simple maintenance. Armed with this knowledge, you can address most refrigerator leaks confidently without unnecessary service calls.
Remember that safety comes first. Always unplug your appliance before investigating leaks, and call a professional immediately if you notice signs of refrigerant leaks or water near electrical components. For everything else, the solutions in this guide should restore your refrigerator to watertight operation and protect your home from water damage.