Physical Address
304 North Cardinal St.
Dorchester Center, MA 02124
Physical Address
304 North Cardinal St.
Dorchester Center, MA 02124

A floor heating leak can go from a minor annoyance to a $10,000 disaster faster than you think. I learned this the hard way when a friend drilled toilet flange screws into their heated garage floor and pierced pressurized PEX lines. That single mistake flooded the subfloor and required complete concrete removal.
Whether you have hydronic radiant heating under tile, concrete, or wood floors, understanding how to spot and address leaks early saves both money and structural integrity. In this guide, you will learn the warning signs of underfloor heating leaks, detection methods ranging from DIY perfume techniques to professional thermal imaging, and exactly how to repair leaks when they occur.
If you are considering radiant floor heating systems for a new installation, this guide also helps you understand what to watch for to prevent future problems.
Detecting a floor heating leak early prevents extensive water damage and costly repairs. Most leaks start small, making them difficult to notice until significant damage has occurred. Understanding these warning signs helps you act before the situation escalates.
The most reliable indicator of a floor heating leak is unexplained pressure loss in your system. A properly sealed hydronic heating system maintains consistent pressure. When you find yourself refilling the boiler or expansion tank more than once per month, a leak exists somewhere in the piping network.
Monitor your pressure gauge regularly. Normal operating pressure typically ranges between 1.0 and 1.5 bars for most residential systems. Consistent drops below this range indicate water escaping the closed loop.
Cold or warm patches on your floor surface often signal a leak beneath. When heated water escapes PEX tubing, that section stops radiating heat properly, creating noticeable cold spots. Conversely, escaping hot water can also create unusually warm areas directly above the leak location.
Walk barefoot across your heated floors during operation. Note any temperature inconsistencies that persist over multiple heating cycles. Mark these locations, as they provide starting points for leak detection.
Damp spots, water stains, or bubbling in floor coverings directly indicate water escaping from below. These visible signs typically appear after the leak has existed for some time. Immediate action is essential once moisture becomes visible.
Check baseboards, wall edges, and transition areas between flooring types. Water follows gravity and often travels horizontally before becoming visible. Hardwood floors may cup or buckle when moisture accumulates underneath.
Your boiler provides clues about system health. Frequent cycling, continuous running, or difficulty maintaining set temperatures suggest the system works harder than necessary. This overwork often stems from pressure loss requiring constant water replacement.
Listen for unusual noises from the circulation pump or boiler. Gurgling, bubbling, or air-related sounds indicate air entering the system through leaks, further confirming a breach in your piping.
Chronic moisture from undetected leaks creates perfect conditions for mold and mildew growth. Musty smells emerging from floors or walls suggest water accumulation in hidden spaces. This health hazard requires immediate attention beyond the heating repair itself.
Unexplained increases in heating costs signal efficiency loss. When water leaks from your system, the boiler must heat replacement water continuously. This extra work consumes more fuel or electricity, raising your monthly expenses without improving comfort.
Understanding your specific heating system type helps prioritize leak prevention and detection efforts. Three main technologies power floor heating, each with different leak risks and characteristics.
Hydronic systems circulate heated water through PEX tubing or PEX-AL-PEX pipes embedded in floors. These systems offer superior efficiency and work with boilers, heat pumps, or solar thermal sources. However, they carry the highest leak risk due to the pressurized water circulating through hundreds of feet of tubing.
Modern hydronic systems use cross-linked polyethylene (PEX) tubing, significantly more durable than older copper or steel pipe systems. Properly installed PEX lasts 50+ years, but installation errors, physical damage, or water chemistry issues can cause premature failures.
Electric systems use resistance cables or heating mats installed beneath flooring. Without water circulation, these systems cannot develop traditional leaks. The primary failure mode involves electrical shorts or cable breaks rather than water escape.
For homeowners concerned about leak risks, electric radiant floor heating offers a water-free alternative worth considering during renovations or new construction.
Less common in residential settings, air-based systems force heated air through floor channels or plenums. These systems present minimal leak risks regarding water damage but offer lower efficiency than hydronic alternatives.
Finding the exact location of a floor heating leak challenges even experienced professionals. Water travels through screed, concrete, and subflooring, making the visible damage location potentially far from the actual leak source. Multiple detection methods exist, ranging from simple DIY approaches to sophisticated professional technologies.
Infrared thermal cameras visualize temperature differences across floor surfaces. Escaping hot water creates distinct thermal signatures visible through thermal imaging, often showing as warm spots against cooler background temperatures.
Professional leak detection services charge $200-400 for thermal imaging surveys. The investment proves worthwhile when considering the alternative of removing large floor sections searching for leaks blindly. Some equipment rental companies offer thermal camera daily rentals for $50-100 if you prefer attempting detection yourself.
Pressurized water escaping PEX tubing creates distinctive sounds, even through concrete layers. Acoustic leak detectors use sensitive microphones and amplifiers to locate these sounds. Professional-grade equipment detects leaks as small as pinholes under several inches of concrete screed.
DIY acoustic detection proves difficult without specialized equipment, though some homeowners report success using medical stethoscopes pressed against floor surfaces in suspected areas.
Pin-type and pinless moisture meters measure water content in flooring materials. Systematic scanning across floor surfaces identifies elevated moisture zones suggesting nearby leaks. This method works best when combined with other techniques for confirmation.
Professional-grade moisture meters cost $200-500, while basic consumer models run $30-80. For suspected leaks, the investment pays for itself quickly by preventing unnecessary floor removal in wrong locations.
Isolating heating circuits and pressure testing each individually remains the most reliable DIY detection method. Professional installers typically pressure test new systems at 4 bars for 24 hours before activation. You can replicate this process on existing systems to identify which circuit contains the leak.
Connect a pressure gauge to each manifold outlet individually. Pressurize the circuit and monitor for drops over several hours. Circuits maintaining pressure are intact; dropping pressure indicates the leak location. This method narrows your search to specific zones before employing more expensive detection techniques.
A low-tech but surprisingly effective technique involves adding strong-scented substances to your heating system water. Common choices include essential oils, perfume, or specialized tracing fluids available from HVAC suppliers. As water escapes through leaks, the scent penetrates flooring materials and becomes detectable at the surface.
Remove floor coverings in suspected areas and smell for the tracer scent. This method works particularly well for identifying general leak zones before committing to floor removal. However, thoroughly flush the system afterward to prevent residue buildup in components.
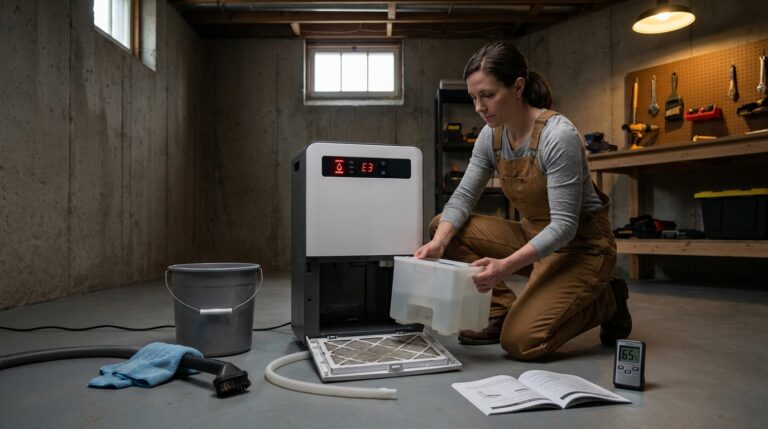
Having the right tools on hand enables faster response when floor heating leaks occur. This equipment list covers both emergency response and detection needs for homeowners managing radiant heating systems.
A quality pressure gauge designed for hydronic systems tops the priority list. Choose models reading up to at least 3 bar with clear dial faces for easy monitoring. Digital pressure gauges offer data logging capabilities useful for tracking slow leaks over time.
Pinless moisture meters provide non-destructive floor scanning capabilities. Look for models calibrated for your specific flooring materials, whether concrete, tile, or wood. Basic thermal imaging attachments for smartphones offer entry-level infrared detection for under $300.
Self-amalgamating silicone tape provides temporary leak sealing for accessible pipe sections. Unlike standard electrical tape, this material bonds to itself creating a watertight seal capable of withstanding hot water temperatures and system pressure.
Epoxy putty rated for plumbing applications offers another temporary repair option. Knead the putty until colors blend, press firmly over leak locations, and allow curing per manufacturer instructions. These repairs buy time while planning permanent solutions.
Keep spare manifold valves and compression fittings compatible with your system. Rubber seals on distributor manifolds commonly fail and can often be fixed by tightening or replacing seals rather than full manifold replacement.
Once you have located a floor heating leak, the repair process depends on accessibility and leak severity. This guide walks through standard repair procedures from initial response through final testing.
Immediately shut down your heating system at both the boiler and circulation pump. Close isolation valves on the manifold to prevent water flow through the affected circuit. Drain the specific zone if isolation valves function properly.
If isolation valves fail or do not exist, you may need to drain the entire system. Capture drained water in clean containers if you plan reusing treated heating water after repairs.
Remove floor coverings to expose the leak location. Tile, hardwood, or laminate removal requires careful work to preserve materials for reinstallation when possible. Mark concrete cutting lines if the leak lies beneath a slab.
Rent a concrete saw or hire a concrete cutting service for slab penetrations. Cut carefully to avoid damaging adjacent PEX tubing. Expect dust and debris; seal the work area from living spaces and use appropriate respiratory protection.
Once you reach the tubing, visually inspect for damage causes. Common issues include punctures from fasteners, cracks from freezing, kinks from poor installation, or failed fittings. Document everything with photos before disturbing the site further, as insurance may cover some repairs.
Extend your access opening several inches beyond visible damage. PEX tubing may be stressed beyond the immediate leak point, requiring additional replacement length for reliable repairs.
Small punctures in accessible locations may accept clamp repairs or compression couplings. These solutions work best when tubing remains in good condition otherwise. However, most professionals recommend replacing damaged sections entirely for lasting results.
Use compatible PEX fittings appropriate for your tubing type. Crimp, clamp, or expansion fittings require specific tools, so verify your tubing specifications before purchasing repair materials. Transition couplings connect PEX to other pipe types if your system uses mixed materials.
Before closing floor access, pressure test the repaired section at operating pressure for at least 4 hours. Monitor for pressure drops indicating incomplete sealing. Test the entire circuit afterward to confirm no additional leaks exist.
Pressurize the system gradually to avoid stressing new connections. Listen carefully for air escape sounds suggesting poor seals. Address any issues while access remains open to avoid repeating the floor removal process.
Restore flooring materials once testing confirms successful repairs. For concrete slabs, use repair compounds rated for heated floor applications. Allow adequate curing time before restoring floor coverings and reactivating the heating system.
Resume heating gradually, increasing temperature over several days to allow materials to adjust. Monitor pressure closely during the first week of operation to confirm repair integrity under thermal cycling.
When you discover an active floor heating leak, immediate action limits damage and repair costs. Follow these emergency protocols while planning permanent repairs.
Shut off water supply to the heating system immediately. Most systems have isolation valves at the boiler or manifold locations. If you cannot locate isolation valves quickly, shut off the main water supply to your home.
Document all visible damage with photos and videos. Insurance claims require thorough documentation of water damage extent and the source location. Note timestamps and any conversations with professionals consulted.
Contact a heating specialist or leak detection professional when:
Emergency service calls typically cost $150-300 for after-hours response, but this investment prevents far more expensive damage from continuing water escape.
Deciding between DIY and professional leak detection involves balancing cost against accuracy and speed. Understanding the trade-offs helps you make informed decisions appropriate for your situation.
Homeowner detection attempts cost $50-300 for basic equipment like moisture meters and pressure gauges. The DIY perfume method requires only household items. However, these techniques often provide approximate zones rather than precise locations.
DIY works best when you have strong indicators of leak locations, such as visible damp patches or obvious cold spots. Success rates drop significantly for leaks under thick concrete or when multiple circuits show pressure drops.
Professional leak detection using thermal imaging and acoustic equipment costs $300-800 depending on system complexity and floor coverings. These services locate leaks with precision measured in inches rather than feet, minimizing floor destruction during repairs.
Some companies offer detection guarantees, refunding fees if they cannot locate the leak. Ask about such policies when hiring services. Combined detection and repair contracts may offer cost savings over separate contracts.
Homeowners insurance may cover leak detection costs when water damage has occurred. Review your policy for coverage details, as some insurers require professional detection for claim validity. Document all expenses and maintain receipts for reimbursement submissions.
HVAC system professionals and specialized leak detection companies often work directly with insurance adjusters, streamlining claim processes during stressful repair situations.
Preventing floor heating leaks proves far more cost-effective than repairs. Implement these practices to maximize system longevity and minimize failure risks.
Inspect your heating system annually before the heating season begins. Check pressure gauges, examine manifold connections for corrosion, and verify isolation valve operation. Schedule professional service every 2-3 years for comprehensive system evaluation.
Monitor boiler water quality regularly. Test pH levels and treat water to prevent corrosion and scale buildup that weakens pipes over time. Properly treated water significantly extends PEX tubing lifespan.
During renovations, mark all heated floor zones clearly. Many leaks result from accidental drilling or nailing into embedded tubing during subsequent construction projects. Use thermal imaging to locate tubing before any floor penetrations.
Install water leak sensors in strategic locations if your home has experienced previous leaks. Smart sensors alert you immediately when moisture appears, enabling faster response before extensive damage develops.
Make pressure gauge checks part of your monthly routine. Record readings in a log to identify gradual pressure loss trends before they become serious leaks. Address any unexplained drops immediately rather than simply refilling and forgetting.
Maintain expansion tanks properly. Failed expansion tanks cause pressure cycling that stresses connections and increases leak risks. Check tank air charges annually and replace tanks showing corrosion or water logging.
For more comprehensive guidance on maintaining your home’s climate systems, explore our heating and cooling guides for seasonal maintenance checklists and professional advice.
A leak in underfloor heating causes system pressure to drop continuously, requiring frequent boiler refilling. Escaping water damages flooring materials, promotes mold growth, reduces heating efficiency, and can compromise structural elements if left unaddressed. In severe cases, leaks cause ceilings to collapse in rooms below and create breeding grounds for toxic mold requiring extensive remediation.
Properly installed wet underfloor heating systems using quality PEX tubing typically last 50 years or more. The manifold components and valves may require replacement every 15-20 years. System longevity depends heavily on water quality maintenance, proper installation practices, and avoiding physical damage during subsequent renovations.
To fix a leak in radiant floor heating: 1) Shut down and isolate the affected circuit, 2) Locate the leak using thermal imaging or pressure testing, 3) Remove floor coverings to access the pipe, 4) Repair using compression couplings for small punctures or replace damaged tubing sections, 5) Pressure test repairs before restoring floors, 6) Gradually restart the system monitoring pressure closely.
General plumbers may fix accessible manifold leaks and connections, but underfloor heating leaks often require specialized HVAC technicians or leak detection professionals. The complexity of locating hidden leaks under flooring and repairing embedded PEX tubing typically exceeds standard plumbing expertise. Choose professionals with specific radiant heating experience for best results.
Yes, most underfloor heating leaks can be repaired without complete system replacement. Small punctures accept compression couplings or clamp repairs when accessible. Larger damaged sections require cutting out and replacing tubing with new PEX using proper fittings. Professional leak detection minimizes floor destruction during repairs. Severe damage might require rerouting circuits around damaged zones.
PEX and PEX-AL-PEX tubing used in underfloor heating carries manufacturer warranties of 25-50 years and typically lasts 50+ years when properly installed and maintained. Actual lifespan depends on water chemistry, installation quality, and avoiding physical damage. Copper or steel pipes in older systems may last 30-50 years but corrode faster with poor water treatment.
Detect underfloor heating leaks through: pressure testing individual circuits for drops, thermal imaging to visualize hot water escape, acoustic listening equipment for pressurized water sounds, moisture meter scanning for elevated readings, or DIY perfume methods adding tracer scents to system water. Professional detection services combining multiple methods provide the most accurate results for hidden leaks.
Some homeowners report temporary success with leak sealers like Fernox or similar products designed for closed heating systems. However, most manufacturers and professionals caution against leak sealers as they may clog components, reduce efficiency, and provide only short-term fixes. Permanent pipe repair or replacement remains the recommended solution for lasting results.
A floor heating leak demands prompt attention to prevent extensive damage and costly repairs. By understanding warning signs like pressure drops, cold spots, and unusual boiler behavior, you can catch problems early before they escalate. Detection methods ranging from simple pressure testing to professional thermal imaging help pinpoint leak locations without unnecessary floor destruction.
Whether you attempt DIY repairs on accessible leaks or hire professionals for hidden damage, addressing the root cause quickly protects your home’s structure and your heating investment. Regular maintenance, pressure monitoring, and careful renovation practices prevent most leaks from occurring in the first place.
For homeowners considering new installations or system upgrades, understanding leak risks helps you make informed decisions between hydronic and radiant heating guide options. With proper care, your underfloor heating system should provide decades of comfortable, efficient warmth for your home.