Physical Address
304 North Cardinal St.
Dorchester Center, MA 02124
Physical Address
304 North Cardinal St.
Dorchester Center, MA 02124

Struggling to find the right heat level for your Whirlpool dryer? You are not alone. Most people get confused about Whirlpool Dryer Change Temperature controls, especially when trying to protect delicate fabrics or dry heavy towels quickly. I have helped dozens of homeowners figure out these settings, and the good news is that adjusting the temperature is straightforward once you understand how the control panel works.
In this guide, I will show you exactly how to change the temperature on your Whirlpool dryer, explain which cycles allow adjustments, and share the specific temperature values for each setting. You will also learn why some dryers refuse to change temperature mid-cycle (a mistake that can actually damage your machine) and how to match heat levels to different fabric types.
Before diving into the step-by-step process, here is a quick reference for what each temperature setting actually means in real degrees:
| Setting | Temperature (Fahrenheit) | Temperature (Celsius) | Best For |
|---|---|---|---|
| Sanitize | 150-160°F | 65-71°C | killing bacteria, bedding |
| High | 140°F | 60°C | Cotton, towels, jeans |
| Medium | 130-135°F | 54-57°C | Synthetics, permanent press |
| Low/Delicate | 125°F | 52°C | Delicates, lingerie, knits |
| No Heat/Fluff Air | Room temperature | Room temperature | Refreshing, dust removal |
These values come directly from Whirlpool’s technical documentation. Keep this table handy when reading clothing care labels.
Follow these simple steps to adjust the heat level before starting your drying cycle:
Step 1: Load your dryer and close the door completely. The temperature button will not respond if the door is ajar.
Step 2: Select your drying cycle by turning the cycle selector knob or pressing the cycle buttons on touch-panel models. Choose Timed Dry if you want full control over the temperature setting.
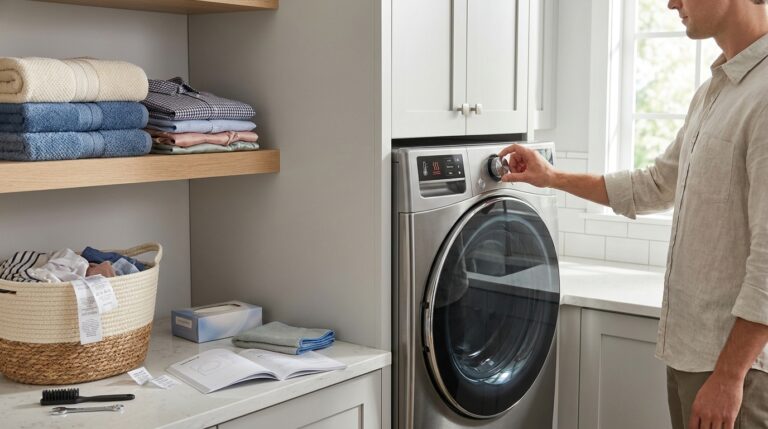
Step 3: Locate the Temperature button on your control panel. It usually sits near the Start button and may be labeled “Temp” or “Heat Level.”
Step 4: Press the Temperature button repeatedly to cycle through available options. Each press changes the setting from High to Medium to Low to Delicate (and back to High). The display or indicator light shows your current selection.
Step 5: Press Start to begin drying at your chosen temperature.
Remember that you must set the temperature before pressing Start. Once the cycle begins, most Whirlpool models lock the temperature setting for safety reasons.
This is where most people get stuck. Whirlpool dryers have two fundamentally different cycle types, and they handle temperature control very differently.
Auto Dry cycles (also called Automatic or Sensor Dry) use moisture sensors to detect when clothes are dry. These cycles have preset temperature levels that you cannot change. The dryer manages heat automatically based on the load size and moisture detected. Common Auto Dry cycles include Normal, Heavy Duty, Delicate, and Permanent Press.
Timed Dry cycles give you full manual control. You select the drying time (20, 40, or 60 minutes) and then choose your preferred temperature setting. The dryer runs for exactly that duration at the heat level you selected, regardless of moisture content.
Check your control panel display. If you see “Auto Dry,” “AccuDry,” or “Sensor Dry” illuminated, you cannot manually adjust the temperature. Switch to “Timed Dry” if you need a specific heat level.
Let me break down exactly what happens at each temperature setting and when to use them:
This is the hottest setting available on most Whirlpool dryers. It runs hot enough to kill common bacteria and dust mites. Use it for bedding, pillows, and items used by sick family members. Not suitable for delicate fabrics or anything that might shrink.
The standard setting for cotton fabrics, towels, jeans, and heavy linens. This temperature removes moisture quickly but can damage synthetic fabrics and cause shrinkage in natural fibers if overdried. Most Auto Dry cycles default to High heat.
Ideal for permanent press fabrics, synthetics, and blended materials. This gentler heat reduces wrinkling and prevents the static cling that often happens with high heat. I use this setting for polyester dress shirts and workout clothes.
These two settings often share the same temperature range on Whirlpool models. Use them for lingerie, silk, wool, lace, and any items labeled “tumble dry low” or “line dry.” The extended drying time at lower heat protects fragile fabrics from damage.
This setting runs the drum without activating the heating element. It freshens clothes, removes dust and pet hair, and helps relax wrinkles in delicate items that cannot handle any heat. Great for refreshing stored items or finishing air-dried clothes.
Match your fabrics to the right heat level using this practical guide:
Cotton and Linen: Use High heat for towels, jeans, t-shirts, and bed sheets. These natural fibers handle heat well and actually benefit from it to remove moisture efficiently.
Synthetics (Polyester, Nylon, Acrylic): Choose Medium heat. High heat can melt or permanently wrinkle these materials. Many gym clothes fall into this category.
Delicates (Silk, Wool, Lace): Always use Low heat or Delicate setting. Better yet, use a drying rack for these items when possible. If you must machine dry, remove while slightly damp.
Permanent Press: The Medium setting was literally designed for this fabric treatment. It reduces the heat shock that causes wrinkles.
Bulky Items (Comforters, Pillows): Use High heat but add dryer balls to prevent clumping. The thickness requires more heat to reach the center, but movement is essential.
Mixed Loads: When drying different fabrics together, choose the temperature safe for the most delicate item in the load. Better to take longer than to ruin a silk blouse mixed in with cotton towels.
Several situations can prevent you from adjusting the heat setting on your Whirlpool dryer. Here is how to diagnose and fix each one:
As mentioned earlier, Auto Dry cycles lock their temperature settings. If you are using Normal, Heavy Duty, or other sensor-based cycles, switch to Timed Dry to gain temperature control.
Whirlpool dryers disable temperature adjustments once the cycle starts. You must stop the current cycle completely (press Stop twice or hold Cancel) and restart to choose a new temperature. Never attempt to change settings while the dryer is actively heating.
Warning: I have seen forum posts from users who tried forcing temperature changes mid-cycle and ended up with a completely non-responsive dryer. The control board can enter a locked state that requires a power reset or professional service.
Whirlpool’s AccuDry feature automatically manages both temperature and drying time based on moisture sensors. When AccuDry is active, manual temperature controls are disabled. Look for the AccuDry indicator on your display and turn it off if you need manual control.
If your dryer runs but never heats up, or if it gets too hot regardless of the setting, the cycling thermostat may have failed. This component regulates temperature by turning the heating element on and off. A failed thermostat often sticks in one position.
You can locate the cycling thermostat near the heating element or blower housing (consult your model’s manual for exact location). Testing it with a multimeter requires disconnecting power and removing the back panel. Consider calling a technician unless you are comfortable with appliance repair.
If pressing the Temperature button produces no response at all, the control board may have failed. Try unplugging the dryer for 60 seconds to reset the electronics. If that does not restore button function, the touch panel or main control board likely needs replacement.
Press the Temperature button on your control panel before starting the cycle. Each press cycles through High, Medium, Low, and Delicate settings. Note that you can only change temperature on Timed Dry cycles; Auto Dry cycles have preset temperatures that cannot be adjusted.
Yes, but only on manual cycles like Timed Dry. Auto Dry and sensor-based cycles automatically control temperature and do not allow manual adjustment. You must also change temperature before starting the cycle, not during.
The thermal switch (also called thermal fuse or high-limit thermostat) is typically located on the heating element housing at the back of the dryer or near the blower wheel. You will need to remove the back panel to access it. This safety device cuts power if the dryer overheats.
Whirlpool dryers operate between 125°F and 160°F depending on the setting. High heat reaches about 140°F, Medium is 130-135°F, Low/Delicate is 125°F, and Sanitize reaches 150-160°F. The cycling thermostat maintains these temperatures by turning the heating element on and off.
Air Fluff (No Heat) can help relax light wrinkles by tumbling clothes at room temperature, but it works best when items are slightly damp. For stubborn wrinkles, use the Wrinkle Shield or Steam Refresh features if your model has them, or remove clothes promptly when the cycle ends.
Understanding how to change temperature on your Whirlpool dryer helps you protect delicate fabrics, speed up drying for heavy items, and avoid the frustration of clothes that come out damaged or still damp. Remember the golden rule: always select your temperature before pressing Start, and stick to Timed Dry cycles when you need specific heat control. For the best results in 2026, clean your lint filter before every load and check your venting system seasonally to maintain proper airflow and temperature accuracy.