Physical Address
304 North Cardinal St.
Dorchester Center, MA 02124
Physical Address
304 North Cardinal St.
Dorchester Center, MA 02124

Can a leaking kettle be fixed? Absolutely. Most kettle leaks stem from worn seals, loose connections, or small cracks that you can repair at home with basic tools and the right materials. Before you toss your electric kettle and spend money on a replacement, read through this guide to learn exactly how to identify the leak source and apply the appropriate fix.
I have repaired dozens of kitchen appliances over the years, and kettle leaks are among the most straightforward DIY fixes you can tackle. The key is understanding where the water is coming from and using food-safe materials that can handle boiling temperatures. In this guide, you will learn the exact steps to get your kettle leaking fixed safely and effectively.
Water and electricity create a serious hazard. Never attempt any repair while your kettle is plugged in or contains water. Unplug the kettle from the power outlet completely and let it dry for at least 24 hours before starting any work. Even a small amount of moisture near electrical components can cause short circuits or electric shock.
Only use food-grade materials for any repair that comes into contact with water you will consume. Standard hardware store silicone or epoxy may contain chemicals that leach into your drinking water. Look for products specifically labeled “food-safe,” “FDA compliant,” or “NSF certified.” High-temperature resistance is equally important since kettles reach boiling point during normal operation.
Before you can fix the leak, you need to pinpoint the exact source. Fill your kettle with water and carefully observe where the water escapes. Here are the four most common leak locations and their typical causes:
Base or Bottom Leaks: Water pooling underneath usually indicates a failed heating element seal, degraded O-ring, or crack in the base plate. This is the most serious type of leak because water can reach electrical components.
Lid Leaks: Steam escaping from the lid or water dripping when pouring suggests a worn rubber seal or misaligned lid mechanism. This is often the easiest fix.
Spout Leaks: Dripping from the spout area typically means a loose connection between the spout and body, or a damaged internal seal where water flows from the main chamber.
Viewing Window Leaks: Many modern kettles have plastic windows to show water levels. These can develop leaks where the window meets the metal body due to degraded gaskets or thermal stress cracks.
| Leak Location | Common Cause | Repair Difficulty |
|---|---|---|
| Base/Bottom | Failed O-ring, heating element seal | Moderate |
| Lid | Worn rubber seal, hinge damage | Easy |
| Spout | Loose connection, internal seal failure | Moderate |
| Viewing Window | Degraded gasket, plastic crack | Easy to Moderate |
Now that you have identified where the water is coming from, follow the specific repair method for your leak type. Each method includes the tools and materials you need, plus detailed instructions to ensure a lasting fix.
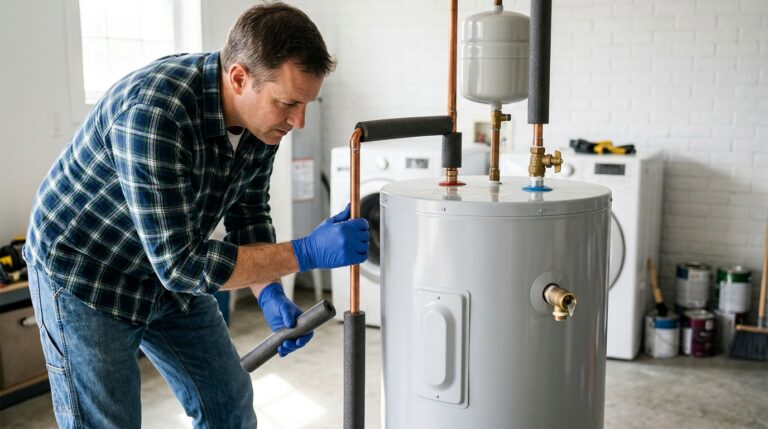
Base leaks require careful attention because they involve the heating element and electrical base. The most common cause is a degraded O-ring or gasket where the heating plate meets the kettle body.
Tools and Materials Needed: Phillips screwdriver, replacement O-ring (check your kettle model specifications), food-grade silicone sealant rated for high temperatures (200F+), clean cloth, isopropyl alcohol for cleaning.
Step 1: Unplug the kettle and ensure it is completely dry. Turn it upside down to access the base plate screws.
Step 2: Remove the screws securing the base plate. Keep track of which screws go where, as they may differ in length.
Step 3: Carefully lift the base plate to expose the heating element and O-ring. Take a photo before disassembling further so you can reference the original configuration.
Step 4: Remove the old O-ring or gasket. Clean the mating surfaces thoroughly with isopropyl alcohol to remove any limescale or residue. Any debris left behind will prevent a proper seal.
Step 5: Install the new O-ring, ensuring it sits properly in its groove. If the O-ring groove is damaged or the leak came from a crack in the metal, apply a thin layer of food-grade silicone sealant around the joint before reassembling.
Step 6: Reattach the base plate, tightening screws evenly in a star pattern to prevent warping. Let the sealant cure for 24 hours before using the kettle.
Lid leaks are the simplest to fix and often only require replacing a rubber seal or adjusting the lid mechanism. If your kettle leaks steam from the lid or drips when pouring, this section applies to you.
Tools and Materials Needed: Replacement rubber seal (search by kettle brand and model), food-grade silicone grease for lubrication, small flathead screwdriver for prying old seal.
Step 1: Open the lid fully and locate the rubber seal around the rim. Most seals simply pull out, though some may have a small retaining clip.
Step 2: Remove the old seal carefully. Clean the groove with warm soapy water and dry completely. Check for cracks in the plastic lid itself.
Step 3: Install the new seal, starting at one point and working your way around. Ensure the seal sits evenly without twists or stretches.
Step 4: Apply a small amount of food-grade silicone grease to the seal surface. This helps the lid close smoothly and extends seal life.
Step 5: Test the lid closure several times. The lid should snap shut firmly with even pressure around the rim.
Spout leaks often occur where the spout attaches to the kettle body. Over time, thermal cycling expands and contracts the metal, loosening the connection or degrading internal seals.
Tools and Materials Needed: Adjustable wrench, plumber’s tape (Teflon tape), food-grade epoxy putty (JB Weld or similar high-temperature rated product), fine sandpaper for surface prep.
Step 1: Empty the kettle completely and dry the spout area. You need a clean, grease-free surface for any adhesive to bond properly.
Step 2: If the spout screws into the body, try tightening it gently with an adjustable wrench. Do not overtighten, as this can crack cast metal or strip threads.
Step 3: For threaded connections that still leak, wrap two to three layers of plumber’s tape around the threads before reassembling. This creates a watertight seal without permanent modification.
Step 4: If the leak comes from a seam or non-removable spout, use food-grade epoxy putty. Mix the putty according to manufacturer instructions and apply it over the leak area, extending at least half an inch beyond the visible crack.
Step 5: Smooth the putty with a wet finger or tool for a clean finish. Allow it to cure fully, typically 24 hours, before testing with water.
The plastic viewing window on many electric kettles is a common failure point. Thermal stress and hard water minerals gradually degrade the gasket or crack the plastic itself.
Tools and Materials Needed: Food-grade silicone sealant (Dow Corning 781 or equivalent), masking tape for clean edges, razor blade for old sealant removal, clean lint-free cloth.
Step 1: Empty and dry the kettle thoroughly. Tape off the area around the window to protect surfaces you do not want to seal.
Step 2: If old sealant is present, carefully scrape it away with a razor blade. Clean the seam between the window and metal body with isopropyl alcohol.
Step 3: Apply a thin, continuous bead of food-grade silicone sealant around the entire window perimeter. Press it into the seam with a tool or finger for good adhesion.
Step 4: Tool the sealant smooth and remove excess with a plastic scraper or your finger dipped in soapy water.
Step 5: Remove the masking tape immediately. Let the sealant cure for 24 hours before filling the kettle.
Different kettle brands have unique designs that affect where and how they leak. Based on forum discussions and repair community reports, here are the specific issues and solutions for popular brands.
Ninja kettles often develop base leaks due to the heating element seal design. Users report the rubber O-ring degrades faster than expected, especially in hard water areas. The fix requires disassembling the base and replacing the O-ring. Some models use a proprietary seal that you must order directly from Ninja customer service.
Breville kettles, particularly the Variable Temperature models, may leak from the base where the temperature probe enters the heating chamber. This requires food-grade silicone sealant rated for continuous hot water exposure. Clean the area thoroughly and apply sealant around the probe entry point, allowing full cure time before use.
Sage kettles (the UK brand name for Breville) commonly suffer from lid hinge breakage. The plastic hinge mechanism can crack, causing the lid to sit crooked and leak steam. While you cannot easily replace the hinge, you can improve the seal by adding a food-safe rubber washer or replacing the lid seal entirely. Some users have successfully used Sugru moldable glue to reinforce cracked hinge points.
Russell Hobbs kettles typically leak from the lid seal or the water level indicator window. The lid seals are readily available as replacement parts and snap into place. For window leaks, food-grade silicone sealant applied around the external seam usually resolves the issue permanently.
Sometimes fixing a leaking kettle is not worth the effort or cost. Here is how to decide whether to repair or replace your appliance.
Repair When: The kettle is less than 3 years old, the leak is minor and accessible, replacement parts are available, and the kettle cost more than $40 originally. A simple $5 O-ring or tube of sealant can extend the life of a quality kettle by several years.
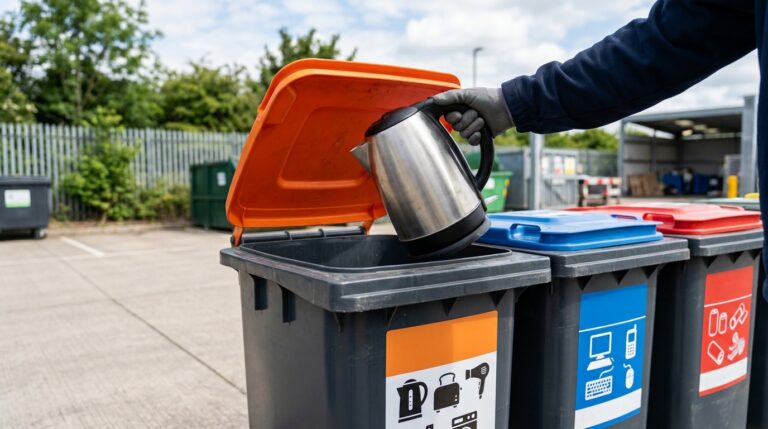
Replace When: The kettle is over 5 years old (average lifespan is 4-5 years), the heating element itself is damaged, multiple leaks exist, or repair costs approach half the replacement price. Also replace if your kettle has exposed wiring or electrical components that got wet, as safety cannot be guaranteed even after drying.
Consider the warranty status as well. Many kettles carry 1-2 year warranties that cover manufacturing defects. If your leak stems from a design flaw and you are within the warranty period, contact the manufacturer for a free replacement rather than attempting DIY repair.
Regular maintenance prevents the conditions that cause most kettle leaks. Hard water and limescale are major contributors to seal degradation and gasket failure.
Descale Monthly in Hard Water Areas: Fill your kettle with equal parts white vinegar and water, boil, and let sit for an hour. Rinse thoroughly. Alternatively, use citric acid powder dissolved in water for a food-safe descaling solution without the vinegar smell.
Empty After Each Use: Do not leave water sitting in your kettle for extended periods. Standing water promotes mineral buildup and can degrade seals faster.
Check Seals Quarterly: Inspect the lid seal and any visible gaskets every few months. Look for cracks, hardening, or deformation. Replace seals at the first sign of wear rather than waiting for a leak.
Avoid Overfilling: Always fill below the maximum line. Excess water puts pressure on seals and can force leaks at weak points.
Yes, most leaking kettles can be fixed at home. Common repairs include replacing worn O-rings, resealing the viewing window with food-grade silicone, tightening spout connections, or replacing lid seals. The success of the repair depends on identifying the exact leak location and using appropriate food-safe materials.
Bottom leaks typically occur due to a failed heating element O-ring or gasket, cracks in the base plate from thermal stress, or loose connections where the heating element meets the kettle body. Hard water limescale buildup accelerates seal degradation. This type of leak requires immediate attention due to electrical hazard risks.
First, unplug and dry the kettle completely. Clean the leak area with isopropyl alcohol. For small cracks or seam leaks, apply food-grade silicone sealant rated for high temperatures. For joint leaks, use plumber’s tape on threaded connections. For window leaks, apply silicone around the perimeter. Always let sealant cure for 24 hours before use.
Only food-grade silicone is safe for kettle repairs. Look for products labeled FDA compliant, NSF certified, or specifically marked food-safe. High-temperature resistance above 212F (100C) is essential. Standard construction silicone contains chemicals that can leach into drinking water and should never be used.
Electric kettles typically last 4 to 5 years with regular use. High-quality stainless steel models may last 6-7 years with proper maintenance. Hard water areas may see shorter lifespans due to accelerated limescale buildup and seal degradation. Regular descaling and proper use can extend kettle life significantly.
Most water kettles can be repaired if the issue is mechanical, such as worn seals, loose connections, or minor cracks. However, kettles with damaged heating elements, exposed wiring, or electrical component failures should be replaced for safety. Repairs are most cost-effective for kettles under 3 years old or premium models.
Common kettle problems include leaking from the base, lid, spout, or viewing window; failure to turn on or heat water; auto-shutoff malfunction; excessive noise during boiling; and limescale buildup affecting performance. Most issues stem from worn seals, mineral deposits, or electrical component wear over time.
To reset an electric kettle, unplug it from the power outlet and let it cool completely for at least 30 minutes. Some kettles have a reset button on the base, usually requiring a paperclip to press. For kettles with limescale protection shutoffs, descale thoroughly before resetting. Plug back in and test with a small amount of water.
Sudden kettle failure often results from thermal cutoff activation due to dry boiling, limescale buildup triggering safety shutoffs, or a blown fuse in the base. Check that the kettle is properly seated on its base, test a different outlet, and inspect for visible damage. If the heating element has failed, replacement is usually more economical than repair.
Getting your kettle leaking fixed is absolutely achievable with the right approach and materials. Start by identifying the leak location, gather food-safe repair materials, and follow the step-by-step methods outlined in this guide. Most repairs take under an hour of active work plus curing time for sealants.
Remember that regular descaling and proper maintenance prevent the conditions that cause leaks in the first place. With the information in this guide, you can extend the life of your electric kettle safely and avoid unnecessary replacement costs. If you encounter a leak type not covered here or the repair seems beyond your comfort level, consult a professional appliance technician for assistance.