Physical Address
304 North Cardinal St.
Dorchester Center, MA 02124
Physical Address
304 North Cardinal St.
Dorchester Center, MA 02124

When your water heater is not filling up, you lose access to hot water for showers, dishes, and daily tasks. This frustrating problem often strikes after maintenance like flushing the tank or following a water supply interruption. Understanding why your water heater won’t fill and knowing how to fix it can save you hundreds in plumbing service calls.
Our team has researched hundreds of real homeowner experiences and consulted professional plumber advice to create this comprehensive guide. We will walk you through the most common causes, provide step-by-step troubleshooting procedures, and explain exactly when you need professional help. Whether you have an electric, gas, or tankless water heater, these solutions will get your hot water flowing again.
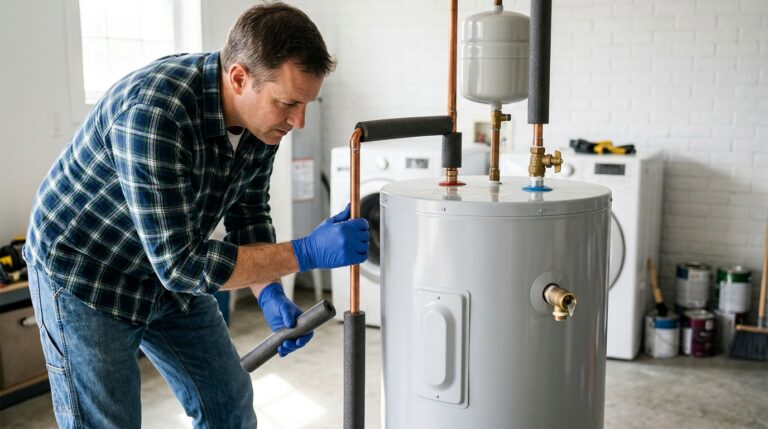
Before diving into repairs, it helps to understand water heater components and how they work together. This knowledge makes identifying problems much easier when something goes wrong.
A water heater fails to fill when something blocks or prevents cold water from entering the tank. The most common culprits include closed supply valves, trapped air (airlocks), sediment blockages, faulty pressure relief valves, and broken internal components. Each cause produces slightly different symptoms that help with diagnosis.
The filling process depends on water pressure pushing cold water through the inlet pipe while displaced air escapes through hot water faucets. When this balance is disrupted, your tank remains empty or fills only partially. Let us examine each cause in detail so you can identify what is affecting your system.
The cold water supply valve controls all water entering your tank. Someone may have accidentally turned it off during maintenance, or the valve itself could be faulty or seized in a partially closed position. This is the most common cause of filling problems and the easiest to fix.
Locate the valve on the cold water inlet pipe, usually positioned above or beside your water heater. Turn the handle counterclockwise until it stops to ensure it is fully open. Ball valves (with lever handles) align with the pipe when open, while gate valves (round handles) require multiple turns.
If the valve feels stuck or only turns partially, it may be seized from mineral deposits or corrosion. Try gently tapping the handle with a wrench to loosen it, but never force it aggressively as this could break the valve and cause flooding. A seized valve requires replacement by a professional.
Airlocks occur when air becomes trapped in the hot water lines, preventing water from flowing properly into the tank. This commonly happens after draining the tank for maintenance, replacing plumbing fixtures, or following water supply interruptions. The air creates a pressure barrier that stops the filling process.
Symptoms of an airlock include sputtering faucets, reduced water flow, or only air coming from hot water taps. You might hear gurgling sounds in the pipes as water tries to push past trapped air bubbles. These symptoms often appear immediately after you restore water supply to an empty tank.
Clearing an airlock requires releasing the trapped air through your home’s faucets. We cover five proven methods for clearing airlocks later in this guide, ranging from simple faucet opening techniques to more involved procedures using a garden hose. Most airlocks clear within 10-15 minutes using these methods.
Over time, minerals from hard water settle at the bottom of your tank and can clog the inlet screen or internal passages. This sediment buildup restricts water flow and can eventually block filling completely. Homes with hard water face this problem more frequently than those with soft water.
The inlet screen sits at the end of the cold water supply pipe inside your tank. This mesh filter catches debris but can become choked with calcium, magnesium, and rust particles. When severely clogged, water cannot enter the tank fast enough to fill it, or it may not enter at all.
Annual tank flushing removes most sediment before it causes problems. If you have never flushed your tank or live in an area with very hard water, sediment blockage is a likely cause of slow or failed filling. A water softener significantly reduces sediment accumulation and extends your water heater’s lifespan.
The temperature and pressure relief valve (T&P valve) serves as a safety device that releases water if pressure or temperature becomes dangerously high. When this valve fails or leaks constantly, it can prevent proper pressurization needed for filling. A leaking T&P valve may also indicate other serious problems requiring attention.
Test your T&P valve by lifting the lever slightly and allowing water to flow out. Water should flow freely when the lever is raised and stop completely when released. If no water flows, the tank may not be receiving water, or the valve itself is blocked. If water continues dripping after releasing the lever, the valve needs replacement.
Never cap or block a leaking T&P valve as this creates a dangerous explosion risk. The valve must operate freely to prevent catastrophic tank failure. Replacement T&P valves cost $15-30 and require basic plumbing skills to install, though many homeowners prefer professional installation for safety.
The dip tube is a long plastic pipe that directs incoming cold water to the bottom of the tank. When this tube cracks, breaks, or disconnects, cold water mixes immediately with hot water at the top instead of heating at the bottom. This causes lukewarm water and can create filling issues as the system cannot maintain proper thermal stratification.
Dip tubes typically fail due to age, chemical degradation, or manufacturing defects in older tanks. Water heaters manufactured between 1993 and 1996 had widespread dip tube failures due to a defective plastic formula used by several manufacturers. If your tank is from this era, dip tube failure is highly likely.
Signs of a broken dip tube include rapidly cooling hot water, reduced hot water capacity, and small plastic particles in faucet aerators. Replacing a dip tube requires draining the tank and removing the cold water inlet fitting, a moderately complex DIY task that many homeowners hire professionals to complete.
Water heaters require minimum pressure of 30-40 PSI to fill properly. If your home’s water pressure drops below this threshold due to municipal supply problems, pressure regulator failure, or shared supply issues, the tank may fill slowly or not at all. Low pressure affects both the filling process and your overall hot water performance.
Check your home’s water pressure using a gauge attached to an outdoor hose bib or washing machine connection. Normal residential pressure ranges from 40-60 PSI. Readings below 30 PSI indicate a pressure problem requiring investigation. High pressure (above 80 PSI) can also damage your water heater and requires a pressure reducing valve.
Pressure regulators located near your main water shutoff can fail gradually, reducing pressure throughout your home. Municipal water supply issues during peak usage times or following main breaks can also temporarily reduce pressure. Contact your water utility if neighbors report similar issues, as this indicates a supply-side problem beyond your control.
Understanding normal filling times helps you identify when your water heater has a problem. The time required depends on tank size, water pressure, and any blockages or restrictions in the system. At standard residential pressure of 50-60 PSI, tanks fill at predictable rates.
Here are the expected filling times for common tank sizes at normal pressure:
| Tank Size | Expected Fill Time | Minimum Pressure Required |
|---|---|---|
| 30-gallon | 5-10 minutes | 30 PSI |
| 40-gallon | 7-12 minutes | 35 PSI |
| 50-gallon | 8-15 minutes | 40 PSI |
| 80-gallon | 15-25 minutes | 40 PSI |
If your tank takes significantly longer than these times, or shows no signs of filling after 30 minutes with the supply valve open, you likely have one of the problems described in the previous section. Low water pressure can double or triple these filling times while remaining technically functional.
During filling, you should hear water flowing into the tank and air escaping through open hot water faucets. The sound changes from air hissing to steady water flow as the tank fills. Complete silence suggests a closed valve or complete blockage, while continuous air-only output indicates a stubborn airlock.
Follow this systematic diagnostic process to identify why your water heater is not filling up. Work through each step methodically, testing after each fix before moving to the next procedure. This approach prevents unnecessary work and helps isolate the actual problem.
Before touching your water heater, complete these safety steps to prevent injury or equipment damage. Water heaters involve electricity, gas, scalding water, and high pressure, all of which can cause serious harm if handled improperly.
For electric water heaters, turn off power at the circuit breaker and verify it is off using a non-contact voltage tester. Never work on electrical components while power is active. For gas water heaters, set the gas valve to the pilot position or completely shut off gas supply at the main valve.
Allow the tank to cool if it contains hot water. Use insulated gloves and safety goggles when working with valves or opening fittings. Keep a bucket and towels nearby to catch any water that escapes during testing. If you smell gas at any point, stop immediately and call your gas utility.
Start with the most common and easiest fix. Locate the cold water supply valve on the pipe entering your tank. Ensure the handle is turned fully counterclockwise until it stops. For ball valves, the handle should align parallel with the pipe direction.
Listen for water flow through the pipe after opening the valve. You should hear a steady flow sound indicating water entering the tank. If you hear nothing, the valve may be faulty internally even though the handle moves freely. This requires valve replacement.
Open all hot water faucets in your home, starting with the highest faucet (usually an upstairs bathroom) and working down to the lowest (basement or ground floor). This creates an escape path for trapped air and allows water to flow into the tank.
Leave faucets open for 10-15 minutes while the tank attempts to fill. You will initially hear air hissing, followed by sputtering as air and water mix, and finally a steady water stream when the air clears. Close faucets from lowest to highest once water flows steadily.
Lift the lever on the temperature and pressure relief valve located on the upper side of your tank. This valve has a small lever and typically includes a discharge pipe extending down the tank side. Lift the lever slightly and listen for water or air escaping.
If no water or air comes out when you lift the lever, your tank is not receiving water. If water sprays out under pressure, the tank is filling or has filled. If water drips constantly from the discharge pipe even with the lever closed, the valve needs replacement.
Inspect the base of your water heater and surrounding floor for water pooling. A leaking tank may prevent proper filling as water escapes as quickly as it enters. Look for rust streaks, moisture, or actual puddles indicating tank failure.
Check all visible connections including the cold water inlet, hot water outlet, T&P valve discharge pipe, and drain valve at the bottom. Tighten any loose fittings, but do not overtighten as this can crack threads. A leaking tank itself usually requires complete replacement.
If you have some water flow but filling is very slow, the inlet screen may be partially clogged. Turn off the cold water supply valve and remove the flexible connector or pipe leading to the tank inlet. Use a flashlight to examine the screen inside the tank fitting.
Clean any visible debris from the screen using a small brush or compressed air. Be careful not to damage the mesh. If the screen is severely corroded or missing, sediment may have entered the tank, requiring professional flushing or tank replacement depending on severity.
Electric water heaters have unique components that can affect filling and operation. Understanding these elements helps diagnose whether you have a filling problem or an electrical heating problem that mimics filling issues.
Electric water heaters include a high-temperature cutoff switch that trips if the water overheats. This safety device can trip during filling problems if heating elements activate without adequate water coverage. Resetting may restore function once the filling issue is resolved.
To reset your electric water heater: turn off power at the circuit breaker, remove the access panel covering the thermostat, carefully remove insulation to expose the red reset button, press the button firmly until you hear a click, replace insulation and panel, then restore power. Verify your water heater electrical requirements are met to prevent future trips.
Check your electrical panel for tripped breakers controlling the water heater. A double-pole 30-amp breaker typically serves water heaters. If the breaker is tripped, reset it by switching fully off then on. Frequent tripping indicates electrical problems requiring professional attention.
Never repeatedly reset a tripping breaker without identifying the cause. This creates fire risk and can damage your water heater. If the breaker trips immediately after reset, leave it off and call an electrician.
Gas water heaters rely on pilot lights, gas valves, and thermocouples that can fail independently of filling issues. However, these components can also be affected by or mistaken for filling problems.
Verify gas supply by checking that other gas appliances function normally. If your stove works but the water heater does not, the problem is specific to the water heater. If all gas appliances fail, check the main gas valve and contact your gas utility.
Ensure the gas control valve on the water heater is set to on (not pilot). The valve has clear markings indicating each position. If you recently had gas work done, air in the lines may require bleeding by a professional.
A pilot light that repeatedly goes out may indicate a failed thermocouple or gas control valve. While this does not directly affect filling, it prevents heating and may be confused with filling issues when no hot water appears.
Relighting a pilot follows a specific sequence: turn the gas valve to pilot, press and hold the pilot button, ignite the pilot with the piezo igniter while holding the button for 30 seconds, then release and turn the valve to on. If the pilot will not stay lit, the thermocouple likely needs replacement.
Tankless water heaters operate differently from tank models and have unique filling considerations. These systems heat water on demand rather than storing it, so traditional filling concepts do not apply in the same way.
Tankless units require minimum flow rates (typically 0.5-1.0 gallons per minute) to activate heating. Low flow from blocked filters, closed valves, or pressure problems prevents the unit from producing hot water. This can seem like a filling problem when it is actually a flow activation issue.
Mineral buildup affects tankless units more severely than tank heaters due to narrow heat exchanger passages. Annual descaling with vinegar or commercial solution maintains proper flow. If you are considering upgrading from a tank system, explore tankless water heater options for your home’s needs.
Airlocks frustrate many homeowners, especially after routine maintenance. These five methods range from simple to more involved, with success rates varying based on airlock severity and your home’s plumbing configuration. Try them in order from simplest to most complex.
The simplest approach requires opening hot water faucets throughout your home to create escape paths for trapped air. Start with the highest faucet in your house and open every hot water tap to at least half open position.
Leave faucets running for 10-15 minutes as the tank fills. You will hear air hissing initially, followed by sputtering as water pushes through. Once water flows steadily without air bubbles, close faucets starting with the lowest and working up. This method clears approximately 60% of airlocks.
This technique, verified by multiple home improvement forums, uses rapid valve cycling to create pressure pulses that dislodge trapped air. It works particularly well for stubborn airlocks in the inlet pipe near the tank.
Turn the cold water supply valve to the closed position, wait 5 seconds, then rapidly open it fully. Wait 10 seconds and repeat this open-close cycle 5-10 times. The pressure changes help break up air bubbles and move them through the system. Follow this by opening faucets to release any displaced air.
Using gravity and strategic faucet selection, this method creates a siphon effect that pulls air through the system more effectively than opening random faucets.
Identify the highest hot water faucet in your home (usually an upstairs shower or sink) and the lowest (basement utility sink or outdoor hose bib connected to hot water). Open both fully and allow water to run for 15-20 minutes. The vertical distance between faucets helps gravity pull air downward and out of the system.
For severe airlocks that resist other methods, connecting a garden hose between cold and hot water faucets creates direct pressure that forces air out.
Connect a garden hose to an outdoor cold water faucet (or washing machine cold supply) and attach the other end to a hot water faucet indoors using an adapter. Turn on the cold water slowly to create pressure that pushes backward through the hot water system, displacing trapped air through other open faucets. Run for 10 minutes, then disconnect and test normal filling.
Using the temperature and pressure relief valve creates a large opening at the top of the tank where air naturally collects. This method works best when combined with other techniques.
Ensure the cold water supply valve is open. Carefully lift the T&P valve lever and hold it open while pressing the internal valve stem. You should hear air escaping, possibly followed by water. Hold for 30 seconds, then release. The sudden pressure release often dislodges air bubbles blocking inlet flow. Never block the valve or tie it open, as this creates dangerous pressure buildup risk.
While many water heater filling problems resolve with DIY methods, certain situations require professional expertise. Knowing when to call a plumber saves time, prevents injury, and avoids making problems worse through incorrect repairs.
Call a professional immediately if you smell gas near a gas water heater, see water leaking from the tank itself (not just fittings), encounter electrical issues beyond a simple breaker reset, or if you have attempted the troubleshooting steps above without success after two hours of work. Internal tank damage, failed dip tubes, and complex valve replacements typically require professional tools and expertise.
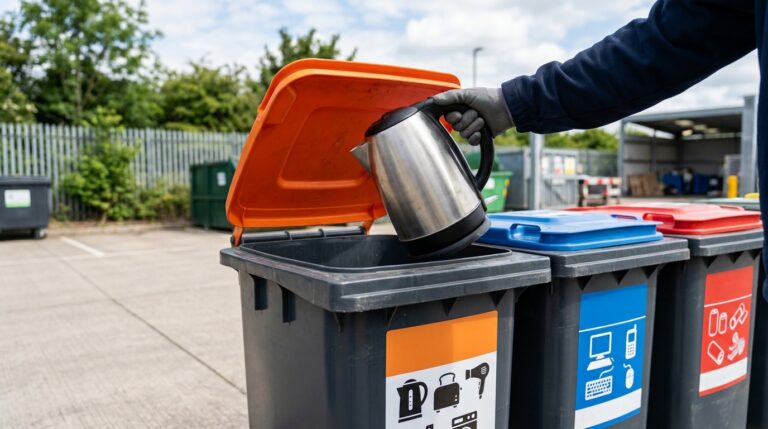
Consider the cost-benefit of repairs versus replacement. If your water heater is over 10 years old and requires major repairs, investing in a new unit often makes more financial sense. Modern water heaters offer improved efficiency and reliability compared to aging units. If replacement makes sense, read our guide to the best water heaters for current recommendations or explore 50-gallon water heater replacement options if that is your current size.
Water heater repair involves risks from electricity, gas, scalding water, and high pressure. Following proper safety procedures prevents injury and property damage. Never skip these precautions regardless of how simple a repair seems.
Always turn off power at the circuit breaker before working on electric water heaters. Use a non-contact voltage tester to confirm power is off before touching any electrical components. For gas units, shut off gas supply and allow any accumulated gas to dissipate before working.
Allow hot water to cool before draining or opening valves. Water stored at 120 degrees Fahrenheit can cause serious burns in seconds. Wear insulated gloves and eye protection when working with valves or pressurized systems. Keep children and pets away from the work area.
Never disable safety devices like the T&P valve or temperature cutoff switches. These prevent catastrophic tank explosions. If a safety device activates repeatedly, identify and fix the underlying cause rather than bypassing the protection. When in doubt, consult a professional plumber or HVAC technician.
Regular maintenance prevents most water heater filling problems and extends your unit’s lifespan. These simple habits reduce sediment buildup, maintain valve function, and catch problems before they cause complete failure.
Flush your tank annually to remove sediment before it causes blockages. Connect a garden hose to the drain valve, run it to a floor drain or outside, and drain 2-3 gallons until water runs clear. This takes 15 minutes and significantly reduces inlet screen clogging.
Test the T&P valve every six months by lifting the lever briefly. This ensures it moves freely and prevents mineral deposits from seizing the mechanism. Inspect the anode rod every 2-3 years and replace it when it is consumed to prevent tank corrosion.
Monitor your water pressure annually using a pressure gauge. Install a pressure reducing valve if pressure exceeds 80 PSI to protect your water heater and other plumbing. Consider a whole-house water softener if you have hard water to minimize mineral buildup throughout your system.
A water heater may not fill due to a closed cold water supply valve, trapped air creating an airlock, sediment blocking the inlet screen, a faulty temperature and pressure relief valve, or a broken dip tube. Check that the inlet valve is fully open and open hot water faucets to release trapped air. If these simple fixes do not work, inspect for sediment blockage or valve failure.
A 50-gallon water heater typically takes 8-15 minutes to fill at normal residential water pressure of 40-60 PSI. Larger 80-gallon tanks take 15-25 minutes, while smaller 40-gallon tanks fill in 7-12 minutes. Low water pressure below 30 PSI can double these filling times. If your tank takes significantly longer or shows no progress after 30 minutes, you likely have a blockage or valve problem.
To clear an airlock in a hot water cylinder: Turn off the water heater power for safety. Open all hot water faucets in your home, starting with the highest and working to the lowest. Leave them open for 10-15 minutes as the tank fills, allowing air to escape. You will hear hissing initially, then sputtering, then steady water flow. Close faucets from lowest to highest once water runs smoothly. Alternative methods include pumping the supply valve rapidly or using the T&P valve to release pressure.
To reset an electric water heater: Turn off power at the circuit breaker. Remove the access panel covering the upper thermostat. Carefully move insulation aside to expose the red reset button above the thermostat. Press the button firmly until you hear a click indicating it has reset. Replace the insulation and access panel. Turn power back on at the breaker. The reset button trips when water overheats, often due to the tank filling incompletely and exposing the heating element to air.
Sediment buildup from hard water minerals is the most common water heater failure. These minerals accumulate at the tank bottom, reducing heating efficiency, blocking the drain valve, clogging the inlet screen, and eventually causing tank corrosion and failure. Annual flushing prevents sediment problems and extends tank life by 3-5 years. Signs of sediment issues include popping or rumbling noises, reduced hot water capacity, and slow filling after maintenance.
Signs of a faulty mixing valve include inconsistent water temperature that shifts between hot and cold, hot water running out faster than usual, scalding hot water followed by sudden cold, and lukewarm water even with the thermostat set high. Mixing valves blend hot and cold water for safety and comfort. When they fail, they cannot maintain proper temperature balance. A licensed plumber should test and replace mixing valves, as incorrect installation creates scalding risks.
After replacing a tank water heater, run hot water faucets for 15-20 minutes to release trapped air. Start with the highest faucet in your home and open all hot water taps to create escape paths. You will hear hissing as air exits, followed by sputtering as water pushes through, then steady water flow when the air clears. If air persists after 30 minutes, try the pump method (rapidly cycling the supply valve) or contact a plumber as the airlock may require professional clearing.
Water heater not filling up is a common problem with solutions ranging from simple valve adjustments to more involved airlock clearing procedures. Start with the basics: check that your cold water supply valve is fully open and open hot water faucets to release trapped air. These two steps resolve the majority of filling problems.
If simple fixes do not work, methodically work through the troubleshooting steps in this guide. Test components, clear sediment, and try multiple airlock removal techniques before calling a professional. Remember that patience is key when dealing with trapped air, as stubborn airlocks may require 20-30 minutes to clear completely.
Safety should always be your priority. Turn off power and gas before working on your water heater, and never disable safety devices like the T&P valve. When in doubt or if you encounter electrical or gas concerns, contact a licensed plumber immediately. With proper maintenance including annual flushing and regular valve testing, you can prevent most filling problems and enjoy reliable hot water for years to come.