Physical Address
304 North Cardinal St.
Dorchester Center, MA 02124
Physical Address
304 North Cardinal St.
Dorchester Center, MA 02124

A dryer that suddenly refuses to start is one of the most frustrating household appliance failures. The good news is that about 80% of dryer startup problems stem from just a handful of common issues that you can diagnose and often fix yourself without calling a repair technician.
Our team has spent years studying appliance repair forums, manufacturer service manuals, and real-world troubleshooting scenarios. We’ve compiled this complete guide to help you diagnose why your dryer won’t start and walk you through the fixes that save homeowners hundreds in service call fees every 2026.
This guide covers both gas and electric dryers from all major brands. We’ll start with the simplest checks that take under five minutes, then move to component testing if needed. Always unplug your dryer before performing any internal repairs or testing.
Before you start disassembling anything, run through this five-minute diagnostic checklist. About half of all “dryer won’t start” issues resolve at this stage.
Step 1: Check for power at the outlet. Open the dryer door and see if the interior light turns on. If it does, you have power reaching the unit. No light means a power supply problem.
Step 2: Verify the circuit breaker. Check your home’s breaker panel for any tripped breakers. Dryers typically run on 240V circuits (electric) or 120V circuits (gas). Reset any tripped breakers by flipping them fully off, then back on.
Step 3: Test the door latch. The dryer will not start if the door isn’t fully closed and latched. Push firmly on the door and listen for the latch click. Try starting again.
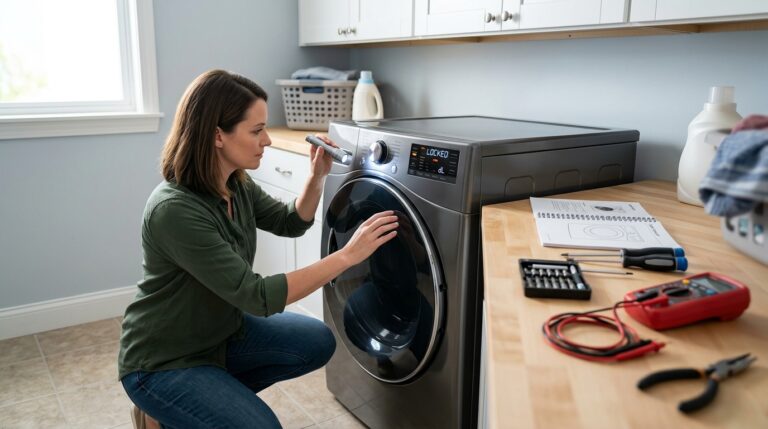
Step 4: Look for Control Lock indicators. Many modern dryers have a control lock or child lock feature. Look for a small padlock icon or “LOC” display. Hold the designated button (usually labeled “Control Lock” or shown in your manual) for 3-5 seconds to disable.
Step 5: Check cycle selection. Some dryers won’t start if an invalid cycle combination is selected. Try selecting a basic Timed Dry cycle and pressing start.
If your dryer still won’t start after these checks, the problem likely involves an internal component that needs testing.
One of the most confusing scenarios is when your dryer shows signs of power (lights on, display active) but the drum won’t spin or the heating won’t engage. This indicates that power is reaching the control board but not flowing properly to the motor or heating components.
First, verify that you have the correct voltage at the outlet. Electric dryers require a 240-volt outlet. You can test this with a multimeter set to AC voltage by placing probes in the outer slots of the dryer outlet. You should read approximately 240 volts between the two hot slots and 120 volts between each hot slot and neutral.
Gas dryers only need 120 volts to run the motor and controls, but they share a common issue: GFCI outlet trips. If your dryer is plugged into a GFCI-protected outlet or circuit, a power surge or moisture can trip the protection. Press the “RESET” button firmly on the outlet or breaker. If it trips again immediately, you may have a ground fault in the dryer’s wiring that requires professional attention.
Inspect the power cord where it enters the dryer. Over time, vibration can cause the cord to fray or the internal connections to loosen. Look for any visible damage, burn marks, or melted plastic. Never use a dryer with a damaged power cord.
Safety warning: Always unplug the dryer before inspecting cords or internal wiring. Never attempt to bypass safety features or modify electrical connections unless you have proper training.
The door switch is a small but critical safety component that tells the dryer’s control board when the door is securely closed. A faulty door switch is the second most common cause of a dryer that won’t start, right after thermal fuse failures.
When working properly, you should hear a faint click when you close the dryer door. This is the switch plunger being depressed. If you don’t hear this click, the switch may be stuck, broken, or misaligned.
To test the door switch, you’ll need a multimeter set to continuity mode. Unplug the dryer and locate the door switch. It’s usually found near the door latch on the front panel or door frame. Remove the wires from the switch terminals, then touch one probe to each terminal. Press the switch plunger. The multimeter should beep or show continuity when pressed, and show no continuity when released.
If the switch shows continuity in both positions or no continuity in either position, it has failed and needs replacement. Door switches typically cost $10-25 and take 15-30 minutes to replace.
Some technicians temporarily bypass the door switch for testing purposes by connecting the two wires together with a wire nut. This should only be done briefly for diagnosis and never left this way. Operating a dryer without a functioning door switch creates a serious safety hazard, especially for homes with children.
The thermal fuse is the single most common component to fail in dryers that won’t start. This safety device cuts power to the motor if the dryer overheats, preventing fires. Once blown, a thermal fuse must be replaced. It cannot be reset.
The most important thing to understand about thermal fuse failure: it almost always indicates an underlying problem. The fuse is doing its job by protecting your home. Simply replacing the fuse without fixing the root cause will result in another blown fuse, often within days or weeks.
The leading cause of thermal fuse failure is a clogged dryer vent. When lint builds up in the vent hose or exterior vent cap, hot air cannot escape properly. The dryer overheats, and the thermal fuse blows to protect the unit. Before replacing any thermal fuse, thoroughly clean your entire vent system from the dryer to the outside.
Other causes include a blocked lint screen, a failed cycling thermostat that doesn’t turn off the heat, or restricted airflow from crushing the vent hose behind the dryer.
To locate your thermal fuse, consult your dryer’s service manual or search online for your model number plus “thermal fuse location.” Most are found on the blower housing or near the heating element. It’s a small white or silver component with two wires, roughly the size of a quarter.
Testing a thermal fuse requires a multimeter set to continuity. Remove the wires, touch probes to both terminals, and check for continuity. A good fuse shows continuity. A blown fuse shows no continuity. Thermal fuses cost $5-15 and are relatively easy to replace with basic hand tools.
Prevention tip: Clean your lint screen after every load. Check and clean your vent system at least once per year. If you dry heavy items like comforters frequently, check more often.
The start switch (also called the push-to-start switch) activates the drive motor when pressed. Over years of use, these switches can wear out, develop intermittent contact, or fail completely.
Signs of a failing start switch include having to press the button multiple times, needing to hold the button down longer than normal, or a completely unresponsive button. Some dryers have a turn-knob start mechanism instead of a push button. These can suffer from worn internal contacts.
To test the start switch, unplug the dryer and remove the control panel to access the switch. Remove the wires from the switch terminals. Set your multimeter to continuity. For push-to-start switches, there should be no continuity when the button is released, and continuity when pressed. If the switch shows the wrong readings or erratic behavior, replace it.
Start switches typically cost $15-40 depending on your dryer model. Replacement involves removing the old switch from the control panel, disconnecting the wires, and connecting the new switch. Take a photo of the wiring before disconnecting to ensure proper reassembly.
Some newer dryers use electronic touchpad controls rather than mechanical switches. These can be harder to diagnose and usually require professional testing equipment to verify failure.
A distinctive symptom that points to specific problems is when you press start and hear a humming sound, but the drum doesn’t turn. This tells you that power is reaching the motor, but something is preventing rotation.
The most common cause of humming without rotation is a failed drive belt. The drive belt wraps around the drum and motor pulley, spinning the drum when the motor runs. If the belt breaks, the motor runs but the drum doesn’t turn. Most dryers have a belt switch that detects when the belt breaks and prevents the motor from running continuously. However, some designs let the motor hum briefly before the switch cuts power.
To inspect the drive belt, unplug the dryer and remove the front or rear access panel (depending on your model). Look for the belt around the drum and motor pulley. A broken belt will be obvious. A loose belt may have slipped off the pulley. A worn belt may have cracked or frayed sections.
Replacing a drive belt requires threading it around the drum, idler pulley, and motor pulley in the correct configuration. Take photos before disassembling. Drive belts cost $10-25 and last 5-10 years under normal use.
If the belt is intact but the motor still hums without starting, the motor itself may have failed. Motor failure is less common than belt or fuse issues but does occur, especially in older dryers or those that have been overloaded repeatedly. Motor replacement typically costs $100-200 for parts alone, making it a borderline decision for older dryers.
Another possibility is a seized drum. Remove the belt and try turning the drum by hand. It should rotate freely with slight resistance. If it’s stuck, check for jammed items between the drum and cabinet, or failed drum support rollers.
Modern dryers rely on electronic control boards to manage all functions. When these fail, symptoms can be erratic: buttons not responding, displays showing error codes, or complete unresponsiveness.
Before assuming control board failure, try a hard reset. Unplug the dryer for 5-10 minutes to allow the control board capacitors to fully discharge. Plug it back in and test. This simple procedure resolves many temporary electronic glitches caused by power surges.
For GE dryers specifically, a hard reset may involve unplugging, waiting, then plugging back in while holding a specific button combination. Consult your manual for model-specific reset procedures.
Older dryers use mechanical timers instead of electronic boards. These can fail due to worn contacts or motor burnout. Testing a timer requires accessing the wiring diagram and checking for continuity between specific terminals at different timer positions. Timer replacement typically costs $50-150.
Control board replacement is one of the more expensive repairs, often running $200-400 for parts. For dryers more than 8-10 years old, this cost approaches the price of a new basic dryer. Consider the age and overall condition of your unit before investing in a new control board.
Each major dryer brand has common failure patterns based on design differences. Here are the brand-specific issues to check:
Whirlpool and Kenmore (built by Whirlpool): These dryers are known for reliable operation but common door switch failures. The thermal fuse is located on the blower housing and is easily accessible. If you have a Whirlpool dryer that won’t start, check the door switch first, then the thermal fuse. Many Whirlpool models have a belt switch that can fail and prevent starting.
GE Dryers: GE units often have control board issues in models with electronic displays. If your GE dryer won’t start, try the hard reset procedure: unplug for 10 minutes, then plug back in while holding the Start button for 5 seconds. GE thermal fuses are sometimes located in less accessible positions, requiring front panel removal.
Samsung Dryers: Samsung units frequently suffer from idler pulley failures that cause the drive belt to break. They also have more complex electronic controls that can display error codes. Check the display for any error code before the dryer fails to start. Common codes include “dc” (door check) and various thermal errors.
LG Dryers: LG dryers are generally reliable but can have moisture sensor issues that prevent proper cycle selection. Ensure the moisture sensor bars inside the drum are clean. LG units also have a tendency for the control board relay to fail after 5-7 years.
Frigidaire and Electrolux: These brands often place the thermal fuse in difficult-to-reach locations. Door switch failures are also common. The drive belt routing on these models is more complex, making belt replacement slightly more challenging.
While many dryer repairs are straightforward DIY projects, some situations warrant professional service. Here’s how to decide:
Call a professional if you encounter any of these conditions: the dryer trips the circuit breaker repeatedly, you smell burning or electrical odors, there are visible burn marks inside the dryer cabinet, the power cord is damaged, or you feel uncomfortable working with electrical components. Safety should always be your top priority.
DIY repair typically costs $10-50 in parts for common issues like thermal fuses, door switches, and drive belts. Professional service calls usually run $100-200 for the diagnostic visit, plus $50-150 for parts and labor. Complex repairs like motor or control board replacement can total $300-500.
Consider replacement instead of repair if your dryer is over 10 years old, has required multiple repairs in the past year, or the repair estimate exceeds 50% of a new dryer’s price. Entry-level dryers start around $400-500, while high-end units run $800-1500.
Warning signs that indicate serious problems include: loud grinding or squealing noises before the failure, frequent overheating, burn marks on clothing, or the dryer feeling excessively hot to touch on the exterior.
Sudden dryer failure is usually caused by a blown thermal fuse due to overheating, a tripped circuit breaker, or a failed door switch. The thermal fuse is the most likely culprit – it protects your dryer from fire by cutting power when overheating occurs. Check your vent for clogs before replacing the fuse. Less commonly, power surges can damage the control board or start switch.
Most dryers do not have a physical reset button. Unlike some appliances, dryers use thermal fuses that must be replaced when blown, not reset. However, you can perform a hard reset by unplugging the dryer for 5-10 minutes, which clears temporary electronic glitches. Some GE models have specific button combinations for resetting the control board – check your manual for details.
Use a multimeter set to continuity mode to test the thermal fuse. Remove the wires from the fuse terminals, touch one probe to each terminal. If the multimeter beeps or shows continuity, the fuse is good. No beep or no continuity means the fuse is blown and must be replaced. The thermal fuse is typically located on the blower housing or near the heating element and looks like a small silver or white disc with two wires attached.
If lights and display work but the drum won’t spin, you likely have a broken drive belt or a failed drive motor. The belt wraps around the drum and motor pulley – when it breaks, the motor may hum but the drum stays still. Unplug the dryer and remove the front panel to inspect the belt. A broken belt will be obvious. Some dryers have a belt switch that prevents operation if the belt breaks.
The thermal fuse is the most commonly replaced part in dryers that won’t start. This safety device blows when the dryer overheats, usually due to restricted airflow from a clogged vent. Other common failures include the door switch (prevents starting when faulty), drive belt (causes drum to stop spinning), and start switch (wears out after years of use). These four components account for approximately 80% of dryer startup problems.
To reset most GE dryers, unplug the unit for 5-10 minutes to allow the control board to fully discharge. Plug it back in and test. For models with electronic controls, try pressing and holding the Start button for 5 seconds while plugging the dryer back in. If the dryer has a Controls Lock feature activated, press and hold the Control Lock button for 3 seconds to deactivate. Check your specific model’s manual for exact reset procedures.
A dryer that won’t start is rarely a sign of catastrophic failure. In most cases, one of four common components has failed: the thermal fuse, door switch, drive belt, or start switch. By following the diagnostic steps in this guide, you can identify the problem and often complete the repair yourself for under $50.
Remember that the thermal fuse is protecting your home from fire. Never bypass it, and always clean your vent system before installing a replacement. Prevention is the best repair – clean your lint screen after every load and inspect your vent system annually to avoid the most common cause of dryer failures.
If you’ve worked through this troubleshooting guide and your dryer still won’t start, it may be time to call a professional. Complex electrical issues, control board failures, or motor problems often require specialized tools and expertise. For dryers over 10 years old, consider whether repair costs justify investing in a new, more efficient model.