Physical Address
304 North Cardinal St.
Dorchester Center, MA 02124
Physical Address
304 North Cardinal St.
Dorchester Center, MA 02124

You set your thermostat to 72 degrees, but the display stubbornly reads 80. The AC keeps running, your energy bill keeps climbing, and your home never feels comfortable. After helping hundreds of homeowners troubleshoot cooling issues over the past decade, I can tell you that an AC that won’t cool below 80 is one of the most common complaints we hear, especially during heat waves.
The good news? Not every cause requires an expensive service call. Some fixes are simple DIY tasks that take under 30 minutes. The not-so-good news? Certain problems indicate serious system failures that demand professional attention. In this guide, I will walk you through exactly why your air conditioner won’t cool below 80 degrees, how to diagnose the issue yourself, and when to pick up the phone and call an HVAC technician.
Before assuming the worst, run through these quick checks. Our team estimates that 40% of “emergency” service calls could be avoided with these simple steps.
Pull out your air filter and hold it up to the light. If you cannot see through it, that dirty filter is likely your culprit. A clogged filter restricts airflow, preventing your AC from moving enough air to cool your home effectively.
Replace disposable filters every 1-3 months depending on usage and home conditions. Homes with pets or high dust levels need more frequent changes. This $10 fix solves more cooling problems than any other DIY step.
Check that your thermostat is set to “COOL” and not “HEAT” or “FAN ONLY.” Replace the batteries if you have not done so recently. Also verify the temperature reading is accurate, thermostats near heat sources like lamps or direct sunlight can read higher than the actual room temperature.
Head outside and look at your condenser unit. Clear away any leaves, grass clippings, or debris within a 2-foot radius. Trim back bushes and vegetation that might block airflow. The unit needs unrestricted airflow to release heat properly.
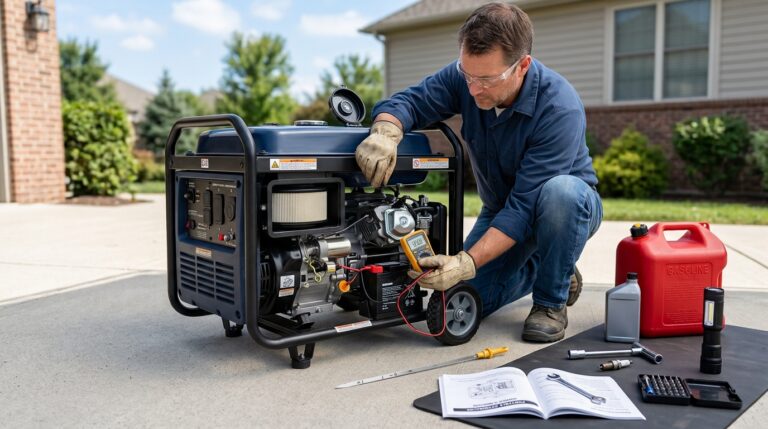
Locate your electrical panel and verify the AC breaker has not tripped. If it has, flip it fully off then back on. If it trips again immediately, stop and call a professional. This indicates an electrical issue that requires expert diagnosis.
Here is something most homeowners do not realize: your AC was never designed to handle every possible outdoor temperature. Every air conditioner is rated for a specific “design temperature” based on your geographic location.
In most regions, residential AC systems are designed to maintain 75-78 degrees indoors when outdoor temperatures hit 92-95 degrees. When the thermometer climbs to 100, 105, or 110 degrees outside, your system may only achieve 80 degrees inside. This is not a malfunction. This is physics.
During a Phoenix heat wave with 115-degree days, Reddit users in the r/phoenix community regularly confirm that 80 degrees indoors is normal and expected. Your system runs continuously, works as hard as it can, and simply cannot overcome the extreme temperature differential.
Check your local design temperature through your utility company or HVAC contractor. Understanding this limitation helps set realistic expectations and prevents unnecessary service calls during record-breaking heat.
I cannot stress this enough: check your filter first. A dirty air filter is the single most common cause of an AC that won’t cool below 80 degrees.
Think of your air conditioner like a coffee maker. Try sucking milkshake through a coffee straw versus a wide milkshake straw. The clogged straw requires significantly more effort and delivers less liquid. Your AC blower motor faces the same restriction when pulling air through a clogged filter.
Reduced airflow means less air passes over the cold evaporator coils. This reduces cooling capacity, can cause the coils to freeze up, and forces your system to run longer without achieving target temperatures.
Replace your filter immediately if it appears gray, clogged with dust, or you cannot remember the last replacement date. Mark your calendar for the next change. This simple maintenance task takes 5 minutes and costs under $15, yet prevents countless service calls.
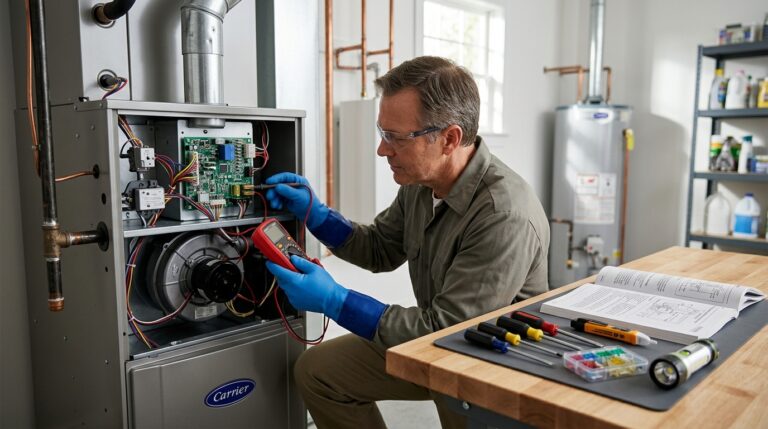
Refrigerant is the lifeblood of your air conditioning system. This chemical absorbs heat from indoor air and releases it outside. Without adequate refrigerant levels, your AC cannot transfer enough heat to cool your home below 80 degrees.
Unlike gasoline in a car, refrigerant does not get “used up.” If your levels are low, you have a leak. Period. Finding and fixing that leak requires professional equipment and EPA-certified handling.
Watch for these warning indicators: Ice forming on the refrigerant lines or evaporator coil. A hissing or bubbling sound near the outdoor unit or refrigerant lines. Your AC runs constantly but produces only lukewarm air from vents. Unusually high electric bills despite poor cooling performance.
One homeowner on a DIY forum reported their system could not cool below 80 for weeks. The technician discovered a pinhole leak in the evaporator coil. After repair and recharge, the system immediately cooled to 72 degrees as programmed.
Never attempt to add refrigerant yourself. This requires specialized gauges, knowledge of proper charging procedures, and EPA Section 608 certification. Improper handling can damage your system further or create environmental hazards.
Your air conditioner has two sets of coils that transfer heat. The evaporator coils inside absorb heat from your indoor air. The condenser coils outside release that heat into the outdoor air. When either set gets dirty, heat transfer suffers and cooling capacity drops.
You can safely clean condenser coils yourself. Turn off power to the unit at the breaker. Remove the outer grille if possible. Spray the coils gently with a garden hose from the inside out. Use a foaming cleaner designed for AC coils if heavily soiled. Let the cleaner sit 10-15 minutes, then rinse thoroughly.
Never use a pressure washer. The high pressure can bend the delicate aluminum fins, permanently damaging the unit. A gentle stream from a garden hose works perfectly.
The indoor evaporator coils are harder to access and typically require professional cleaning. Signs of dirty evaporator coils include weak airflow from vents, frozen coils visible through inspection panels, and musty odors from mold growth on the coils.
Schedule professional coil cleaning every 2-3 years as preventive maintenance. This service typically costs $100-300 but restores lost efficiency and prevents costly repairs.
An undersized air conditioner works correctly but lacks the capacity to cool your space effectively. You might notice the system runs constantly, never reaching the set temperature, yet does not show signs of mechanical failure.
Air conditioner capacity is measured in tons or BTUs. A 1-ton unit handles approximately 12,000 BTU per hour. Residential systems typically range from 1.5 to 5 tons. Proper sizing requires a Manual J calculation that factors in square footage, ceiling height, insulation levels, window sizes, and local climate.
Many older homes have AC units that were “eyeballed” by the installer rather than properly calculated. Additionally, additions, finished basements, or converted attics increase your cooling load beyond what the original system was designed to handle.
Your system cannot cool below 80 even during moderate 85-90 degree days. The unit runs non-stop but never satisfies the thermostat. Different rooms have dramatically different temperatures. Your home was expanded but the AC was never upgraded.
If you suspect undersizing, consult an HVAC professional about a load calculation. Solutions range from supplemental cooling with best window air conditioners or best portable air conditioners to full system replacement with properly sized best central air conditioners.
You could have a perfectly functioning air conditioner that still cannot cool below 80 because the cooled air never reaches your living spaces. Leaky ductwork and poor home sealing waste tremendous amounts of energy.
According to Department of Energy research, the average home loses 20-30% of conditioned air through duct leaks. In older homes, this can reach 40% or higher. Leaks typically occur at joint connections, where flexible duct meets rigid duct, or where ductwork runs through unconditioned attics or crawl spaces.
DIY duct inspection is possible in unfinished basements or attics. Look for obvious gaps, disconnected sections, or tape that has dried out and failed. You can seal accessible leaks with foil-backed tape or mastic sealant. However, comprehensive duct sealing requires professional equipment and typically costs $500-2,000 depending on system size.
Cooled air also escapes through gaps around windows, doors, electrical outlets, and attic access points. Check weatherstripping around doors and windows. Add foam gaskets behind outlet covers on exterior walls. Seal obvious gaps with caulk or expanding foam.
Small leaks add up quickly. One homeowner reported their AC finally reached 74 degrees after simply adding weatherstripping to a poorly sealed attic access hatch. That single gap was dumping hundreds of dollars of cooled air into their hot attic each summer.
When mechanical components start failing, your AC may still run but with significantly reduced cooling capacity. Understanding these failures helps you communicate effectively with technicians.
Short cycling occurs when your AC turns on, runs briefly, then shuts off before reaching the set temperature. It then restarts a few minutes later. This pattern indicates a problem and causes excessive wear.
Common causes of short cycling include an oversized AC unit that cools too quickly, low refrigerant causing the system to freeze up and shut down on safety controls, a failing capacitor that cannot maintain consistent power to the compressor, or a clogged air filter causing the system to overheat and shut down.
The capacitor stores electrical energy to start your compressor and condenser fan motor. When it weakens or fails, your outdoor unit may hum but not start, or the fan runs while the compressor does not engage.
Capacitor replacement is a common repair that costs $150-400 depending on accessibility and local rates. This is a relatively affordable fix compared to major component failures.
The compressor is the heart of your AC system, pumping refrigerant between indoor and outdoor coils. Compressor failure is serious and expensive. Signs include the outdoor unit running but no cooling occurring, loud clicking or grinding noises from the outdoor unit, or the unit tripping the circuit breaker.
Compressor replacement typically costs $1,500-3,000 or more. At this price point, replacement of the entire outdoor unit or full system often makes more financial sense, especially for units over 10 years old.
The indoor blower motor pushes air through your ductwork. If it fails or runs weakly, you get little to no airflow from vents even when the system is technically “running.” Symptoms include weak or no airflow from vents, a burning smell from the indoor unit, or unusual squealing or grinding noises from the air handler.
Knowing when to call for help saves money and prevents making problems worse. Here is the clear dividing line between DIY and professional territory.
Replace air filters monthly or as needed. Clean debris from around the outdoor condenser unit. Reset tripped circuit breakers once. Change thermostat batteries and verify settings. Clean condenser coils with gentle water spray. Add weatherstripping to doors and windows.
Refrigerant leaks or recharging needs. Electrical issues beyond a simple breaker reset. Compressor, capacitor, or blower motor failures. Evaporator coil cleaning or repair. Ductwork sealing or replacement. System sizing evaluation and load calculations. Any repair involving opening refrigerant lines.
When you call, ask these questions to ensure quality service: Are you licensed and insured in my state? Will you provide a written estimate before starting work? Do you offer a warranty on repairs? Can you explain exactly what failed and why? Are there multiple repair options at different price points?
Be wary of companies that immediately recommend replacement without explaining the specific failure, refuse to provide written estimates, or pressure you into same-day decisions. Reputable technicians diagnose thoroughly and present options.
Facing a major AC repair brings a difficult decision: fix the old unit or invest in a new one? Use the $5000 rule as a practical guideline.
Multiply the age of your current unit by the quoted repair cost. If the result exceeds $5,000, replacement usually makes more sense than repair.
For example: A 12-year-old unit needing an $800 compressor repair equals $9,600 (12 x 800). This exceeds $5,000, so replacement is likely the wiser choice. Conversely, a 5-year-old unit needing a $300 capacitor repair equals only $1,500 (5 x 300), making repair the clear answer.
The average residential air conditioner lasts 10-15 years with proper maintenance. Units approaching or exceeding this range face increasing failure risk. Major repairs on aging systems often lead to additional failures within 1-2 years.
Additionally, newer energy efficient air conditioners use significantly less electricity. If your current unit is 10+ years old, a modern replacement could cut your cooling costs by 20-40%, helping offset the purchase price through lower utility bills.
Consider full system replacement if your unit is over 12 years old and needs a major repair, you have faced multiple repair calls in the past 2 years, your energy bills keep rising despite stable rates, or your system uses obsolete R-22 refrigerant which is being phased out and increasingly expensive.
When you are ready to replace, our guide to the best air conditioners helps you find the right unit for your home and budget.
Common causes include dirty air filters restricting airflow, low refrigerant from leaks, dirty condenser or evaporator coils reducing heat transfer, an undersized AC unit for your home, air leaks in ductwork wasting cooled air, or reaching your system’s design temperature limit during extreme heat. Start by checking and replacing your air filter, then inspect the outdoor condenser unit for debris before calling a professional for refrigerant or component issues.
Yes, this is often normal. Residential AC systems are designed to maintain 75-78 degrees indoors when outdoor temperatures reach 92-95 degrees. When it is 100+ degrees outside, your system may only achieve 80 degrees inside while running continuously. This is not a malfunction but rather your system operating at its engineering limits. Check your local design temperature to understand what your specific unit was rated for.
Signs of low refrigerant include ice forming on the refrigerant lines or evaporator coil, hissing or bubbling sounds near the outdoor unit, the AC running constantly but producing only lukewarm air from vents, and unusually high electric bills despite poor cooling performance. Unlike gasoline in a car, refrigerant does not get used up. Low levels always indicate a leak requiring professional repair and recharge.
Short cycling occurs when your AC turns on, runs briefly, then shuts off before reaching the set temperature, only to restart minutes later. This pattern indicates problems like an oversized unit, low refrigerant, failing capacitor, or clogged filter. Short cycling matters because it causes excessive wear on components, increases energy consumption, prevents proper dehumidification, and leads to premature system failure.
The 3 minute rule, also called a compressor delay or time delay, prevents your AC compressor from restarting too quickly after shutting down. When a compressor stops, refrigerant pressures need time to equalize before restarting. Starting too soon can damage the compressor motor. Most modern thermostats and control boards enforce this delay automatically, which is why your AC may not start immediately after you turn it on.
An AC that won’t cool below 80 degrees frustrates every homeowner who experiences it. After reading this guide, you now understand that causes range from simple fixes like dirty filters and blocked condensers to serious issues like refrigerant leaks and failing compressors. You also learned about the design temperature concept, which helps set realistic expectations during extreme heat waves.
Start your troubleshooting with the DIY checks: replace your filter, clear debris from the condenser, verify thermostat settings, and check for ice on refrigerant lines. These steps solve many issues without spending a dime on service calls. When you encounter refrigerant problems, electrical failures, or component issues, call a licensed HVAC professional.
Regular maintenance prevents most of these problems before they start. Change filters quarterly, keep your condenser clean, and schedule professional tune-ups every 1-2 years. An ounce of prevention keeps your AC cooling properly and your home comfortable all summer long.