Physical Address
304 North Cardinal St.
Dorchester Center, MA 02124
Physical Address
304 North Cardinal St.
Dorchester Center, MA 02124

Your whole house fan not working usually stems from six common causes: power supply problems, a failed capacitor, motor issues, faulty switches, worn belts, or blocked vents. I have spent 15 years troubleshooting HVAC systems, and whole house fans consistently rank among the most straightforward repairs homeowners can tackle themselves.
This guide walks you through every troubleshooting step from basic power checks to advanced diagnostics. You will learn how to identify the root cause, determine when a DIY fix makes sense, and understand exactly when to call a professional. Whether your fan hums but will not spin, makes strange noises, or refuses to turn on entirely, the answers you need are right here. If you are considering a replacement instead, our guide to the top-rated whole house fans can help you choose the right model for your home.
Always begin with the simplest explanation before assuming a major component failed. Power supply problems cause roughly 30% of whole house fan failures, and most take under five minutes to identify.
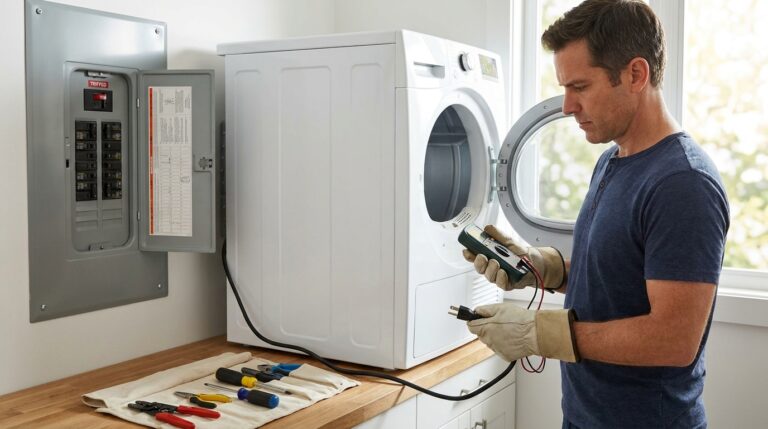
A tripped breaker or blown fuse is the most common power issue. Locate your electrical panel and look for any switch that sits between ON and OFF positions. Reset any tripped breakers by pushing them fully OFF, then back to ON. If the breaker trips again immediately, you have a short circuit that requires professional attention.
Older homes may have a dedicated fuse for the whole house fan circuit. Check the attic access area near the fan itself. Some installations include a secondary fuse block or disconnect switch that homeowners overlook.
Use a receptacle tester on the outlet powering your fan, or plug in a working lamp to verify power. If you have a plug-in model, test the outlet. For hardwired installations, check the junction box connections with the power off at the breaker. Loose wire nuts or corroded connections interrupt power flow without tripping the breaker.
Look for signs of electrical problems like burn marks, melted plastic, or a burning smell near the motor housing or switch. These indicate dangerous conditions requiring immediate professional inspection.
Electric motors in whole house fans typically last 10-15 years with proper maintenance. When they fail, the symptoms usually announce themselves clearly if you know what to listen for.
If your whole house fan makes a humming noise but the blades do not move, the motor is receiving power but cannot start rotating. This points to either a failed capacitor or seized motor bearings. Capacitor issues are far more common and significantly cheaper to fix. A humming sound without motion almost always means the motor is healthy but lacks the startup boost it needs.
Modern whole house fans include thermal overload protection that shuts the motor off when internal temperatures exceed safe limits. If your fan runs for a few minutes then stops, or if you notice a hot motor housing, overheating is likely.
Overheating stems from dust buildup, blocked vents, failing bearings creating excess friction, or electrical problems drawing too much current. Clean the motor housing and ensure all vents remain unobstructed before testing again.
Older belt-drive fans and some direct-drive models use bearings that require periodic lubrication. When bearings dry out or corrode, the motor cannot overcome the friction to start spinning. You may hear grinding or squealing noises before complete failure occurs.
Some motors have sealed bearings that cannot be lubricated. Others feature oil ports labeled “OIL” on the motor housing. Two or three drops of SAE 20 non-detergent motor oil every two years keeps bearings functioning properly.
The capacitor stores electrical energy and releases it to give the motor the initial jolt needed to start spinning. When it fails, the motor hums but cannot start. Capacitor failure accounts for the majority of “humming but not spinning” complaints.
A bad capacitor produces specific symptoms you can recognize without tools. The fan hums when switched on, but the blades do not move. Giving the blades a manual push may start them spinning. Once started, the fan might run normally, proving the motor works fine. The fan may start on cooler days but fail on hot days when the capacitor weakens further.
Replacing a capacitor costs between $15-40 for the part and takes roughly 30 minutes for anyone comfortable working with electricity. Always disconnect power at the breaker before starting. Discharge any remaining power by shorting the capacitor terminals with an insulated screwdriver, as capacitors can hold a dangerous charge even with power disconnected.
Match the replacement capacitor exactly by microfarad rating (marked as μF or MFD) and voltage rating. Using the wrong capacitor damages the motor or creates a fire hazard. Most whole house fans use capacitors rated between 5-20 μF at 250-370 volts.
If your capacitor bulges, leaks oil, or shows corrosion, replacement is definitely needed. Even capacitors that look fine can fail internally, so testing with a multimeter capable of capacitance measurement provides definitive confirmation.
Wall switches, especially variable speed models, rank among the most failure-prone components in whole house fan systems. Heat buildup from current flow eventually degrades internal contacts.
Variable speed controls use solid-state components that run hot during normal operation. After years of use, these switches commonly fail to make proper contact or deliver inconsistent voltage. Users on home improvement forums report these switches feeling hot to the touch before complete failure.
Test a suspected bad switch by bypassing it temporarily. With power disconnected, connect the hot wires directly together using a wire nut. Restore power at the breaker. If the fan runs normally, the switch is your problem. Never leave wires connected this way permanently, as it eliminates the safety function of the switch.
Whole house fans with thermostats or programmable timers add additional failure points. A faulty thermostat may not signal the fan to start even when attic temperatures soar. Timer mechanisms can jam or wear out, especially in dusty attic environments.
Bypass the thermostat temporarily by connecting wires directly to test fan operation. If the fan runs with direct connection but not through the thermostat, the control unit needs replacement. Programmable timers that fail to engage often need simple cleaning or complete replacement depending on the model.
Belt-driven whole house fans use a motor pulley connected to a larger fan pulley via rubber belt. These belts stretch, crack, and break over time, typically lasting 5-10 years depending on usage and environmental conditions.
A squeaking or squealing whole house fan usually indicates belt slippage or pulley misalignment. Belts that are too loose slip against the pulley, creating friction and noise. Belts that are too tight put excess strain on motor bearings and reduce efficiency.
Check belt tension by pressing the belt midway between pulleys. Properly tensioned belts deflect approximately 1/2 inch under moderate pressure. Adjust the motor mounting bracket to achieve correct tension, ensuring the motor remains square to the fan pulley to prevent uneven wear.
Inspect belts for cracking, fraying, or glazing on the contact surfaces. A completely broken belt produces no noise at all, just a running motor with stationary blades. Replacement belts cost $10-25 and installation requires basic hand tools.
While replacing the belt, inspect pulleys for wear. Worn pulleys develop grooves that cause new belts to fail prematurely. Clean all pulley surfaces with a rag to remove belt residue and debris that causes slippage.
Whole house fans move massive air volumes, typically 2,000-7,000 cubic feet per minute depending on model size. Any restriction in airflow forces the motor to work harder, potentially causing overheating and premature failure.
Your attic must provide sufficient free vent area to exhaust the air the fan pulls in. Industry standards recommend 1 square foot of net free vent area per 750 CFM of fan capacity. A 4,500 CFM fan needs at least 6 square feet of exhaust venting distributed between soffit, gable, and ridge vents.
Blocked or insufficient vents create back pressure that stalls the fan and overheats the motor. Check that soffit vents remain clear of insulation, bird nests, or debris. Ridge vents should show daylight when viewed from the attic. Understanding proper attic fan sizing ensures your ventilation system matches your home’s requirements.
Gravity-operated louvers should open fully when the fan runs and close completely when it stops. Stuck louvers prevent proper airflow and create dangerous backdrafting conditions. Test louver operation by running the fan and observing full opening. Clean hinges with silicone spray if movement feels sticky.
Dust accumulation on fan blades creates imbalance that causes vibration and bearing wear. Clean blades annually with a damp cloth or vacuum with brush attachment. Never run the fan with wet blades, as water throws off balance and can damage the motor.
Improper whole house fan operation creates negative pressure that pulls combustion gases down chimneys and flues instead of allowing them to exhaust normally. This backdrafting introduces carbon monoxide and other dangerous gases into your living space.
When a whole house fan runs with insufficient make-up air or blocked attic vents, the negative pressure it creates can overcome natural draft in water heater, furnace, or fireplace flues. Combustion gases then enter your home instead of exhausting outside. This risk increases dramatically in tightly sealed modern homes with limited air infiltration.
Never operate a whole house fan with fireplace ashes still warm, and ensure all combustion appliances draft properly before running the fan. Installing carbon monoxide detectors on every floor provides essential early warning protection.
Always open multiple windows when running your whole house fan. A fan moving 4,000 CFM through a single open window creates a wind tunnel effect and extreme negative pressure. Distribute airflow by opening windows in several rooms on the intake side of your home.
Ensure your attic has adequate exhaust venting to match the fan capacity. Undersized vents create pressure that works against both fan efficiency and safe combustion appliance operation. If you smell gas, smoke, or exhaust fumes when the fan runs, shut it off immediately and consult an HVAC professional.
Some repairs fall safely within homeowner capability while others demand professional expertise. Understanding this boundary saves money on simple fixes while preventing costly mistakes on complex issues.
Capacitor replacement requires basic electrical safety knowledge but presents manageable risk for most homeowners. Belt replacement involves mechanical skills but no electrical work. Cleaning and lubrication, vent inspection, and louver adjustment require only time and attention to detail.
These repairs typically cost $15-50 in parts and save $150-300 in labor charges. Homeowners comfortable with household electrical work can complete them in under an hour.
Motor replacement, wiring repairs inside junction boxes, and any work involving the main electrical panel require licensed electricians or HVAC technicians. These repairs involve higher voltage, complex troubleshooting, and code compliance requirements. Mistakes can create fire hazards or electrocution risks.
Professional motor replacement costs $400-800 including parts and labor. Complete fan replacement runs $1,000-2,500 depending on fan size and attic accessibility. If your fan is over 15 years old and needs major repairs, replacement often makes better financial sense than continued maintenance.
Repair costs range from $15-50 for DIY capacitor or belt replacement to $400-800 for professional motor replacement. Service call fees typically run $75-150 before any parts or labor. Complete fan replacement costs $1,000-2,500 depending on size and installation complexity.
A properly maintained whole house fan lasts 15-25 years. Capacitors typically need replacement every 10-15 years. Belts last 5-10 years. Motors in well-maintained units often exceed 20 years of service.
Sudden failures usually indicate electrical issues: tripped circuit breaker, blown fuse, or failed capacitor. Less commonly, a motor can burn out from overheating, or a belt can break on belt-drive models. Always check power supply first when failure occurs suddenly.
Yes, most whole house fans use a motor run capacitor to provide the electrical phase shift needed for single-phase motor operation. The capacitor stores energy and releases it to help the motor start and run efficiently. Without it, the motor hums but cannot spin.
This symptom almost always indicates a failed or weak capacitor. The motor receives power and tries to start, but lacks the boost needed to overcome inertia and begin rotation. Replacing the capacitor, which costs $15-40, typically solves the problem completely.
Yes, for many common issues. Capacitor replacement, belt changes, cleaning, and basic troubleshooting fall within capable homeowner skills. However, motor replacement, wiring repairs, and electrical panel work require professional licensing for safety and code compliance.
A whole house fan not working rarely requires immediate replacement. Most failures stem from easily identified and often inexpensive causes. Start with power supply verification, check the capacitor if you hear humming, and inspect belts on older units. These three steps resolve the majority of issues homeowners encounter.
Regular maintenance prevents most failures before they occur. Clean your fan annually, lubricate bearings if applicable, and inspect belts and capacitors every few years. When you understand the difference between whole house fans and attic fans, you can make informed decisions about repair, replacement, or upgrades to your home ventilation system.
Respect your limits with electrical work. Saving $200 on labor charges makes no sense if you risk injury or create fire hazards. For complex issues or any repair that makes you uncomfortable, professional HVAC technicians provide expertise that protects your home and family while restoring comfortable, efficient cooling.