Physical Address
304 North Cardinal St.
Dorchester Center, MA 02124
Physical Address
304 North Cardinal St.
Dorchester Center, MA 02124

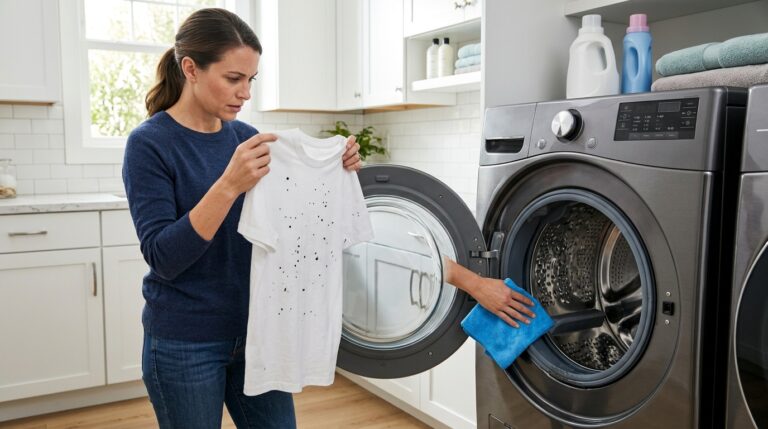
You walk into your laundry room and hear an unmistakable sound: water running. Your washing machine sits quietly with the power off, yet water continues to trickle into the drum. Or worse, the washer is actively running and water keeps pouring in, threatening to overflow onto your floor. This is one of the most common washing machine problems homeowners face, and it demands immediate attention to prevent water damage, mold growth, and costly repairs.
Our team has helped hundreds of homeowners diagnose this exact issue over the past eight years. The good news? Most washer filling problems stem from just three components, and many can be fixed yourself in under an hour. In this guide, you will learn how to diagnose why your washer is filling with water, perform simple tests to identify the faulty part, and complete repairs that could save you hundreds in service calls.
If water is actively overflowing from your washer, act immediately. Turn off the water supply valves located behind your machine, typically marked hot and red, cold and blue. Rotate both valves clockwise until firm resistance stops you. This cuts off all water flow to the appliance within seconds.
Next, unplug the washing machine from the electrical outlet. Standing water and electricity create a serious hazard. If water has already reached your flooring, use towels or a wet-dry vacuum to remove it quickly. Place fans to dry the area within 24 hours to prevent mold growth and subfloor damage.
Once the immediate crisis passes, you can work through the diagnostic steps below to identify and fix the root cause. For additional appliance troubleshooting resources, visit our troubleshooting guides collection.
Understanding how your washing machine controls water flow helps you diagnose problems faster. During a normal wash cycle, the control board signals the water inlet valve to open, allowing water to flow into the drum. As water rises, it compresses air in a connected tube called the air dome. This air pressure travels to the pressure switch, which tells the control board when the correct water level is reached. The board then signals the valve to close.
When your washer is filling with water at the wrong time, something has broken in this chain of communication. The water inlet valve might be stuck open mechanically. The pressure switch may not be detecting water levels correctly. The air dome tube could be clogged with detergent residue. Or in rare cases, the control board itself has failed to send proper signals.
According to our repair data and community reports from forums like iFixit and AppliancePartsPros, approximately 70 percent of washer filling problems trace back to the water inlet valve. Another 20 percent involve the pressure switch or air dome tube. The remaining 10 percent are split between control board failures and water supply issues.
The water inlet valve sits at the back of your washing machine where the hot and cold water supply hoses connect. Inside this valve, small electromagnetic solenoids open and close gates that control water flow. When electricity flows to the solenoid, the gate opens. When power stops, a spring should force the gate closed.
Over time, mineral deposits from hard water can build up on these gates, preventing complete closure. Small debris particles may wedge themselves in the valve seat. The rubber seals inside can crack or harden with age. Any of these failures allow water to seep through continuously, even when your washer is turned off.
The classic symptom of a bad water inlet valve is water slowly entering the drum when the machine is not running. You might notice the drum has water after sitting overnight. During a wash cycle, the washer may fail to stop filling at the proper level, leading to overfilling and potential overflow.
The pressure switch, also called the water level switch, monitors how full your washer has become. As water rises in the drum, it pushes air up through a small tube connected to the air dome. This compressed air exerts pressure on a diaphragm inside the pressure switch. When pressure reaches the threshold for your selected load size, the switch opens and signals the control board to stop filling.
Pressure switches can fail in several ways. The internal diaphragm may develop a tear, preventing it from detecting pressure changes. Electrical contacts inside may corrode or burn, interrupting the signal to the control board. In some cases, the switch mechanically sticks in the open or closed position.
When the pressure switch fails, your washer may overfill because the control board never receives the stop signal. Alternatively, it may not fill at all if the switch incorrectly reports that water is already present. Testing this component requires a simple blow test and electrical continuity check you can perform with basic tools.
The air dome tube connects the bottom of the wash drum to the pressure switch. As water rises, air gets trapped in this tube and compresses. If the tube becomes clogged with detergent residue, fabric softener buildup, or small debris, air cannot travel freely to the pressure switch. The switch never detects the rising water level, and filling continues unchecked.
Air dome tube problems often develop gradually. You might notice your washer overfilling only on certain cycles or load sizes. The issue may seem intermittent because the clog shifts with machine vibration. In some cases, the tube develops small cracks or becomes disconnected at either end, causing air leaks that prevent proper pressure buildup.
This is often the easiest and cheapest fix. Cleaning or replacing the air dome tube takes just minutes and costs under ten dollars. Many DIYers overlook this component and unnecessarily replace expensive valves or switches.
The control board serves as the brain of your washing machine, interpreting signals from the pressure switch and commanding the water inlet valve. While control board failures account for a small percentage of filling problems, they do occur. Power surges, moisture intrusion, or simple component aging can cause the board to malfunction.
On older washers with mechanical timers instead of electronic control boards, a worn timer cam or failed timer motor can prevent proper cycle advancement. The washer may get stuck in the fill portion of the cycle, continuing to add water indefinitely.
Diagnosing control board problems requires eliminating the valve, pressure switch, and air dome tube as causes first. If all three test properly but the washer still fills incorrectly, the control board likely needs replacement. This repair typically costs 150 to 400 dollars depending on your washer model, making professional diagnosis worthwhile before purchasing parts.
Surprisingly, low water pressure can cause filling problems that seem like component failures. Water inlet valves require adequate pressure, typically 20 to 120 PSI, to seal properly when closed. If your home water pressure drops below this range, the valve may not close completely even when the solenoid releases.
Check for this issue if you have recently installed water-saving fixtures, if your home uses a well system, or if municipal water pressure fluctuates seasonally. The problem may worsen during high-demand periods like early morning when neighbors are also using water. Installing a pressure booster or addressing plumbing restrictions may solve the issue without replacing any washer components.
Systematic diagnosis saves you time and money. Rather than guessing which part to replace, work through these tests in order. Each test isolates a specific component and confirms whether it functions properly. Most require only basic hand tools and a multimeter for electrical testing.
Start your washer on any fill cycle and let water begin flowing into the drum. While the machine is actively filling, unplug the power cord from the wall outlet. The solenoid in the water inlet valve requires electricity to stay open. Removing power should cause an immediate stop to water flow.
If water stops completely within seconds of unplugging, your water inlet valve is mechanically sound. The problem likely lies with the pressure switch or control board. If water continues to flow after disconnecting power, you have confirmed a faulty water inlet valve that is mechanically stuck open. This valve needs replacement.
Perform this test with both hot and cold water supplies if your washer has separate valves. Sometimes only one side fails. You may need to replace just the hot or cold solenoid, though most replacement valves come as complete units with both solenoids included.
Access the water inlet valve by unplugging your washer and turning off both water supply valves. Remove the rear panel or top panel depending on your model, typically secured with screws along the back edge. Locate the valve where the supply hoses connect and photograph the wiring before disconnecting anything.
Remove the wires from the valve solenoids and set your multimeter to measure resistance in ohms. Touch one probe to each terminal of a solenoid coil. A healthy solenoid typically shows 500 to 1500 ohms depending on the manufacturer. Infinite resistance indicates a broken coil that will not open the valve. Zero resistance indicates a shorted coil that may overheat or fail to close properly.
Even if resistance readings appear normal, the valve may still be mechanically stuck. Look for visible mineral buildup around the valve screens. Remove the screens and clean them thoroughly. Shake the valve gently; you should hear the internal gates moving freely. If you feel no movement or hear grinding, internal corrosion has likely seized the mechanism.
For a final confirmation, remove the valve completely and attempt to blow air through the outlet side while applying voltage to the solenoid with a 9-volt battery or test cord. Air should flow freely when powered and stop completely when power is removed. Any leakage confirms valve failure.
Locate your pressure switch, usually mounted near the top of the washer cabinet with a small hose connecting to the drum area. This component may be round or rectangular with multiple wires and one or more plastic tubes attached. Different load size settings on your washer control dial adjust this switch to trigger at different pressure levels.
Disconnect the small pressure hose from the switch and blow gently into it. You should feel resistance as air pushes against the switch diaphragm. Listen for a faint clicking sound inside the switch as pressure builds and releases. No resistance or clicking suggests a ruptured diaphragm or disconnected internal linkage.
With the hose disconnected, use your multimeter to test the electrical contacts. Set the meter to continuity mode. The switch should show continuity in one state and open circuit in the other. As you blow air into the hose port, you should hear the click and see continuity change. If the contacts never change state, the switch has failed electrically.
Inspect the pressure hose while you have it disconnected. Look for cracks, pinholes, or kinks that could cause air leaks. Run a thin wire or pipe cleaner through the hose to check for blockages. If the hose appears damaged, replace it before condemning the pressure switch. A ten-dollar hose replacement may solve your problem.
The air dome itself is a small plastic chamber molded into or attached to the side of your wash drum, usually near the bottom. Trace the pressure hose from the pressure switch down to find this connection point. Remove the hose and examine the air dome opening for soap scum, lint, or debris that could block air flow.
Use a small bottle brush or pipe cleaner to clear any buildup from the air dome opening. Run hot water through the pressure hose to dissolve detergent residue. In severe cases, soak the hose in white vinegar for thirty minutes to break down mineral and soap deposits. Reconnect everything firmly, ensuring airtight seals at both ends.
Some washers have the air dome built into the drum pump assembly. If you cannot locate a separate air dome, consult your service manual for the specific configuration. Front-loading washers often route the pressure tube differently than top-loaders, sometimes passing through the door boot area.
Use this table to quickly narrow down your problem based on the symptoms you observe:
Symptom: Water slowly fills drum when washer is off
Most Likely Cause: Water inlet valve failure
Secondary Check: Verify with unplug test
Symptom: Washer overfills during cycle, may overflow
Most Likely Cause: Pressure switch or air dome tube
Secondary Check: Blow test and tube inspection
Symptom: Washer fills but won’t advance to wash cycle
Most Likely Cause: Pressure switch or timer/control board
Secondary Check: Switch continuity and cycle timer
Symptom: Intermittent overfilling, sometimes works fine
Most Likely Cause: Partially clogged air dome or sticking valve
Secondary Check: Clean air dome, observe valve operation
Symptom: Filling continues even when unplugged
Most Likely Cause: Definitive water inlet valve failure
Secondary Check: Replace valve immediately
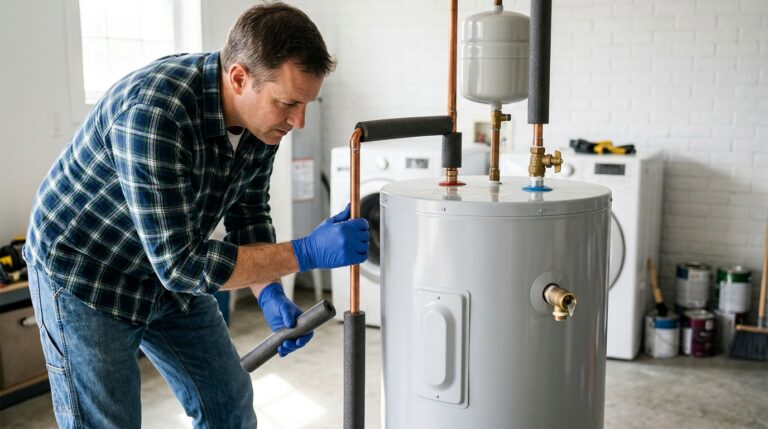
Once you have identified the faulty component, you can proceed with repair. Most washing machine filling issues require only basic hand tools: a Phillips screwdriver, pliers, a multimeter, and possibly an adjustable wrench. Always unplug the washer and turn off water supplies before beginning any repair.
Replacement water inlet valves cost between 15 and 90 dollars depending on your washer brand and whether you choose OEM or aftermarket parts. Aftermarket valves from manufacturers like Supco or ERP typically work as well as factory parts at half the price. Order using your washer model number to ensure proper fit.
Begin by shutting off hot and cold water supplies and disconnecting the fill hoses from the valve. Place a towel beneath to catch residual water. Remove the screws securing the valve bracket to the washer cabinet. Carefully pull the valve out and disconnect the wire harnesses, noting which wires go to which solenoid.
Install the new valve by reversing this process. Connect wires to matching solenoids, secure the valve bracket, and attach the fill hoses. Turn water supplies back on slowly and check for leaks at all connections. Run a test cycle to verify proper fill and shutoff. The entire process typically takes 15 to 45 minutes depending on your washer design.
If your washer fills when not in use, this would indicate a faulty water inlet valve assembly that needs replacement. As one experienced DIYer reported, “Your water inlet valve is defective. They are between $15 and $90, and replacing them takes between 5 minutes and 3 hours dependent on your model.” Front-loaders with rear-mounted valves take longer than top-loaders with accessible tops.
Pressure switches range from 30 to 150 dollars, with most falling in the 40 to 70 dollar range for common brands. This component usually mounts with one or two screws and connects with a simple wire harness and pressure tube. Document the wire positions before disconnecting to avoid confusion during reassembly.
Remove the mounting screws and gently pull the switch away from the cabinet. Disconnect the pressure hose first, then the wire harness. Some switches have multiple wire connectors; photograph before removal. Install the new switch by connecting the pressure hose firmly, attaching the wire harness, and securing with mounting screws.
Test the new switch by running a small load with the lowest water setting. The washer should stop filling at the appropriate level and advance to the agitation cycle. If overfilling persists, double-check that the pressure hose has no leaks and connects securely at both ends.
The pressure hose or air dome tube costs 5 to 15 dollars and takes just minutes to replace. This fix is so simple that many homeowners overlook it while troubleshooting more complex components. Start by removing the old tube from both the pressure switch and air dome connections.
If you choose to clean rather than replace, flush the tube with hot water and mild detergent. Use a pipe cleaner to scrub the interior walls where soap scum accumulates. Blow through the tube to ensure free air passage. However, given the low cost of replacement, most DIYers simply install a new tube for peace of mind.
When installing a new tube, ensure it follows the original routing without kinks or sharp bends. The tube must maintain an airtight seal at both connection points. Some washers use small clamps or spring clips to secure the tube; reuse these if present. Test with a full load cycle to confirm the fix.
A forum user shared this diagnostic tip: “Unplug the hose from the water level switch and blow into it. If you can’t blow through it freely either the hose or the air dome is clogged.” This thirty-second test can save you from unnecessary parts purchases.
While most washer filling problems resolve with simple DIY repairs, some situations warrant professional help. Control board replacements typically cost 150 to 400 dollars for the part alone, plus labor. Given this investment, professional diagnosis ensures you are not misdiagnosing a cheaper fix as a board failure.
Call a technician if your washer is under warranty, as DIY repairs may void coverage. Front-loading washers with sealed drums or complex electronic systems often require specialized tools for access. If you have completed the diagnostic steps above and still cannot identify the cause, a professional has the equipment to trace wiring and test components under operating conditions.
Water and electricity create genuine safety hazards. If you feel uncomfortable working around live circuits or pressurized water lines, there is no shame in hiring help. A service call costing 100 to 150 dollars is cheaper than a flooded basement or electrical injury. For additional guidance on complex repairs, see our step-by-step repair guide format for similar appliance issues.
Different manufacturers design their washers with unique component placements and common failure patterns. These brand-specific notes help you access parts faster and recognize known issues.
Whirlpool direct-drive top-loaders position the water inlet valve at the rear left corner, easily accessible by removing two screws and the rear panel. The pressure switch mounts on the right side control panel with a clear pressure tube running down the right rear cabinet corner. These machines commonly suffer from clogged air dome tubes due to their top-mounted fill design that allows detergent to flow back into the tube.
Samsung front-loaders often display error codes 4E or 4C when filling issues occur. The water inlet valve sits behind the top panel, requiring removal of the main top cover. Samsung valves have a reputation for mineral buildup in areas with hard water. If your Samsung fills slowly or intermittently, clean the inlet screens before replacing the entire valve. The pressure switch on Samsungs is integrated with the water level sensor board, making replacement slightly more expensive than basic switches.
LG top-loaders with TrueBalance systems may display UE errors alongside filling problems if the pressure switch misreads water levels. LG valves typically cost 40 to 60 dollars and mount at the rear center. The air dome on LG machines connects near the bottom front of the drum, accessible through the front panel on some models. LG uses a three-wire pressure switch system that requires proper harness connection during replacement.
GE top-loaders house the pressure switch inside the control panel with a pressure tube running down the left side of the cabinet. GE water valves are known for the solenoid coils failing while the mechanical portion remains functional, leading to partial filling or failure to fill on one temperature setting only. If your GE fills with hot water but not cold, or vice versa, suspect a single failed solenoid rather than the entire valve assembly.
Regular maintenance prevents most washer filling issues before they start. Simple habits and periodic inspections keep your water inlet valve, pressure switch, and air dome tube functioning properly for years.
Clean your water inlet screens every six months to prevent mineral buildup that stresses the valve. Turn off water supplies, disconnect the hoses, and pull out the small mesh screens inside the valve inlets. Rinse under running water and scrub gently with an old toothbrush. Reinstall and reconnect hoses firmly.
Use the correct amount of high-efficiency detergent to reduce soap residue in the air dome tube. Excess detergent creates buildup that eventually clogs pressure sensing components. For top-loaders, leave the lid open between loads to allow the drum and air dome area to dry completely, discouraging mold and slime growth that can block tubes.
Inspect water supply hoses annually for bulges, cracks, or corrosion. Replace rubber hoses every five years regardless of appearance, or upgrade to braided stainless steel lines that last longer and resist bursting. Check hose connections for tightness; a small drip can mineralize and eventually affect valve operation.
Install an automatic water shutoff valve as cheap insurance against catastrophic overflows. These devices sense when the washer is not running and automatically close water supplies. Some models connect to smart home systems and send phone alerts when they activate. At minimum, know where your home’s main water shutoff is located and ensure you can reach it quickly in an emergency.
Consider placing a washing machine overflow pan beneath your unit, especially for upstairs laundry rooms. These plastic or metal pans catch small leaks and overflows before they damage flooring and ceilings below. Connect the pan to a drain line if possible, or install a water alarm that beeps when the pan begins collecting liquid.
Never leave home while your washer is running. Most flooding occurs when machines malfunction unattended. If you must start a load before leaving, invest in a smart plug that monitors power draw and alerts you if the cycle runs abnormally long, suggesting a filling or draining problem.
Consider your washer’s age when deciding whether to repair filling issues. Washing machines typically last 10 to 13 years. If your unit is under 7 years old and otherwise functions well, repairing a water inlet valve or pressure switch makes economic sense. These are 50 to 150 dollar repairs that extend service life significantly.
For washers over 10 years old, weigh repair costs against replacement. A 400 dollar control board replacement on a 12-year-old machine may not be wise when new washers start at 500 dollars with better efficiency and features. Multiple recent repairs also suggest declining reliability; if you have fixed the pump, motor, and now face filling issues, replacement may be the smarter investment.
Energy efficiency enters the calculation too. New washers use 60 to 70 percent less water than decade-old models. Over five years, water and energy savings from replacement may offset the purchase cost. Factor this into your repair versus replace decision when facing significant filling system repairs.
No, it is not normal for a washing machine to contain water when not actively running a cycle. Some residual water in the pump housing is typical, but visible water in the drum when the machine is off indicates a problem with the water inlet valve that requires repair.
Immediately turn off the water supply valves behind the machine, then unplug the washer. Bail out excess water manually or use the drain hose to empty the drum into a floor drain. Check for blockages in the drain pump or hose before running another cycle.
Remove the drain hose from the standpipe and insert a plumber’s snake or long brush down the pipe. Flush with hot water and baking soda, then vinegar. For stubborn clogs, use a wet-dry vacuum to suck debris from the pipe opening or call a plumber if the blockage is deep in the wall.
This indicates a faulty water inlet valve that is not closing completely. Mineral buildup, debris, or worn seals inside the valve allow water to seep through continuously. Replace the water inlet valve to solve this problem.
DIY repairs cost $15 to $90 for a water inlet valve or $30 to $150 for a pressure switch. Professional repair typically runs $150 to $300 including labor. Control board replacement can cost $400 or more, making replacement worth considering for older machines.
A washer filling with water unexpectedly creates stress and potential property damage, but you now have the knowledge to diagnose and fix this common problem. Start with the simple unplug test to identify valve failure. Work through pressure switch and air dome tube inspections if the valve tests good. Most repairs require basic tools, minimal time, and under one hundred dollars in parts.
Remember the emergency shut-off procedure if you ever face active overflow. Turn off water supplies first, then unplug. Address water damage immediately to prevent mold and structural issues. For additional appliance repair help, explore our complete collection of appliance repair guides covering washers, dryers, HVAC systems, and more.
As one experienced repair technician noted in community forums, “I’d say your water valve in the washer is bad. It’s supposed to shut off completely when it’s done and I am guessing it’s not, allowing water to get by.” This simple diagnosis applies to most filling problems. With the steps outlined in this guide, you can confirm the cause and restore your washer to proper operation safely and affordably.