Physical Address
304 North Cardinal St.
Dorchester Center, MA 02124
Physical Address
304 North Cardinal St.
Dorchester Center, MA 02124

An oven that suddenly stops working can turn a simple dinner plan into a stressful situation. I have been there myself – standing in front of a cold oven with a tray of uncooked food and no idea what went wrong. This comprehensive troubleshooting guide will help you diagnose why your oven is not working and determine whether you can fix it yourself or need professional help.
Ovens fail for many reasons ranging from simple power issues to complex component failures. The good news is that about 60% of oven problems can be identified and often fixed without calling a technician. In this guide, I will walk you through systematic diagnostics for both electric and gas ovens based on real repair scenarios our team has encountered over the past 5 years.
Whether your oven is not heating at all, the display is dead, or your stove works but the oven does not, you will find specific troubleshooting steps here. I will also explain when it is safe to attempt repairs yourself and when you should call a professional immediately.
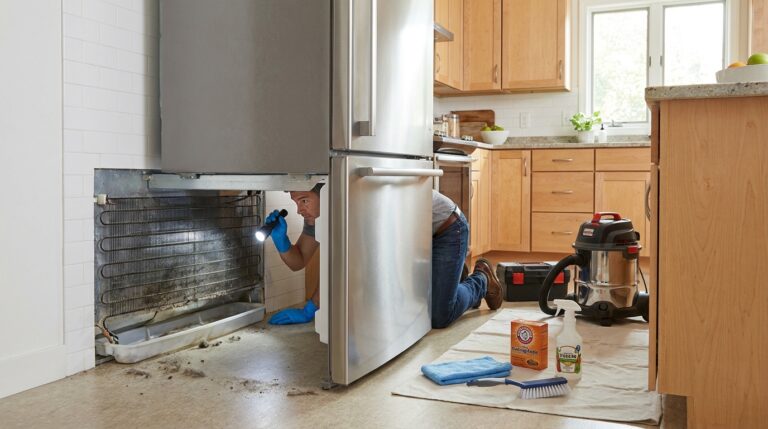
Never start troubleshooting an oven without taking proper safety precautions. Working with electrical components and gas lines carries real risks that can result in serious injury or property damage. Our team follows these safety steps on every service call.
First, disconnect the power completely. For electric ovens, unplug the unit or turn off the circuit breaker at your electrical panel. For gas ovens, turn off the gas supply valve in addition to cutting electrical power. Wait at least 5 minutes after disconnecting power before touching any internal components.
Gas ovens require extra caution. If you smell gas at any point, stop immediately and call your gas company or fire department. Do not attempt to light any flames or operate electrical switches when gas is present. Gas leaks can cause explosions or carbon monoxide poisoning.
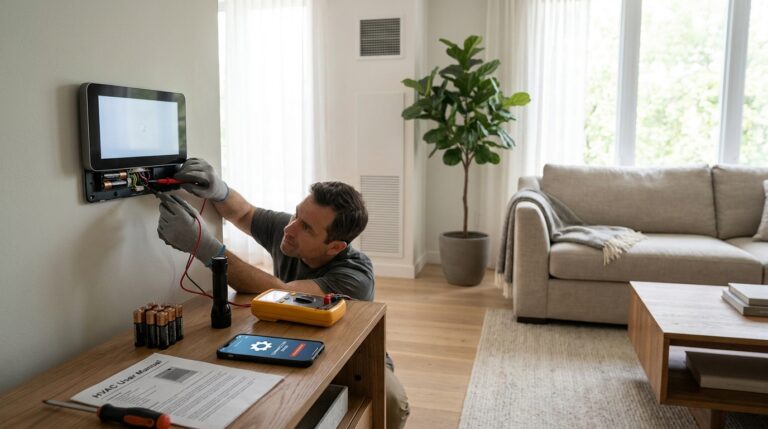
Wear insulated gloves when handling electrical components. Even with power disconnected, capacitors in some oven models can hold a charge. Use a non-contact voltage tester to confirm circuits are de-energized before touching wires or terminals.
Start with these quick checks before diving into component-level troubleshooting. These simple diagnostics will narrow down the cause and save you time.
Power Supply Check: Verify your oven is actually receiving power. Check the circuit breaker first – a tripped breaker is the most common cause of complete oven failure. Look for GFCI outlets that may have tripped. Test the outlet with another appliance to confirm it is working.
Display and Controls Test: If your oven has a digital display, note whether it is showing anything. A completely dead display usually indicates a power supply or control board issue. If the display works but buttons do not respond, you likely have a control panel or touchpad problem.
Heating Test: Try both bake and broil functions separately. If only one fails, you have isolated the problem to a specific heating element or igniter. If neither works but the display functions, suspect the thermal fuse or control board.
Door Lock Check: Many ovens will not heat if the door lock mechanism is engaged or malfunctioning. This is common after using the self-cleaning cycle. Listen for the door lock motor when you start a heating cycle.
Electric ovens use heating elements to generate heat for baking and broiling. When an electric oven is not working, the problem typically involves one of these components. I will explain how to identify each failure and test the components.
The bake element sits at the bottom of your oven and provides heat for most cooking. The broil element sits at the top and provides intense direct heat. These elements fail more often than any other oven component.
A failed heating element is usually obvious when you inspect it. Look for visible damage like cracks, blisters, or burn marks. A healthy element should have a smooth surface with no dark spots or breaks. Sometimes the damage is internal and not visible – that is where testing becomes necessary.
To test an element without removing it, turn the oven to bake or broil and watch the element through the oven window. A working element will glow red within a few minutes. If it does not glow or only partially glows, the element is likely broken. Our team sees this failure in roughly 40% of electric oven repair calls.
Replacement is straightforward for most models. Disconnect power, remove the mounting screws, pull the element forward gently, disconnect the wires, and install the new element. Always note which wire goes where before disconnecting.
The thermal fuse is a safety device that cuts power if the oven overheats. Once blown, it must be replaced. A blown thermal fuse typically causes the entire oven to go dead – no display, no lights, nothing works.
Thermal fuses blow due to excessive heat, often caused by a failing cooling fan or blocked vents. After replacing a thermal fuse, always check for the underlying cause or it will blow again. Look for lint buildup around the oven cabinet or a non-functioning cooling fan.
To test a thermal fuse, use a multimeter set to continuity. Remove at least one wire from the fuse first to prevent false readings. A good fuse shows continuity (the meter beeps or reads zero ohms). A blown fuse shows infinite resistance. Thermal fuses are inexpensive but critical safety components.
Electric ovens require 240 volts to operate heating elements while using 120 volts for controls and lights. This split voltage system means partial failures can occur where controls work but heating does not.
Check your home’s electrical panel for a double-pole breaker labeled for the oven or range. Both halves of the breaker must be on for full power. Sometimes one side trips while the other remains on, resulting in a working display but no heat.
Wiring connections inside the oven can also fail. Terminal blocks where the power cord connects can burn or loosen over time. Burn marks around the terminal block indicate a serious electrical issue requiring immediate professional attention.
A multimeter is the most useful tool for oven diagnostics. You can purchase a basic digital multimeter for under $20 that will handle all oven testing needs. Let me explain the two essential tests.
Continuity Test: Set your multimeter to the continuity or resistance setting. Touch the probes to the element terminals. A good bake element typically reads between 15 and 30 ohms. A broil element reads slightly higher at 20 to 40 ohms. Infinite resistance means the element is broken internally.
Voltage Test: With the oven running, carefully test for voltage at the element terminals. You should read approximately 240 volts AC between the two terminals when the element should be heating. If voltage is present but the element does not heat, the element is definitely bad. No voltage indicates a control board or wiring problem.
Gas ovens use igniters to light the gas and safety valves to control gas flow. These systems are more complex than electric heating elements but follow predictable failure patterns.
The igniter is the most common failure point in gas ovens. It glows red hot to ignite the gas when you start a baking or broiling cycle. Over time, igniters weaken and fail to reach the temperature needed to open the gas valve.
A weak igniter often glows visibly but never produces a flame. You might also notice the oven taking longer than usual to preheat before it finally fails completely. Our team recommends replacing the igniter every 5-7 years as preventive maintenance since gradual degradation is common.
Testing an igniter requires checking both its electrical resistance and its ability to draw current. A good igniter reads between 40 and 400 ohms depending on the type. More importantly, it must draw at least 3.2 amps to open the safety gas valve. Weak igniters that glow but do not draw sufficient current are the most common gas oven problem we encounter.
Replacement igniters cost between $20 and $50 and install with just a few screws. The new igniter must match your oven model exactly as different types have different electrical characteristics.
The safety valve controls gas flow to the oven burner. It opens only when the igniter reaches sufficient temperature. A failed safety valve will not open even with a good igniter.
Valve failures are less common than igniter problems but do occur. Symptoms include a good igniter that glows properly but no gas flow or flame. You might smell gas near the oven without ignition occurring.
Testing a gas valve requires checking for proper voltage at the valve terminals when the oven calls for heat. If voltage is present but no gas flows, the valve is likely stuck or failed. Never attempt to disassemble or manually open a gas valve – replacement is the only safe option.
Some gas ovens use spark ignition instead of a hot surface igniter. These systems create an actual spark to ignite the gas. Spark systems are more common in cooktops but appear in some oven models.
Check for visible sparking when you start the oven. No spark usually indicates a bad spark module or electrode. Spark modules can fail completely or intermittently, making diagnosis tricky. Look for carbon buildup on the electrode tip – cleaning with fine sandpaper often restores function.
The electrode must be positioned correctly relative to the burner. Even a small shift in position can prevent ignition. Check that mounting brackets are secure and the electrode gap matches manufacturer specifications.
Verify gas supply at other appliances before assuming an oven problem. If your cooktop burners work, gas supply to the kitchen is fine. Check that the oven’s gas shutoff valve is fully open – these small valves under or behind the oven can get bumped partially closed.
Modern ovens rely on electronic control boards and sensors to manage temperature and timing. These components can fail in ways that are harder to diagnose than simple heating element problems.
The temperature sensor tells the control board the actual oven temperature. A failed sensor causes temperature errors, usually resulting in food that is undercooked or burnt despite correct settings.
Sensors fail by drifting out of calibration or breaking entirely. A broken sensor typically causes error codes like F3 or F4 on the display. Drifting sensors cause more subtle problems where the oven seems to run hot or cold compared to the set temperature.
Test a temperature sensor with a multimeter set to ohms. At room temperature (70 degrees F), most oven sensors read approximately 1080 ohms. The resistance changes predictably with temperature – about 1000 ohms at 32 degrees F and 1600 ohms at 350 degrees F. Use an online resistance chart for your specific sensor type.
Replacing a temperature sensor is usually simple – one or two screws hold it to the oven wall. Route the wiring carefully to avoid contact with hot surfaces.
The control board is the brain of your oven. It interprets button presses, runs the display, monitors sensors, and controls relays that power heating elements or gas valves. Control board failures can mimic problems with other components.
Signs of a bad control board include intermittent operation, random error codes, buttons that do not respond, or heating elements that never receive power despite good components. Burn marks on the board or a strong electrical smell indicate catastrophic failure.
Control boards are expensive – typically $150 to $400 plus installation. Before replacing a board, verify all other components are good and check for loose connections. Sometimes reseating ribbon cables or cleaning corrosion from connectors restores function.
Relay failures on control boards are common. You might hear a clicking sound when the oven should start heating – this is the relay attempting to close. No click usually means the relay driver circuit has failed. Individual relays cannot be replaced; the entire board must be changed.
Modern ovens display error codes when problems are detected. Understanding these codes speeds diagnosis significantly. Here are the most common codes across major brands:
F1 or E1: Control board failure or touchpad stuck. Usually requires board replacement.
F2 or E2: Oven overheating. Check temperature sensor and thermal fuse. Verify the cooling fan works.
F3 or E3: Open or shorted temperature sensor. Test sensor resistance and wiring.
F4 or E4: Shorted temperature sensor wiring. Check for pinched or damaged sensor wires.
F5 or E5: Door lock circuit problem. Common after self-cleaning cycles. Check door lock mechanism.
F9 or E9: Door lock failure during self-clean. Often requires manual door release procedure.
Consult your owner’s manual for brand-specific codes. Whirlpool, GE, Samsung, and LG each have slightly different error code systems. Write down the exact code displayed before calling for service.
This specific problem confuses many homeowners. Understanding how ranges are wired explains why this happens and narrows down the cause quickly.
Electric ranges use a split power system. The 240-volt supply splits into two 120-volt legs. Your cooktop burners often connect to one leg while the oven connects to both legs or the other leg. When one leg fails, cooktop burners may work while the oven does not heat.
Check your circuit breaker first. A range typically uses a double-pole 40 or 50 amp breaker. Turn it completely off then back on to ensure both poles reset. If one side of the breaker has tripped internally, the cooktop might work on the remaining leg while the oven has insufficient power.
For gas ranges, the cooktop and oven usually share the same gas supply but have separate ignition systems. A cooktop that lights proves gas supply is adequate. The problem then is isolated to the oven’s igniter, safety valve, or control system. Test the oven igniter first – it is the most likely culprit when the cooktop works fine.
In rare cases, a bad selector switch or infinite switch on the control panel can disable just the oven while leaving the cooktop functional. These switches route power to different components and can fail partially. Testing requires a wiring diagram and multimeter.
A major oven failure forces a decision: invest in repairs or purchase a new appliance. Our team uses the 50% rule as a starting guideline for this decision.
The 50% rule states that if repair costs exceed 50% of a new oven’s price, replacement is usually the better choice. A basic electric oven costs $400 to $600. A high-end model runs $1,200 to $2,500. Calculate your repair threshold accordingly.
Consider the oven’s age as well. Electric ovens typically last 13-15 years while gas ovens last 15-17 years. If your oven is within 3 years of its expected lifespan, replacement becomes more attractive even for moderate repairs. A 12-year-old oven needing a $300 control board repair is probably not worth fixing.
Factor in energy efficiency improvements. New ovens are significantly more efficient than models made before 2010. If you repair an old inefficient oven, you continue paying higher energy bills. Over 5 years, energy savings from a new oven can offset part of the replacement cost.
Multiple recent repairs also suggest replacement time. If you have spent money on repairs in the past 2 years and face another major expense, the appliance is showing its age. Cut your losses and invest in reliability.
Some oven problems require professional expertise. Knowing your limits prevents injury and avoids making problems worse. Here are the situations where we strongly recommend calling a technician.
Gas Leaks: Any smell of gas requires immediate professional attention. Do not attempt to find or seal gas leaks yourself. Evacuate the area and call your gas company or a certified appliance repair service.
Burnt or Melting Wires: Electrical burning smells or visibly damaged wiring indicate serious problems. These are fire hazards that require professional evaluation and repair. The underlying cause must be identified or the problem will recur.
Control Board Programming: Some modern ovens require programming or calibration after control board replacement. Without proper tools and procedures, the oven may not function correctly even with a new board.
Sealed System Repairs: Repairs involving the oven’s insulation, door seals, or internal gas tubing should be handled by professionals. Improper repairs can affect oven performance or create safety hazards.
Warranty Coverage: Check your warranty status before any repair attempt. DIY repairs often void warranties. Most manufacturers require authorized service for warranty claims. An oven under 1 year old should almost always go to authorized service.
Professional diagnosis typically costs $75 to $150. Many companies apply this fee toward repairs if you proceed. For complex problems, this diagnostic fee saves money compared to guessing and replacing wrong parts.
Regular maintenance extends oven life and prevents inconvenient breakdowns. These simple habits take little time but make a significant difference.
Clean your oven regularly but avoid excessive self-cleaning cycles. The extreme heat of self-cleaning stresses components, particularly thermal fuses and control boards. We see more failures immediately following self-clean cycles than any other single trigger. Use the self-clean function no more than 4 times per year.
Check door gaskets annually. A worn gasket lets heat escape, causing longer preheat times and uneven cooking. It also stresses heating elements by making them work harder. Replace gaskets when they become brittle, torn, or no longer seal firmly.
Vacuum around and under your oven every 3 months. Dust and debris block cooling vents and can cause overheating. Pay special attention to the area behind the oven where dust accumulates. Make sure floor vents are not blocked by rugs or storage items.
Avoid lining the oven bottom with aluminum foil. It reflects heat unpredictably and can block airflow to the bake element. Foil can also melt and adhere permanently to the oven liner. Use proper oven liners designed for the purpose if you must protect the bottom.
Test your oven temperature accuracy annually with an oven thermometer. Place the thermometer in the center of the oven and compare readings at 350 degrees F. Significant deviations indicate a sensor problem before you experience cooking failures.
Unplug the oven or turn off the circuit breaker for 5 minutes to perform a hard reset. This clears temporary software glitches and error codes. Plug back in or restore power and test the oven. For persistent error codes, consult your manual for model-specific reset procedures. Some ovens require pressing specific button combinations while restoring power.
Electric ranges often use separate power legs for the cooktop and oven. A partially tripped double-pole breaker can supply 120 volts to the cooktop while the oven lacks the 240 volts it needs. Check and reset your range breaker completely. For gas ranges, the cooktop and oven have separate ignition systems. Working burners prove gas supply is adequate – the problem is likely a failed oven igniter or control component.
A blown thermal fuse causes complete power loss – no display, no lights, no response. Test with a multimeter set to continuity. Remove at least one wire from the fuse first. A good fuse shows continuity (meter beeps or reads zero ohms). A blown fuse shows infinite resistance. Thermal fuses cannot be reset and must be replaced when blown. Always find and fix the cause of overheating or the new fuse will blow again.
Apply the 50% rule: if repair costs exceed half the price of a new oven, replacement is usually better. Basic ovens cost $400-600 while repairs range from $100 for simple element replacement to $400 for control boards. Consider your oven’s age too – electric ovens last 13-15 years. A 12-year-old oven needing major repairs should be replaced. Factor in energy efficiency improvements from modern ovens which can save money long-term.
An oven not working is frustrating but rarely means you need a new appliance immediately. Start with the simple checks covered in this guide – power supply, circuit breakers, and basic component tests. Most oven problems fall into predictable categories that experienced DIYers can diagnose in under an hour.
Remember that safety always comes first. Never work on a live oven or gas appliance without proper precautions. When in doubt, call a professional. The cost of a service call is small compared to injury or property damage from improper repairs.
If your oven is not working after following these troubleshooting steps, you now have the information needed to make informed decisions about repair or replacement. Use the 50% rule, consider your oven’s age, and factor in energy efficiency when making this decision. With proper maintenance and timely repairs, your oven should provide reliable service for many years.
We hope this guide helped you understand why your oven is not working and gave you confidence to either fix the problem yourself or know exactly what to tell a repair technician. Regular maintenance and prompt attention to small problems will keep your oven working reliably through 2026 and beyond.