Physical Address
304 North Cardinal St.
Dorchester Center, MA 02124
Physical Address
304 North Cardinal St.
Dorchester Center, MA 02124

Learning how to lift water heater tanks safely can save you hundreds of dollars on installation costs while protecting your back from serious injury. Whether you are replacing an old unit, moving one to a new location, or elevating it to meet code requirements, understanding the proper techniques makes all the difference between a successful project and a trip to the emergency room. In this guide, I will walk you through everything our team has learned from years of home improvement projects, including weight calculations, essential tools, step-by-step lifting methods, and critical safety precautions you cannot afford to skip.
Before you attempt to lift any water heater, you need to understand that these appliances are deceptively heavy and awkward to handle. A typical 50-gallon tank weighs over 500 pounds when full, and even empty tanks can tip the scales at 150 pounds or more. The cylindrical shape creates a high center of gravity that makes tipping a constant risk, which is why professional plumbers use specialized equipment rather than brute force.
This article covers the complete process from preparation through execution. You will learn why you might need to lift a water heater in the first place, how much different tank sizes actually weigh, what tools make the job manageable, and when it is smarter to call a professional. By the end, you will have the confidence and knowledge to decide whether this is a DIY project for you or one best left to the experts.
Homeowners find themselves needing to lift or raise water heaters for several common reasons. Understanding your specific situation helps determine the best approach and whether you need additional equipment or professional assistance.
One of the most common reasons to lift a water heater is to meet building code requirements for elevation. In many jurisdictions, water heaters installed in garages must be raised at least 18 inches off the floor. This requirement exists to prevent ignition of flammable vapors that might pool near the ground from sources like gasoline, paint thinners, or other chemicals commonly stored in garages.
The 18-inch rule applies specifically to gas water heaters with ignition sources less than that height above the floor. Electric water heaters generally do not have this requirement since they lack open flames, but some local codes still mandate elevation for all water heater types. Always check with your local building department to confirm the specific requirements in your area before beginning installation.
If your home is located in a flood-prone area, elevating your water heater could be a legal requirement rather than just a good idea. The Federal Emergency Management Agency (FEMA) and local floodplain management regulations often require that mechanical equipment, including water heaters, be elevated above the base flood elevation level for your property.
Flood water can completely destroy a water heater in minutes, leaving you without hot water for days or weeks after the waters recede. Even if not required by code, raising your water heater onto a sturdy platform can protect your investment and ensure you have hot water when you need it most after a flood event. The small cost of proper elevation pales in comparison to replacing a flooded unit and dealing with water damage cleanup.
Any water heater replacement requires lifting the old unit out and the new unit into position. This might sound straightforward until you realize the old tank is still partially full of water even after draining, and sediment buildup adds unexpected weight. Many DIYers underestimate this challenge and find themselves stuck mid-project with a tank they cannot safely move.
Relocation projects, such as moving a water heater from a garage into a dedicated utility closet or vice versa, require lifting the tank multiple times during the process. Understanding proper lifting techniques becomes even more critical when you are navigating tight spaces, stairs, or corners where a dropped tank could cause serious damage to your home or yourself.
Before attempting to lift any water heater, you must understand exactly how much weight you are dealing with. Underestimating tank weight is the leading cause of lifting injuries and damaged flooring.
Water heaters come in several standard sizes, and each has dramatically different weight characteristics depending on whether the tank is empty or full. Here is what you can expect from common residential sizes:
A 40-gallon water heater typically weighs between 110 and 130 pounds when empty. When full, that same tank balloons to approximately 450 to 470 pounds because water weighs 8.34 pounds per gallon. This is the size most commonly found in apartments and small homes with one to two bathrooms.
A 50-gallon water heater, the standard size for most family homes with three to four people, weighs between 130 and 160 pounds empty. Fill it with water and you are suddenly handling 550 to 580 pounds of weight. This size represents the upper limit of what most homeowners should attempt to lift without professional help or specialized equipment.
An 80-gallon water heater, common in larger homes or those with multiple bathrooms, weighs 160 to 200 pounds empty and exceeds 800 pounds when full. Moving an 80-gallon unit by yourself is not just difficult, it is dangerous. The weight combined with the awkward cylindrical shape creates a serious tipping hazard that can cause back injuries or worse.
Water heaters present unique lifting challenges because of how their weight is distributed. Unlike a box where weight is spread across a flat base, a water heater concentrates most of its mass in a relatively small cylindrical footprint with a high center of gravity. This makes the tank want to tip over with any sideways force.
When you lift a water heater, you are not just fighting the total weight. You are constantly working to keep it balanced. The smooth metal exterior offers no gripping points, and the rounded sides make it difficult to get a secure hold. This is why professionals almost never attempt to lift water heaters by hand alone, even when the weight seems manageable on paper.
Proper preparation separates successful water heater lifting projects from disasters. Skipping these steps leads to water damage, gas leaks, electrical hazards, and injuries.
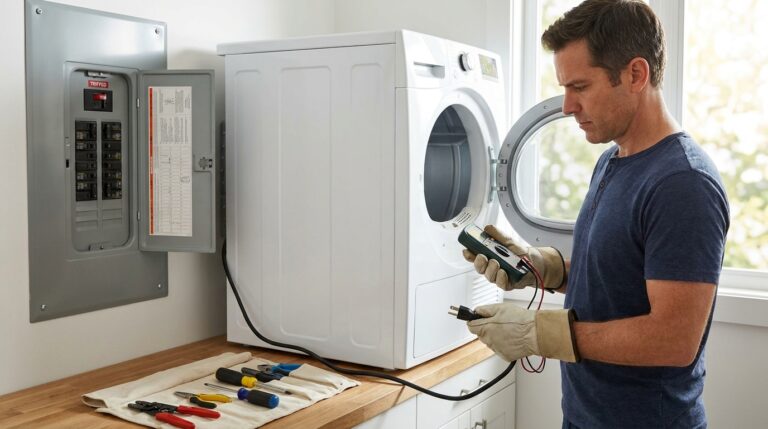
For electric water heaters, start by turning off the circuit breaker that supplies power to the unit. Never attempt to move a water heater while it is connected to live electrical power. Once the breaker is off, verify the power is disconnected by testing the heating element connections with a non-contact voltage tester. Understanding electrical breaker requirements for water heaters helps ensure your electrical system is properly configured for safe operation.
For gas water heaters, turn the gas control valve to the OFF position and shut off the gas supply at the valve located on the gas line near the tank. If you smell gas at any point, stop immediately and call your gas company or a licensed plumber. Gas leaks are not something to troubleshoot yourself.
Close the cold water supply valve located at the top of the water heater. This valve typically has a round or oval handle that you turn clockwise to close. Once the supply is off, open a hot water faucet somewhere in your home to relieve pressure in the tank and allow air to enter as water drains out.
Disconnect the cold water inlet pipe and hot water outlet pipe from the top of the tank using appropriate wrenches. You may need to cut pipes if they are soldered copper connections, in which case you should plan for pipe replacement during reinstallation. Have a bucket ready to catch any water that drains from the disconnected pipes.
Connect a garden hose to the drain valve located near the bottom of the tank. Run the other end of the hose to a floor drain or outside where water can safely discharge. Open the drain valve by turning the handle counterclockwise or lifting the lever, depending on the valve type.
Be patient during this step. A full 50-gallon tank can take 30 to 45 minutes to drain completely, and the water flow will slow to a trickle as the tank empties. Opening the temperature pressure relief (TPR) valve at the top of the tank allows air to enter and helps the water drain faster. This valve is the lever with a pipe running down the side of the tank.
Older water heaters often have significant sediment buildup in the bottom of the tank. This sediment adds unexpected weight and can clog your drain valve during emptying. If water stops flowing from the drain hose but the tank still feels heavy, sediment is likely blocking the valve. You may need to use a wet/dry vacuum to remove sediment through the top opening or contact a professional.
Once draining is complete, close all valves and remove any remaining hoses. Take photos of your plumbing and electrical connections before disassembly to serve as reference during reinstallation. Clear a path from the water heater to the exit point, removing any obstacles that could cause you to trip while carrying or moving the tank.
Having the right tools transforms an impossible job into a manageable one. Professional plumbers rely on specialized equipment rather than muscle power, and you should too.
An appliance dolly or hand truck rated for at least 500 pounds is essential for moving any water heater safely. Look for models with large pneumatic tires that can handle the weight and navigate uneven surfaces like gravel or thresholds. The best appliance dollies for water heaters have straps or a mechanism to secure the tank to the frame.
Strap systems keep the tank from tipping backward during transport, which is the most common cause of accidents when using a dolly. Models specifically designed for water heaters, like the ones mentioned in professional forums, feature curved backs that match the cylindrical shape of the tank and distribute weight evenly.
Heavy-duty lifting straps allow you to secure the tank and create handles where none exist. Ratchet straps rated for at least 1,000 pounds working load are ideal for wrapping around the tank and cinching tight. Once secured, these straps provide gripping points that make it much easier to control the tank during lifting and moving.
Some DIYers report success using a simple belt or strap wrapped around the tank and pulled into their body to maintain close control during lifting. This technique works best for empty tanks under 150 pounds and should not be attempted with larger units or by individuals with any back concerns.
For heavier tanks or installations requiring elevation onto stands, hydraulic equipment provides mechanical advantage that makes the job safer. Hydraulic table carts allow you to roll the tank into position, then raise it to the exact height needed for placement onto a stand or drain pan.
Floor jacks with a wide, stable base can also be used to lift water heaters, though you need a secure platform on top of the jack to prevent the tank from slipping. Some professionals use a combination of a hydraulic jack for elevation and straps or dollies for positioning. The key is never relying on brute strength alone.
Furniture sliders placed under the tank bottom allow you to slide a water heater across smooth floors without lifting, which is useful for small adjustments in position. A helper is arguably the most important tool for any water heater move, providing an extra set of hands, eyes, and judgment calls when navigating obstacles.
Protective equipment including work gloves with good grip, steel-toed boots, and back support belts add safety margins to your project. Keep a helper nearby even if you think you can handle the weight alone. A second person can spot tipping hazards, help navigate corners, and call for help if something goes wrong.
With preparation complete and tools ready, it is time to execute the lift. Choose the method that matches your tank size, available equipment, and physical capabilities.
This method works best for empty 40-gallon tanks weighing under 150 pounds. Start by tilting the tank slightly and sliding the lip of your appliance dolly underneath the bottom edge. Use the strap system to secure the tank to the dolly frame, ensuring the tank cannot tip backward during transport.
Tip the dolly back slowly, letting the tank rest against the frame while keeping the weight balanced over the wheels. Move carefully, watching for thresholds, uneven surfaces, or low ceilings. When you reach the destination, lower the dolly forward gently and slide the tank off onto its new location or stand.
Two people can safely move most empty residential water heaters using proper lifting techniques. Wrap ratchet straps around the tank to create handles, or use the metal flanges at the top where pipes connect as gripping points. Both lifters should bend at the knees, keep their backs straight, and lift simultaneously on a coordinated count.
Carry the tank close to your body with one person at the top and one at the bottom to distribute weight and maintain balance. Communicate constantly about obstacles, steps, or adjustments needed. Set the tank down gently before anyone releases their grip to prevent sudden shifts in weight.
When installing a water heater onto a stand or drain pan, a hydraulic table cart provides controlled elevation that is impossible to achieve manually. Position the empty tank on the cart platform and roll it into position over the stand. Use the hydraulic foot pump to raise the platform until the tank bottom clears the stand height.
Carefully slide the tank off the platform onto the stand, or have helpers guide it into position as you lower the platform. This method is the safest way to achieve the 18-inch elevation required for garage installations and is the technique most professional plumbers prefer when working alone.
For tight spaces where equipment cannot fit, some professionals use a gradual elevation technique with wooden blocks. Tilt the tank slightly and slide a 2×4 board under the raised edge. Lower the tank onto the block, then tilt it the opposite direction and add another board.
Continue this process, alternating sides and gradually building up the height until the tank reaches the desired elevation. While slower than other methods, this technique requires minimal equipment and works in spaces where dollies or carts cannot maneuver. Always use sturdy lumber rated to handle the weight without cracking or splitting.
Safety must remain your top priority throughout any water heater lifting project. A moment of carelessness can result in permanent back injury or significant property damage.
Water heaters are exactly the wrong shape and weight for safe manual lifting. The combination of heavy weight, awkward shape, and high center of gravity creates perfect conditions for back strain or herniated discs. Never attempt to lift a full or partially full tank by hand under any circumstances.
Even empty tanks should only be lifted using proper technique: bend at the knees, keep your back straight, hold the load close to your body, and avoid twisting while carrying. If you have any history of back problems, do not attempt to lift water heaters yourself. The money saved on DIY installation is not worth months of physical therapy or surgery.
Know the exact weight of your tank before attempting any lift. A 50-gallon tank full of water weighs over 550 pounds, which exceeds the safe lifting capacity of most individuals regardless of fitness level. Equipment ratings are equally important. Never exceed the weight capacity of dollies, straps, or jacks, and remember that capacities are often listed as maximum limits under ideal conditions.
Factor in safety margins by ensuring your equipment is rated for at least 50 percent more than the actual weight you are moving. A 500-pound rated dolly is appropriate for a 300-pound tank, not a 500-pound tank. This buffer accounts for dynamic forces that occur during movement, tipping, and transitions between surfaces.
The cylindrical shape of water heaters makes them inherently unstable during transport. A tank that tips over can crush feet, damage flooring, or rupture internal components that lead to leaks. Always secure tanks to dollies using straps, and maintain a firm grip when hand carrying.
Watch for slippery surfaces, especially if any water drained from the tank onto the floor. Even small amounts of water create slip hazards when carrying heavy loads. Clean up spills immediately and wear shoes with non-slip soles rated for work environments.
Knowing when to hire a professional is just as important as knowing how to do the job yourself. Some situations demand expert help for safety, code compliance, or practical reasons.
Call a licensed plumber if you are dealing with an 80-gallon or larger tank, need to navigate stairs, or have any physical limitations that could affect your lifting ability. Professionals also should handle any installation requiring modification of gas lines, significant electrical work, or complex plumbing reconfiguration.
Flood zone elevation projects often require permits and inspections that professionals can navigate more efficiently than homeowners. If your local code requires seismic strapping, expansion tanks, or other safety features, professional installation ensures compliance and protects your warranty coverage.
A professional water heater installation typically costs between $800 and $1,500 depending on your location and installation complexity. DIY installation requires purchasing or renting equipment: appliance dollies cost $100 to $300, hydraulic carts run $200 to $500, and lifting straps are $20 to $50.
However, factor in the value of your time, the risk of injury, and potential costs from mistakes like water damage or code violations. For most homeowners, attempting to move tanks over 50 gallons or requiring elevation onto stands makes more sense to hire professionals who have the right tools and experience. If you are simply sliding an empty 40-gallon tank across a garage floor to a new position, DIY might be reasonable.
Be honest about your physical capabilities and experience level. If you have never lifted heavy objects using proper technique, a water heater is not the place to start. Plumbing skills also matter. Disconnecting and reconnecting water, gas, and electrical lines requires knowledge of codes, proper materials, and safety procedures.
Many homeowners successfully handle the draining and preparation steps themselves, then hire professionals just for the lifting and reconnection phases. This hybrid approach saves money while keeping you safe from the riskiest parts of the job.
A 40 gallon water heater weighs approximately 110 to 130 pounds when empty and 450 to 470 pounds when full of water. The weight difference is dramatic because water weighs 8.34 pounds per gallon, adding over 330 pounds to the tank when filled.
Yes, you can raise a water heater using proper equipment and techniques. Most homeowners use appliance dollies, lifting straps, or hydraulic carts to safely elevate tanks onto stands or platforms. The 18-inch elevation requirement for garage installations is common in building codes to prevent ignition of flammable vapors.
A 100 gallon commercial water heater weighs approximately 200 to 250 pounds empty and over 1,000 pounds when full. Due to extreme weight, 100 gallon tanks should never be moved by homeowners without professional equipment and multiple trained installers.
An empty 50-gallon hot water heater typically weighs between 130 and 160 pounds depending on the manufacturer and whether it is gas or electric. Gas models tend to weigh slightly more due to the burner assembly and venting components.
Water heaters in flood hazard areas must typically be elevated above the base flood elevation level determined by FEMA and local floodplain management regulations. Many areas require elevation on platforms or stands that place the tank above potential flood water levels to prevent damage and contamination.
California regulations focus on energy efficiency standards and seismic strapping requirements. New installations require proper bracing to prevent tanks from tipping during earthquakes, and energy efficiency standards affect which models can be sold in the state. Check current local codes as requirements can vary by jurisdiction.
Learning how to lift water heater tanks safely requires understanding the weight involved, having proper equipment, and knowing your personal limits. A 40-gallon tank might seem manageable at 130 pounds empty, but add water or poor lifting technique and you have a recipe for injury. Larger tanks over 50 gallons demand professional equipment or professional help in most cases.
The key takeaways from this guide are simple but critical. Always drain the tank completely before attempting any lift. Use proper equipment like appliance dollies or lifting straps rather than relying on brute force. Follow safety procedures for electrical and gas disconnection before moving the unit. And most importantly, know when to call a professional rather than risking your health or safety.
If you are planning a water heater replacement or elevation project in 2026, start by assessing your specific situation. Check local codes for elevation requirements, calculate the actual weight you will be handling, and honestly evaluate whether you have the tools and physical capability to complete the job safely. When in doubt, hire a professional. The cost of installation is always less than emergency medical bills or the long-term consequences of a back injury.
For more information about water heater selection and maintenance, visit our water heater reviews and buying guide. Understanding how water heaters work can also help you make informed decisions about repairs versus replacement and what features matter most for your home.