Physical Address
304 North Cardinal St.
Dorchester Center, MA 02124
Physical Address
304 North Cardinal St.
Dorchester Center, MA 02124

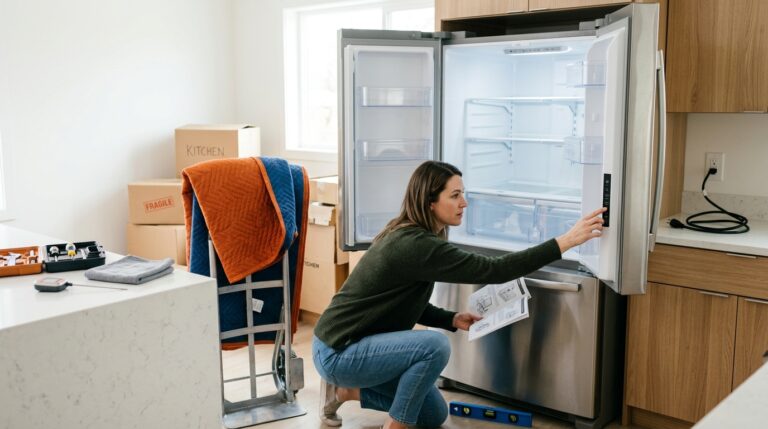
You waited 30 minutes, listening to the motor hum. You lifted the lid with anticipation. And there it was: soup. Liquid, warm, definitely-not-ice-cream soup staring back at you. If your ice cream maker is not freezing, I completely understand your frustration. I have been there more times than I care to admit.
The good news? In almost every case, your machine is not broken. The issue usually comes down to three things: the freezer bowl is not cold enough, your ice cream base is too warm, or your recipe has ingredient ratios that prevent freezing. I have spent months testing different machines, troubleshooting failed batches, and talking to home ice cream makers to figure out exactly what works and what does not.
In this guide, I will walk you through the exact diagnostic steps to fix your ice cream maker. You will learn the precise temperatures your bowl needs, how to test if it is working properly, and when it is actually time to replace equipment. Let us get your frozen desserts back on track.
When your ice cream maker is not freezing, one of three things is almost always the problem. Understanding these will save you hours of frustration.
First, your freezer bowl is not frozen solid. Freezer bowl machines (like most Cuisinart models) rely on a liquid-filled core that must freeze completely. If this bowl is not at 0 degrees Fahrenheit (-18 Celsius) or colder, it simply cannot extract enough heat from your mixture to freeze it.
Second, your ice cream base is too warm. Pouring a room-temperature base into the machine overwhelms the freezing capacity. The bowl warms up before the mixture can freeze, leaving you with liquid.
Third, your recipe has ingredient problems. Too much sugar, added alcohol, or excess salt can lower the freezing point of your mixture so much that home machines cannot reach the required temperature.
Most ice cream maker failures trace back to the freezer bowl. This component looks simple, but it is doing the heavy lifting of heat extraction. Let me break down exactly what you need to know.
Your freezer bowl needs to be at 0 degrees Fahrenheit (-18 Celsius) minimum. However, I have found that colder is significantly better. Many experienced home ice cream makers on forums recommend -15 degrees Fahrenheit (-26 Celsius) or even colder for reliable results.
Here is the science: the freezing point of a typical ice cream base is around 27 to 22 degrees Fahrenheit (-3 to -6 Celsius). Your bowl must be substantially colder than this to overcome the thermal mass of the base and extract heat quickly enough. The wider that temperature gap, the faster freezing happens.
If your refrigerator freezer only reaches 5 degrees Fahrenheit (-15 Celsius), you are asking the bowl to work at the edge of its capacity. This leads to longer churn times, softer results, or complete failure to freeze.
Most people think they can tell if a bowl is frozen by shaking it. That sloshing sound you hear? It actually means the bowl is NOT ready. Let me explain the proper testing methods.
The shake test: Pick up the bowl and shake it gently. If you hear liquid sloshing inside the walls, it needs more time. A fully frozen bowl should make little to no sound, or a very dull thud. The liquid inside has solidified when fully frozen.
The visual inspection: Look at the bowl immediately after removing it from the freezer. If condensation forms rapidly and frost appears within 30 seconds, that is a good sign. If the bowl looks dry or room-temperature, it is not cold enough.
The thermometer method: For precise results, use an infrared thermometer on the bowl surface immediately after removing it from the freezer. It should read 0 degrees Fahrenheit (-18 Celsius) or below. I do this every time now, and it has eliminated guesswork.
This is where forum insights really changed my approach. Many users report that their refrigerator freezer simply cannot get cold enough for consistent ice cream making.
A standard refrigerator freezer typically maintains 0 to 5 degrees Fahrenheit (-18 to -15 Celsius). This is the minimum for safe food storage, but it is at the edge of what ice cream making requires. Deep freezers (chest or upright) commonly reach -10 to -20 degrees Fahrenheit (-23 to -29 Celsius).
The difference is dramatic. Users on Reddit’s ice creamery community consistently report success after moving their bowls to deep freezers. One user noted: “After 48 hours in my fridge freezer, the bowl was still sloshing. Moved it to my garage chest freezer for 24 hours, and it was solid as a rock.”
If you have access to a deep freezer, use it. The lower temperature gives you a much larger margin of error and significantly faster freezing times once you start churning.
Pouring warm base into your ice cream maker is like asking someone to cool a bathtub with an ice cube. It simply will not work. Here is what you need to know about base temperature.
Your ice cream base must be at 39 degrees Fahrenheit (4 degrees Celsius) or colder before churning. This is not a suggestion. This is a requirement for proper freezing.
When you pour a warm base into the freezer bowl, the bowl must first cool the mixture down to its freezing point before any actual freezing can begin. This warming of the bowl uses up your precious freezing capacity. By the time the base reaches freezing temperature, your bowl may have warmed too much to continue the process effectively.
I always measure my base with a thermometer before pouring it in. If it reads above 40 degrees Fahrenheit (4.5 degrees Celsius), I put it back in the refrigerator for another 30 minutes.
The physics here is straightforward but important to understand. Ice cream freezing is a race against time. Your freezer bowl has a finite amount of cold thermal energy stored in its frozen walls.
As the dasher (the mixing paddle) churns, it scrapes frozen mixture from the bowl walls and incorporates it into the center. This continuous scraping and mixing is what creates smooth ice cream rather than a solid block of ice.
If your base starts at 70 degrees Fahrenheit (21 degrees Celsius) instead of 39 degrees Fahrenheit (4 degrees Celsius), you are asking the bowl to absorb roughly twice as much thermal energy just to reach the starting line. That energy expenditure leaves insufficient cooling power for the actual freezing and air incorporation that creates proper ice cream texture.
Professional ice cream makers almost always age their bases overnight. There are good reasons for this practice beyond just temperature.
First, overnight refrigeration guarantees your base hits the required 39 degrees Fahrenheit (4 degrees Celsius) or below. No guesswork, no waiting, no risk.
Second, aging allows the fat globules in your base to partially crystallize and the proteins to hydrate fully. This improves whipping properties and creates a smoother final texture. The difference between a base churned immediately versus one aged overnight is noticeable.
I make my base the day before I plan to churn. It sits in the refrigerator for at least 12 hours, usually 24. This habit alone solved about half of my early ice cream failures.
Sometimes the problem is not your equipment at all. It is what you put inside it. Certain ingredients can make it physically impossible for home ice cream makers to freeze a mixture.
Sugar is essential for ice cream, but too much creates a chemistry problem. Sugar molecules interfere with water crystallization, a phenomenon called freezing point depression.
As you add more sugar to a mixture, the freezing point drops lower and lower. A base with too much sugar might need to reach 20 degrees Fahrenheit (-7 Celsius) or even lower to freeze solid. Your home ice cream maker cannot reach these temperatures.
Most balanced ice cream recipes contain 15 to 20 percent sugar by weight. If you are experimenting with recipes and adding extra sugar, honey, or other sweeteners beyond standard amounts, you may have crossed the threshold where home freezing becomes impossible.
The solution is simple: stick to tested recipes from reputable sources until you understand the ratios. Then make small adjustments and test.
Alcohol presents an even more dramatic freezing point issue. Pure ethanol freezes at -173 degrees Fahrenheit (-114 Celsius). Even small amounts of alcohol in your base significantly lower the freezing point.
This is why boozy ice cream recipes often fail in home machines. A recipe calling for several tablespoons of whiskey, rum, or vodka might sound delicious, but it may be physically impossible for your Cuisinart to freeze it.
If you want alcoholic ice cream, add the alcohol after churning while the mixture is still soft. Fold it in gently, then freeze the finished product in your freezer. Alternatively, reduce the alcohol on the stovetop before adding it to your base to evaporate some of the alcohol content.
Salt has a similar freezing point depression effect. While you would not normally add table salt to sweet ice cream, certain flavor combinations might include salty ingredients. Be aware that excessive salt will lower your freezing point.
Stabilizers like guar gum or xanthan gum are actually helpful for freezing. They bind water and prevent large ice crystals from forming, making freezing easier rather than harder.
Fat content matters too. A base with insufficient fat (below 10 percent) will freeze harder and more icily than one with proper fat content. Fat does not prevent freezing, but it affects texture and the perception of coldness.
Not all ice cream makers work the same way. Understanding which type you own helps diagnose problems correctly.
Freezer bowl machines (Cuisinart ICE-21, ICE-30, most home models) require you to freeze the bowl in advance. Problems with these machines almost always trace back to the three issues we have covered: insufficient bowl freezing, warm base, or recipe problems.
Compressor machines (Cuisinart ICE-100, Breville Smart Scoop, higher-end models) have built-in refrigeration systems. These do not require pre-freezing, but they have their own failure modes.
Compressor machines can suffer from refrigerant leaks, compressor failure, or thermostat sensor issues. If your compressor machine is not getting cold at all, check that it has adequate ventilation space around it. These machines generate significant heat and need room to breathe.
If your compressor machine runs but does not get cold after 10 minutes of operation, it likely needs professional repair or replacement. Unlike freezer bowl machines where you can simply replace the bowl, compressor repairs are rarely cost-effective for home units.
When your ice cream maker is not freezing, follow this diagnostic process in order. It will isolate the problem quickly.
Step 1: Test your freezer bowl immediately after removing it from the freezer. Shake it. Listen for sloshing. Use an infrared thermometer if available. The bowl surface should read 0 degrees Fahrenheit (-18 Celsius) or below. If it is warmer, return it to the freezer for another 12 to 24 hours, or move it to a colder freezer.
Step 2: Check your freezer temperature. Use a thermometer placed in your freezer overnight. If it reads above 0 degrees Fahrenheit (-18 Celsius), your freezer is the problem. Adjust the thermostat or use a different freezer.
Step 3: Verify your base temperature. Insert a thermometer into your base mixture before pouring it into the machine. It must be at 39 degrees Fahrenheit (4 degrees Celsius) or below. If warmer, refrigerate longer.
Step 4: Review your recipe. Calculate the sugar percentage. If it exceeds 20 percent by weight, reduce it. Check for alcohol content. If the recipe includes more than 1 to 2 tablespoons of hard liquor for a full batch, reduce or eliminate it.
Step 5: Check your fill level. Do not fill the machine beyond three-quarters full. Overfilling prevents proper air incorporation and can insulate the center of the mixture from the freezing walls.
Step 6: Listen to your machine. The motor should sound like it is working. If the dasher is not turning, your mixture will not freeze evenly. Stop the machine and check that the paddle is properly inserted.
Step 7: Time the process. Most ice cream reaches proper consistency in 15 to 25 minutes. If it is still liquid after 30 minutes, stop the machine. Something is wrong. Continuing will not help and may damage the motor.
Freezer bowls do not last forever. The liquid inside can gradually lose its freezing properties, or the seal can fail. Here is how to tell if it is time for a new bowl.
Age: Most freezer bowls work well for 3 to 5 years with regular use. After that, performance declines even with proper care. If your bowl is older than 5 years and suddenly stops working, replacement is likely needed.
Visible damage: Check for cracks in the plastic exterior, dents, or any sign that the sealed chamber inside has been compromised. A damaged bowl will never work properly.
Never freezes solid: If your bowl has been in a properly functioning freezer for 48 hours and still sloshes when shaken, the internal liquid has likely leaked or degraded. Time to replace it.
Inconsistent results: When a bowl starts failing, you might get good results one day and soup the next, even with identical preparation. This inconsistency usually means the freezing medium inside is breaking down.
Longer freeze times: If you used to get solid results after 24 hours in the freezer but now need 48 hours for the same result, your bowl is losing efficiency.
Sometimes the economics do not favor repairs. Here is how to decide.
Replacement freezer bowls typically cost 30 to 50 dollars. A new entry-level ice cream maker costs 60 to 100 dollars. If your machine is less than 3 years old and works well otherwise, buying a replacement bowl makes sense.
If your machine is older than 5 years, shows other signs of wear, or the motor sounds strained, put that 40 dollars toward a new machine instead. The technology improves over time, and newer models often have better freezing efficiency.
For compressor machines, replacement is almost always the better option. Repairs cost nearly as much as a new unit, and repaired compressors often fail again within a year.
Consider upgrading to a compressor machine if you make ice cream frequently. The convenience of no pre-freezing and the ability to make multiple batches in a row is worth the investment for serious home ice cream makers.
To fix ice cream that won’t freeze, first verify your freezer bowl is at 0F (-18C) or colder using a thermometer. Next, ensure your ice cream base is chilled to 39F (4C) or below before churning. Check your recipe for excess sugar or alcohol, which can lower the freezing point too much. Finally, make sure you are not overfilling the machine. If all these conditions are met and it still won’t freeze, your freezer bowl may need replacement.
Ice cream remains liquid after churning when the freezer bowl is not cold enough to extract sufficient heat from the mixture. This happens if the bowl was not frozen long enough, your freezer temperature is above 0F (-18C), or your ice cream base was too warm when added. The bowl warms up before the mixture can freeze, leaving you with soup.
For freezer bowl machines, the bowl must be frozen at 0F (-18C) minimum, ideally -15F (-26C) or colder. Test with an infrared thermometer immediately after removing from the freezer. If using a compressor machine, ensure it has adequate ventilation and the compressor is running. If the compressor runs but produces no cold after 10 minutes, the refrigerant may be depleted or the compressor may have failed.
Slow freezing indicates your freezer bowl is not cold enough, your base is too warm, or your recipe has high sugar or alcohol content. Each of these factors forces the machine to work harder and longer. A properly frozen bowl with cold base should produce ice cream in 15 to 25 minutes. If it takes longer than 30 minutes, something is wrong.
Freeze your ice cream maker bowl for a minimum of 24 hours. Many experienced users recommend 48 hours for best results, especially if using a standard refrigerator freezer. Use the shake test: if you hear liquid sloshing inside the walls, it needs more time. A fully frozen bowl should make little or no sound when shaken.
If your bowl still sloshes after 48 hours in the freezer, either your freezer is not cold enough or the bowl is defective. Test your freezer with a thermometer; it should read 0F (-18C) or below. If the freezer is cold enough, the liquid inside your bowl has likely leaked or degraded over time. The bowl needs replacement.
An ice cream maker not freezing is frustrating, but it is rarely a mystery once you know what to check. In nearly every case, the problem comes down to three factors: your freezer bowl temperature, your base temperature, or your recipe ratios.
Start with the freezer bowl. Verify it is truly frozen using the shake test or a thermometer. Make sure your freezer reaches 0 degrees Fahrenheit (-18 Celsius) or below. Move to a deep freezer if necessary. Then ensure your base is at 39 degrees Fahrenheit (4 degrees Celsius) or colder before churning. Finally, check your recipe for excess sugar or alcohol that might be lowering the freezing point too much.
Work through the troubleshooting checklist systematically. If your bowl is more than 5 years old and never seems to freeze solid anymore, it is probably time for a replacement. The investment in a new bowl or machine will pay off in consistent, creamy homemade ice cream for years to come.