Physical Address
304 North Cardinal St.
Dorchester Center, MA 02124
Physical Address
304 North Cardinal St.
Dorchester Center, MA 02124

When your AC blower keeps turning on and off repeatedly, you are dealing with a problem HVAC technicians call short cycling. This frustrating issue wastes energy, stresses your system, and leaves your home uncomfortable. I have helped dozens of homeowners troubleshoot this exact problem, and the good news is that many causes are DIY-fixable once you know what to look for.
AC blower short cycling happens when the fan motor runs for brief periods—sometimes 30 seconds, sometimes a few minutes—then shuts off before completing a full heating or cooling cycle. The motor might restart immediately or stay off for hours before acting up again. Understanding why your blower motor keeps starting and stopping is the first step toward a permanent fix.
If you are new to HVAC troubleshooting guides, this article will walk you through everything from basic thermostat checks to advanced component testing.
A properly functioning blower motor runs continuously throughout each heating or cooling cycle. When your thermostat calls for cooling, the sequence starts with the outdoor condenser unit activating, followed by the indoor air handler blower motor circulating air across the cold evaporator coil. The blower should stay on steadily until the thermostat reaches the set temperature.
During heating cycles, the process varies slightly depending on your system type. Gas furnaces ignite burners first, then activate the blower once the heat exchanger reaches proper temperature. Heat pumps engage the compressor and reversing valve before starting the indoor blower. In both cases, the blower motor should maintain consistent airflow rather than cycling intermittently.
Your blower motor pulls return air through filters and return vents, pushes it across the conditioning surface (evaporator coil for cooling, heat exchanger for heating), then distributes conditioned air through supply ducts. Any interruption to this airflow pattern—whether from component failure or control issues—triggers the on-off behavior you are experiencing.
Understanding your HVAC system type helps narrow down potential causes, as furnaces, heat pumps, and air conditioners have slightly different blower control sequences.
Multiple components can trigger short cycling behavior. Through years of diagnostic experience, I have identified the most common culprits and how to recognize each one.
Your thermostat sends the 24-volt signal that tells the blower when to run. When this signal becomes erratic, the blower responds by cycling on and off unpredictably. Faulty thermostat wiring, loose connections, or a malfunctioning control board inside the thermostat itself can all cause intermittent operation.
I always recommend the wall-pull test first. Remove the thermostat from its mounting plate entirely. If the blower stops running immediately, your thermostat is likely the problem. If the blower continues running with the thermostat disconnected, the issue lies downstream in the control board, relay, or wiring between components.
Battery-powered thermostats can also cause weird behavior when batteries run low. Weak batteries may provide enough power for the display but fail to maintain consistent control signals. Replace batteries before assuming component failure.
For detailed thermostat diagnostics, see our complete thermostat troubleshooting guide.
The relay switch acts as an electrical gatekeeper, opening and closing the high-voltage circuit that powers your blower motor. When relays stick closed, the blower runs continuously. When relays fail to close properly or chatter open and closed, you get the on-off cycling that brings you here.
Relays can fail from age, electrical arcing, or damage to the coil that activates the switch. A failing relay may produce an audible clicking sound as it struggles to maintain contact. If you hear rapid clicking from your air handler or furnace cabinet coinciding with blower cycling, suspect the relay.
Testing relays requires a multimeter to check for proper coil resistance and contact continuity. Some relays can be replaced individually, while others are integrated into control boards requiring board replacement.
Capacitors store electrical energy to help motors start and run efficiently. Your blower motor likely has either a start capacitor (provides startup torque), a run capacitor (maintains running efficiency), or both. When capacitors weaken or fail, motors struggle to start or maintain consistent operation.
A failing run capacitor often causes the motor to start normally then shut off after 30 seconds to a few minutes as it overheats or draws excessive current. The motor may restart once cooled, creating an intermittent cycle that seems random but actually follows a heat-buildup pattern.
Visual inspection can identify obviously failed capacitors—look for bulging tops, leaking fluid, or burn marks. However, many failing capacitors look fine externally while testing weak with a capacitor tester or multimeter. Capacitor replacement is typically a straightforward DIY repair costing $15-50 for the part.
The control board serves as your HVAC system’s brain, interpreting thermostat signals and sequencing component operation. Modern furnaces and air handlers use sophisticated circuit boards that can develop intermittent faults causing erratic blower behavior.
ECM (electronically commutated motor) blower systems add another layer of complexity. These variable-speed motors have control modules mounted directly on the motor housing—often called the silver head or ECM module. Power surges, voltage fluctuations, or internal component failure can cause these modules to send intermittent run signals to the motor.
Control board diagnosis requires electrical testing and sometimes board removal for inspection of solder connections and components. While individual components on some boards can be repaired, most homeowners replace the entire board when failure is confirmed.
Safety limit switches monitor temperature and airflow to protect your system from damage. High-limit switches shut down burners or blowers when heat exchanger temperatures exceed safe ranges. Pressure switches verify proper airflow before allowing operation. When these switches malfunction or when real airflow restrictions exist, they can trigger blower cycling.
A dirty air filter, blocked return vents, or closed supply registers can restrict airflow enough to trip limit switches. The blower starts, airflow proves insufficient, the limit switch opens, and the blower shuts off. Once cooled or reset, the cycle repeats. This pattern often shows the blower running progressively shorter periods as heat builds up faster with each attempt.
Some limit switches reset automatically while others require manual reset buttons. Repeated tripping indicates either a failed switch or a real airflow problem requiring correction.
Learn more about airflow issues in our guide to proper return vent airflow.
The blower motor itself can cause intermittent operation through internal wear or damage. Worn bearings increase mechanical resistance, causing the motor to draw excessive current and overheat. Internal winding shorts or opens can produce similar symptoms.
Motors with failing bearings often make noise before failing completely—squealing, grinding, or rumbling sounds indicate mechanical wear. The motor may start when cold but seize or overheat after brief operation. In some cases, manually spinning the blower wheel reveals stiffness or rough rotation.
Electrical testing with a multimeter can measure motor amp draw (comparing to nameplate ratings) and winding resistance. Motors testing outside specifications require replacement, though some older motors can be rebuilt by motor shops.
After analyzing hundreds of forum discussions and service calls, I have noticed that specific timing patterns often point to specific problems. Use these patterns to narrow your diagnosis faster.
A consistent 30-second runtime before shutdown almost always indicates a high-limit switch trip from overheating or airflow restriction. Check your air filter first. If the filter is clean, inspect return and supply vents for blockages. A dirty evaporator coil can also restrict airflow enough to trigger limit switches.
This timing pattern suggests a failing run capacitor or motor overheating from bearing wear. The motor starts normally when cool, runs until heat builds to critical levels, then shuts off on internal thermal protection. After cooling for 10-30 minutes, the cycle repeats. Test capacitor microfarad ratings and check motor amp draw against specifications.
Rapid cycling indicates control signal problems rather than motor issues. Suspect thermostat malfunctions, control board relay chattering, or ECM module failure. The component is receiving conflicting or intermittent run commands. Try the wall-pull thermostat test mentioned earlier to isolate whether the problem originates before or after the thermostat.
Truly random cycling with no consistent timing suggests loose wiring connections, failing relays with inconsistent contact resistance, or control boards with heat-sensitive component failure. These issues often worsen as components heat up during operation. Gently wiggling wire connections while the system runs (safely) may reveal loose terminals.
Follow these steps in order for systematic diagnosis. Each step eliminates potential causes before moving to more complex checks.
Turn off power to your HVAC system at the breaker before opening any panels. Verify power is off with a non-contact voltage tester. Capacitors can store lethal electrical charges even with power disconnected—discharge capacitors with an insulated screwdriver across terminals before touching them.
Wear safety glasses when working inside HVAC cabinets. Sheet metal edges are sharp. If you smell gas around a furnace, stop immediately and call your gas company. Never bypass safety switches for testing purposes.
Start with the wall-pull test. Remove your thermostat from the wall plate or disconnect the low-voltage wires. If the blower stops, you have isolated the problem to the thermostat or its wiring. Replace batteries if applicable, check wire connections, and consider thermostat replacement if problems persist.
If the blower continues running with the thermostat disconnected, the problem lies in the air handler or furnace control components. Reconnect the thermostat and proceed to electrical checks.
Verify the breaker feeding your air handler or furnace is properly seated and not tripped. Some systems have separate breakers for indoor and outdoor units—check both. Reset any tripped breakers by fully switching off then on.
Inspect the disconnect switch near your outdoor unit and the power switch or breaker on or near your indoor unit. Loose connections in these switches can cause voltage drops leading to erratic operation.
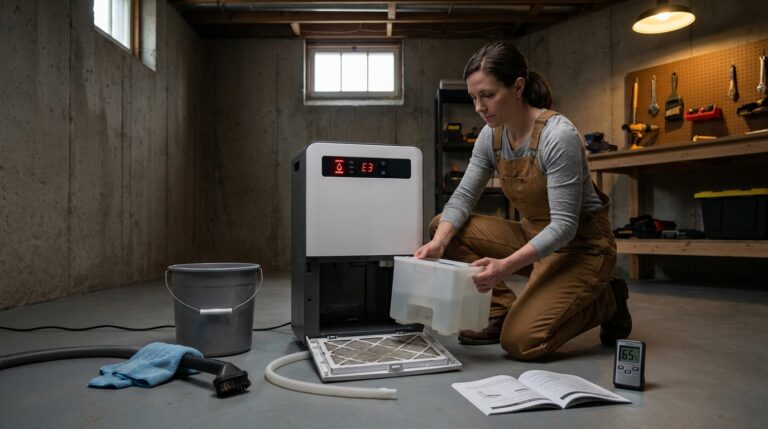
Remove and inspect your air filter. A clogged filter is the most common cause of airflow restrictions leading to limit switch trips. Hold the filter up to a light source—you should see light passing through. If the filter appears dirty or you cannot see light through it, replace it immediately.
While the filter is out, inspect the return air opening for debris or obstructions. Run the system temporarily without the filter (only for testing) to see if airflow improves and cycling stops. If cycling stops without the filter, you have found your restriction.
Some blower motors include thermal reset buttons that trip when motors overheat. Locate your blower motor inside the air handler or furnace cabinet. Look for a small red or yellow button on the motor housing or nearby control module.
Press any reset button you find firmly. If it clicks when pressed, it was tripped. A tripped reset button indicates motor overheating from bearing wear, capacitor failure, or airflow restriction. Resetting may restore temporary operation, but investigate the underlying cause.
Not all motors have reset buttons. ECM motors with integrated control modules often lack user-serviceable resets—the module handles thermal protection internally.
With power restored and panels secured, start a heating or cooling cycle and listen carefully at the air handler cabinet. You should hear a distinct click when the blower engages—that is the relay closing. If you hear multiple rapid clicks or chattering sounds, the relay is failing to maintain consistent contact.
No click at all suggests a control board or thermostat signal problem. The relay is not receiving the command to close, or the control board is not sending it.
If basic checks have not resolved the issue, component-level testing with a multimeter identifies specific failures. Test capacitor microfarad ratings against the rating printed on the capacitor (typically 5-20% tolerance allowed). Measure motor amp draw while running and compare to the nameplate full-load amperage rating.
Control board testing requires checking for proper 24V signal from the thermostat and proper relay coil voltage. These tests involve live electrical circuits—proceed only if comfortable with electrical testing or consult our advanced HVAC diagnostic procedures for detailed guidance.
A frozen evaporator coil can also cause blower issues as the system struggles with restricted airflow. If you suspect freezing, see our guide on fixing a frozen AC unit.
Understanding repair costs helps you decide whether to DIY or call a technician. Prices vary by region and system type, but these ranges provide reasonable expectations for 2026.
| Repair Type | DIY Part Cost | Professional Repair Cost | DIY Difficulty |
|---|---|---|---|
| Air filter replacement | $10-30 | $50-100 (service call) | Easy |
| Capacitor replacement | $15-50 | $150-300 | Moderate |
| Relay replacement | $20-75 | $200-400 | Moderate |
| Thermostat replacement | $50-250 | $200-500 | Easy to Moderate |
| Control board replacement | $150-600 | $400-1,200 | Moderate to Hard |
| Blower motor replacement | $150-600 | $400-1,500 | Moderate to Hard |
| ECM module replacement | $200-500 | $500-1,000 | Moderate |
Professional costs include diagnostic labor, markup on parts, and warranty coverage on the repair. DIY saves labor costs but requires proper diagnosis—replacing the wrong component gets expensive quickly.
Some situations require professional expertise regardless of your DIY skills. Call a technician when:
Complex control board failures often require manufacturer-specific diagnostic procedures and specialized tools. ECM motor module programming sometimes needs proprietary software to configure properly.
Professional technicians also carry liability insurance and warranty their work. A failed DIY capacitor replacement might cost you $30 in parts. A misdiagnosed control board replacement costs significantly more.
If you are hearing unusual AC noises beyond normal operation, professional diagnosis prevents minor issues from becoming major failures.
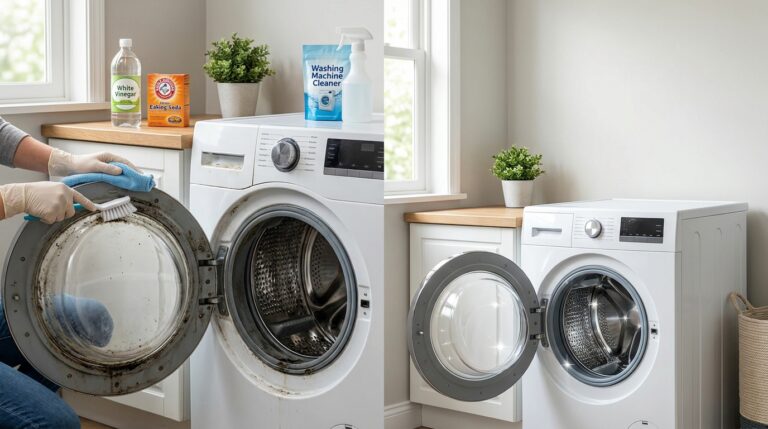
Regular maintenance prevents the component failures that cause short cycling. Change your air filter every 1-3 months depending on filter type and household conditions. Homes with pets or high dust levels need more frequent changes.
Schedule annual professional maintenance including blower motor amp draw testing, capacitor checking, and control board inspection. Technicians can identify weakening components before they fail completely.
Install surge protection at your HVAC disconnect to protect control boards and ECM modules from power surge damage. Whole-house surge protectors provide additional protection for all electronic components.
Keep return and supply vents unobstructed. Furniture, curtains, or storage items blocking vents create airflow restrictions that stress blower motors and trigger limit switches.
Your blower motor is likely short cycling due to a faulty thermostat, failing relay switch, bad capacitor, or control board malfunction. Other causes include limit switch trips from restricted airflow, motor bearing wear, or ECM module failure. Start by checking your air filter and testing the thermostat with the wall-pull test.
A blower that runs 1-3 minutes then shuts off typically indicates a failing run capacitor, motor overheating from bearing wear, or high-limit switch trips from airflow restriction. The motor starts normally when cool but overheats during operation. Check your air filter first, then test the capacitor with a multimeter.
Intermittent starting and stopping suggests control signal problems rather than motor failure. Suspect thermostat issues, chattering relays, or failing control boards sending erratic run commands. Try the wall-pull thermostat test—if the blower stops when you remove the thermostat, that is your problem component.
Brief 1-10 second operation indicates rapid control signal interruption. Check for failing relays that cannot maintain contact, control board issues, or ECM module failure. The component is receiving conflicting run/stop commands. Listen for relay chattering sounds to identify relay problems.
Turn off power at the breaker and locate the blower motor inside your air handler or furnace cabinet. Look for a small red or yellow reset button on the motor housing or control module. Press firmly until you feel or hear a click. Restore power and test operation. If the reset trips again, investigate underlying causes like capacitor failure or bearing wear.
No, not all blower motors have external reset buttons. Older PSC motors often include thermal reset buttons that trip on overheating. Modern ECM motors with integrated control modules typically handle thermal protection internally without user-accessible resets. If you cannot locate a reset button on your motor, it likely does not have one.
Professional blower motor replacement costs $400-1,500 depending on motor type and accessibility. DIY motor replacement costs $150-600 for the part alone. If the issue is just a bad capacitor, DIY repair costs $15-50 versus $150-300 professionally. Get multiple quotes for motor replacement as prices vary significantly between contractors.
A blower that starts but will not stay running indicates power or control issues. Check for tripped breakers, loose wire connections, failing capacitors, or motor overheating. If the motor runs briefly then shuts off, test the capacitor and check for airflow restrictions. Random shutoffs suggest control board or relay problems.
Fixing an AC blower that keeps turning on and off requires systematic diagnosis starting with simple checks and progressing to component testing. Most homeowners can resolve thermostat issues, dirty filters, and even capacitor replacements themselves. More complex electrical problems may require professional expertise.
The key is understanding what the timing and symptoms tell you about the underlying cause. Use the diagnostic patterns in this guide to narrow possibilities quickly. Remember that safety comes first—when in doubt, call a professional who can resolve the issue without risk to you or your system.
For more HVAC maintenance and repair information, explore our other AC repair guides covering everything from seasonal maintenance to emergency repairs.