Physical Address
304 North Cardinal St.
Dorchester Center, MA 02124
Physical Address
304 North Cardinal St.
Dorchester Center, MA 02124

Discovering your oven won’t switch off is stressful and potentially dangerous. This common appliance issue affects homeowners across all major brands including GE, Whirlpool, Samsung, and Frigidaire. Whether you have an electric oven that keeps heating or a gas oven that won’t shut off, understanding the problem and knowing exactly what steps to take can prevent fire hazards and help you decide between repair or replacement.
In this comprehensive guide, I’ll walk you through the immediate safety actions you should take, explain the most common causes behind why your oven won’t switch off, and help you diagnose whether this is a DIY fix or requires professional repair. Based on real homeowner experiences and manufacturer guidance, you’ll have a clear roadmap for handling this frustrating appliance emergency.
If your oven won’t switch off, take these steps immediately. Safety is always the priority before attempting any diagnosis or repair.
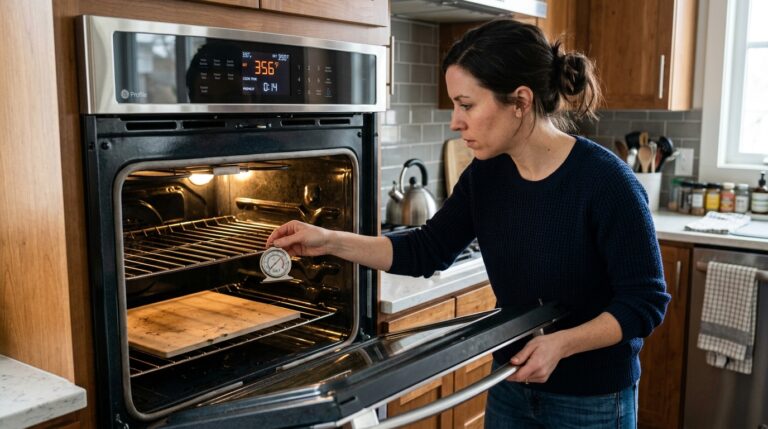
First, turn off your oven at the control panel. Wait 30 seconds to see if it responds. If the display still shows active heating or the elements remain glowing hot, move to step two immediately.
Locate your electrical panel and find the breaker dedicated to your oven or range. Flip it to the OFF position. For gas ovens, you’ll also want to shut off the gas supply valve if you can safely access it behind the unit.
Open all windows in your kitchen to ventilate any heat buildup. If you smell gas or notice any burning electrical smells, evacuate your home immediately and call emergency services from outside.
Never leave your home unattended while the oven is malfunctioning. Fire departments respond to hundreds of kitchen appliance fires annually, and many could be prevented with immediate power disconnection.
Once the power is off and the oven begins cooling, document what you observed. Did the display show error codes? Was the oven heating uncontrollably or just not responding to the off button? These details will help with diagnosis later.
There are several reasons why your oven won’t switch off, but fortunately, the list of possible causes is relatively limited. Understanding these potential issues helps you communicate effectively with repair professionals and decide if this is something you can tackle yourself.
The most common culprits include a faulty oven control board with shorted relays, defective heating elements that have grounded out, a broken thermostat or temperature sensor, or in gas models, a malfunctioning gas valve. Each of these components plays a critical role in your oven’s heating and shutdown cycles.
Less commonly, the issue might stem from a malfunctioning touchpad, door latch switch problems, or wiring issues within the oven cabinet. The specific symptoms your oven displays – such as whether the controls are responsive or if only certain elements stay on – can help narrow down which component is at fault.
The oven control board, also called the ERC (Electronic Range Control) or PCB (Printed Circuit Board), is the brain of your oven and represents the single most common cause when an oven won’t switch off. This electronic component sends voltage to your heating elements based on your input and temperature sensor readings.
When one of the control board’s relays shorts out, it can send continuous voltage to your bake or broil element regardless of what the display shows or what buttons you press. This means your oven continues heating even after you’ve turned it off at the controls.
Symptoms of a faulty control board include an unresponsive display, the oven continuing to heat after being turned off, erratic temperature behavior, or error codes displayed on the panel. In some cases, you might notice the oven works intermittently – sometimes shutting off normally, other times staying on.
Testing a control board typically requires a multimeter to check if the relays are stuck in the closed position. However, for most homeowners, the diagnosis process involves ruling out other components first. If your heating elements test fine and your thermostat responds correctly, the control board is likely the culprit.
Control board replacement costs range from $200 to $500 for the part alone, depending on your oven brand and model. Professional installation typically adds $150 to $300 to the total repair cost. Some companies offer control board repair services for significantly less than replacement, which can be worth exploring for newer, high-end ovens.
A defective or grounded heating element is another common reason your oven won’t switch off, particularly in electric ovens and ranges. Your oven has two heating elements – the bake element at the bottom and the broil element at the top – and either can develop problems that cause continuous heating.
Heating elements can become “grounded” when the internal heating wire breaks and contacts the outer metal casing. This creates a direct path for electricity to flow, bypassing the control board’s relay. Even when the control board tries to cut power, the grounded element continues heating because electricity flows around the normal control circuit.
Visual inspection often reveals problems with heating elements. Look for visible cracks, blisters, bubbles, or burn marks on the element surface. A grounded element might also show physical damage where the wire has broken through the insulation.
Testing a heating element requires a multimeter to measure resistance. A properly functioning bake element typically shows 15-25 ohms of resistance, while a broil element should read 15-30 ohms. Significantly lower resistance (close to zero ohms) indicates a short or ground, while infinite resistance suggests a complete break.
The good news is that heating elements are relatively affordable and straightforward to replace. Most replacement elements cost between $20 and $60, making this one of the most economical oven repairs. If you’re comfortable with basic DIY repairs, replacing a heating element typically takes less than 30 minutes and requires only a screwdriver and your multimeter for verification.
Your oven’s thermostat or temperature sensor plays a crucial role in regulating heat and signaling when to shut off heating cycles. When this component fails, your oven may not receive accurate temperature information, leading to continuous heating even after reaching the target temperature or being turned off.
Modern ovens use electronic temperature sensors (often called oven probes) rather than mechanical thermostats. These sensors work by changing resistance as temperature changes – typically decreasing resistance as temperature increases. The control board reads this resistance to determine oven temperature.
A faulty temperature sensor can fail in two ways that relate to your oven not switching off. First, it might send incorrect resistance readings that make the control board believe the oven is much cooler than it actually is, causing continuous heating. Second, some sensor failures can cause communication errors that confuse the control board’s programming.
Testing a temperature sensor is straightforward with a multimeter. At room temperature, most sensors read around 1,000 to 1,100 ohms. As temperature increases, this resistance should decrease smoothly and predictably. If your sensor shows infinite resistance (open circuit) or resistance that doesn’t change with temperature, it needs replacement.
Temperature sensors are among the most affordable oven components, typically costing $15 to $40. Most are easy to access from inside the oven cavity and require only basic tools to replace. If your sensor tests within normal range, however, the issue likely lies with the control board misinterpreting the sensor data rather than the sensor itself.
If your oven fan won’t turn off but the heating elements have stopped, you may be dealing with a different issue altogether. Many modern ovens, especially convection models, include cooling fans that continue running after the oven is turned off.
This is actually normal operation in most cases. Cooling fans are designed to dissipate heat from the oven’s internal components, particularly the control board and electronic parts. They typically run for 20 to 30 minutes after cooking completes, protecting sensitive electronics from heat damage.
However, if your cooling fan runs for hours or never shuts off even when the oven is completely cold, there may be a problem. Issues can include a faulty fan switch, a stuck cooling fan relay on the control board, or a temperature sensor that keeps signaling excessive heat.
Before worrying about repair costs, first determine if your fan is a cooling fan or the convection fan. Convection fans should stop immediately when you turn off the oven. Cooling fans are normal. If you’re unsure which type you have, consult your owner’s manual or search online for your specific model’s specifications.
Gas ovens that won’t switch off present unique concerns and potential causes beyond those found in electric models. While the control board and temperature sensor issues mentioned above can affect gas ovens too, gas-specific components can also cause continuous heating problems.
The gas valve is the most critical gas-specific component to check. This electromechanical valve opens to allow gas flow to the burner and closes to shut off the gas supply. If the valve sticks in the open position or its solenoid fails, gas will continue flowing even when the oven should be off.
A stuck gas valve is particularly dangerous because it can lead to gas buildup in your kitchen. If you smell gas or suspect a gas valve problem, immediately shut off the gas supply at the valve behind your oven (if accessible) or at your home’s main gas shutoff. Do not attempt to relight the pilot or use any electrical switches, including lights, in the area.
The ignition system in gas ovens can also contribute to problems. If the igniter continues glowing or sparking after the oven should be off, it indicates a control issue. While a faulty igniter alone won’t cause continuous heating (the gas valve should still close), it’s often a symptom of a larger control board problem affecting multiple systems.
Gas oven repairs involving gas valves, ignition systems, or any gas-related components should always be performed by qualified professionals. The risk of gas leaks, fire, and carbon monoxide poisoning makes DIY gas repairs inadvisable for everyone except certified technicians.
Facing an oven that won’t switch off can feel overwhelming, but a systematic approach helps you identify the problem and decide on next steps. Before calling a repair service, work through this diagnostic process to gather information that will help any technician – or help you decide if this is a DIY repair.
Step 1: Confirm the problem. Turn off the oven at the controls. Wait one minute and verify that heating elements are still hot or glowing. Check if the display shows the oven as off or if it’s still indicating active heating. Take note of any error codes displayed.
Step 2: Check for stuck buttons. Sometimes physical control knobs or touchpad buttons can become stuck in the “on” position. Gently wiggle knobs and press each button to ensure none are physically depressed. Unplug the oven for 60 seconds, then plug back in to reset the control board.
Step 3: Perform a visual inspection. With the oven unplugged or breaker off, remove the oven racks and inspect both heating elements for visible damage. Look for cracks, blisters, bubbles, or areas where the element appears broken or deformed.
Step 4: Test the temperature sensor. Access your oven’s temperature sensor (usually a thin metal rod protruding from the back wall). Disconnect it and measure resistance with a multimeter. At room temperature, expect 1,000-1,100 ohms. Test again while heating the sensor gently with a hair dryer – resistance should decrease smoothly.
Step 5: Test heating elements. Disconnect one element at a time and measure resistance. Bake elements should read 15-25 ohms, broil elements 15-30 ohms. Significantly lower readings indicate a grounded element that could cause continuous heating.
Step 6: Assess the control board. If all components test within normal ranges, the control board is the likely culprit. Control boards require specialized knowledge to test properly – if you’ve ruled out elements and sensors, the board probably needs replacement or professional repair.
Once you’ve identified the problem, you’ll need to decide whether to repair or replace your oven. This decision depends on several factors including your oven’s age, the cost of repair, and your personal preferences for newer technology versus keeping an existing appliance.
As a general guideline, consider replacement if your oven is over 10-12 years old and the repair exceeds 50% of a new oven’s cost. Most ovens have an expected lifespan of 13-15 years with proper maintenance, so investing several hundred dollars in a unit near the end of its service life may not make financial sense.
For ovens under 8 years old, repairs typically make economic sense. These units have plenty of useful life remaining, and addressing problems promptly can prevent secondary issues. Heating element and temperature sensor repairs are particularly worthwhile since they’re relatively inexpensive and often add years of reliable service.
If you’re considering replacement, check out our guide to the best double wall ovens or explore top-rated gas ranges to compare features and pricing. Modern ovens offer improved energy efficiency, better temperature accuracy, and smart features that weren’t available even five years ago.
Consider also whether your current oven meets your cooking needs. If you’ve been wishing for more capacity, convection cooking, or air frying capabilities, a malfunction might be the push you need to upgrade to a model that better suits your lifestyle.
While you can’t prevent every oven malfunction, regular maintenance can help avoid many problems and extend your oven’s lifespan. These simple practices take just minutes but can save you hundreds in repair costs over time.
Clean your oven regularly, but avoid harsh chemical cleaners that can damage components. Wipe up spills promptly, especially those containing sugar which can become extremely hot and damage heating elements. For self-cleaning ovens, run the cleaning cycle every few months rather than waiting for heavy buildup.
Inspect your heating elements monthly for signs of wear. Catching a small crack or blister early allows for replacement before the element fails completely and potentially causes other problems. Similarly, check door gaskets for tears or gaps that can affect temperature regulation.
Avoid slamming the oven door, which can damage the door switch and affect oven operation. Don’t use aluminum foil on the oven floor – it can block airflow and reflect heat onto sensitive components. Never run the self-cleaning cycle before important events, as the extreme stress can reveal existing weaknesses in older units.
Finally, address small problems promptly. That error code you keep ignoring? That slightly uneven heating? These warning signs rarely resolve themselves and often indicate developing issues that will become more serious – and expensive – over time.
Turn off the circuit breaker dedicated to your oven immediately. For gas ovens, also shut off the gas supply valve if accessible. Open windows for ventilation and never leave your home unattended while the oven is malfunctioning.
Yes, an oven that won’t switch off is a serious fire hazard. Continuous heating can lead to overheating, component failure, and potentially kitchen fires. Gas ovens that won’t turn off also risk gas leaks and carbon monoxide buildup. Always cut power immediately.
Repair costs vary by the component: heating elements cost $20-60 plus potential labor, temperature sensors run $15-40, and control boards range from $200-500 plus professional installation. Total repairs typically range from $50 for simple DIY fixes to $800 for professional control board replacement.
Some causes like heating elements and temperature sensors are straightforward DIY repairs requiring basic tools and a multimeter. However, control board repairs and any gas oven issues should be handled by professionals due to the complexity and safety risks involved.
Ovens retain significant heat after being turned off, which is normal. However, if your oven continues actively heating or elements remain glowing hot more than 5 minutes after being turned off, you have a malfunction requiring immediate attention.
Warning signs include unresponsive buttons, error codes, the oven not turning off, intermittent operation, temperature inaccuracies, and display issues. If your oven behaves erratically or ignores commands, the control board is likely failing.
Yes, ovens that won’t switch off are fire hazards. Continuous heating can cause food to burn, ignite nearby materials, damage internal components leading to electrical fires, or in gas models, cause gas explosions. Always cut power immediately.
Visual signs include cracks, blisters, bubbles, or burn marks on the element surface. Testing with a multimeter should show 15-30 ohms resistance depending on the element type. Significantly lower resistance indicates a short or ground.
Dealing with an oven that won’t switch off is undoubtedly stressful, but understanding the problem and taking appropriate action can help you resolve the issue safely. Start by cutting power immediately, then work through the diagnostic process to identify whether the control board, heating element, or temperature sensor is at fault.
For many homeowners, calling a professional repair service is the safest choice, especially when dealing with control board issues or gas ovens. However, simple heating element and temperature sensor replacements are often manageable DIY projects that can save significant money.
If your oven is older or repair costs are high, this might be the time to explore replacement options. Modern ovens offer improved efficiency and features that might make upgrading worthwhile. Whatever path you choose, never ignore an oven that won’t switch off – the fire risk is real and immediate action is always the safest approach.