Physical Address
304 North Cardinal St.
Dorchester Center, MA 02124
Physical Address
304 North Cardinal St.
Dorchester Center, MA 02124

There is nothing more frustrating than waking up to the smell of… nothing. You set your bread machine last night expecting fresh bread for breakfast, but your bread machine is not working. I have been there more times than I care to admit, and after spending months testing different machines and troubleshooting every possible failure mode, I have learned that most bread machine problems have surprisingly simple fixes.
This guide covers everything from machines that refuse to start to loaves that collapse faster than my attempts at souffles. Whether your kneading paddle stopped spinning, your bread came out dense as a brick, or the entire unit sits silent and uncooperative, I will walk you through the diagnostic steps that actually work. By the end of this troubleshooting guide, you will know exactly why your bread maker is misbehaving and what to do about it.
Before diving into specific problems, let us cover the most common reasons bread machines fail to start or complete their cycles. These issues account for about 80% of all service calls and frustrated forum posts.
The bread pan is not seated properly. This is the number one cause of machines that seem completely dead. The pan must lock firmly into place to engage the safety switch that allows the unit to operate. Remove the pan and reseat it, making sure it clicks or locks securely.
The kneading paddle is not installed correctly or has become stuck. If your machine turns on but nothing moves inside, check that the paddle is properly seated on the drive shaft. Dried dough can cement the paddle in place, preventing it from turning.
The drive belt has broken or slipped off. When you hear the motor running but the paddle does not turn, a broken belt is the likely culprit. This requires opening the machine to inspect and replace.
The safety switch is malfunctioning. Most machines have a switch that detects whether the lid is closed and the pan is seated. If this switch fails, the machine will not start.
Old or improperly stored yeast is being used. Yeast is a living organism with an expiration date. Dead yeast means flat, dense bread no matter how perfectly your machine functions mechanically.
Now that we have covered the quick fixes, let us explore each category of bread machine failure in detail. I have organized these by symptom so you can jump straight to your specific problem.
Your bread maker sits silent when you press start. No lights, no sounds, no movement. This is actually one of the easier problems to diagnose because the cause is usually external rather than a failed component.
Check the outlet first. Plug a lamp or phone charger into the same outlet to verify it is working. I once spent 20 minutes troubleshooting a machine that simply was not getting power from a tripped GFCI outlet in my kitchen.
Verify the bread pan is locked in completely. The pan engages a safety switch that prevents operation when loose. Listen for a click when you insert and turn the pan. If you do not hear it, the pan is not seated properly. Remove it, check for obstructions, and reinstall firmly.
Inspect the power cord for damage. Frayed cords, bent prongs, or loose connections can interrupt power flow. If the cord shows any wear, discontinue use and contact the manufacturer.
Test the control panel. If the display lights up but the start button does nothing, try unplugging the machine for 10 minutes to reset the control board. This simple reset resolves many electronic glitches.
You hear the machine running. The display shows it is in the knead cycle. But when you peek through the window, the paddle sits motionless while dough sits unmoved. This is one of the most common bread machine problems, and it has several possible causes.
The paddle is stuck to the shaft. Old dough acts like glue, cementing the paddle to the drive shaft. Soak the pan in warm water for 30 minutes, then try to wiggle the paddle free. Never force it, as you can damage the shaft.
The drive belt has broken. When the motor runs but nothing turns, the belt connecting the motor to the paddle shaft has likely snapped or slipped off. This happens more frequently on older machines or those used heavily. You will need to remove the bottom or back panel to inspect the belt. Look for a black rubber band around pulleys. If it is broken or missing, order a replacement from the manufacturer.
The motor coupling has failed. Some machines use a plastic coupling between the motor and drive shaft instead of a belt. These can crack or strip over time. Listen for a clicking or grinding sound when the machine should be kneading. That often indicates coupling failure.
The motor itself has burned out. If you smell burning or the machine hums but nothing moves even with a good belt, the motor may be dead. Motors can fail from overheating, age, or attempting to knead overly stiff dough. Replacement motors are available for some brands, but often a new machine makes more financial sense.
Mechanical issues are frustrating, but ingredient problems are more common. When your bread comes out flat and dense, yeast is almost always the culprit. Understanding how yeast works in a bread machine can save you from many failed loaves.
Check your yeast expiration date. Yeast is alive until it is not. Expired yeast is dead yeast. Even unexpired yeast can die if stored improperly. Keep yeast in the freezer for maximum life, and always check the date before baking. Fresh yeast should foam when proofed in warm water with a pinch of sugar.
Use the right yeast type. Bread machines need bread machine yeast or instant yeast, not active dry yeast. Active dry yeast must be dissolved in water first, while bread machine yeast can be added directly to dry ingredients. Using the wrong type means your yeast may never activate properly.
Check your liquid temperature. Yeast dies above 140 degrees Fahrenheit. Hot water from your tap can kill yeast instantly. Use lukewarm water, around 110 to 115 degrees, or follow your recipe precisely. I use a thermometer for the first few attempts with any new machine until I understand its heating patterns.
Measure ingredients precisely. Bread machines are less forgiving than hand baking. Too much salt inhibits yeast activity. Too much sugar can actually kill yeast in high concentrations. Use proper measuring techniques, leveling flour rather than scooping, and follow recipes exactly until you understand how your machine behaves.
Your bread rose beautifully during the cycle. You watched it puff up through the window, looking perfect. Then you opened the lid to find a crater where your loaf used to be. This collapsing happens to every bread machine owner eventually.
Too much yeast causes overproofing. When yeast produces too much gas, the gluten structure cannot support the expanded loaf. The dough rises beyond its structural capacity, then collapses when the bubbles burst. Reduce yeast by 1/4 teaspoon and see if the problem resolves. Many users on Reddit report fixing collapsed loaves simply by reducing from 1.5 teaspoons to 1.25 teaspoons.
Too much liquid creates weak dough. Excess water makes dough slack and unable to hold its shape. The loaf rises, then spreads and falls. Check your dough consistency during the knead cycle. It should form a smooth, slightly tacky ball that cleans the sides of the pan but sticks slightly to the bottom.
Opening the lid during baking causes collapse. The sudden temperature drop shocks the rising dough. Resist the urge to peek during the final rise and bake cycles. Use the window if your machine has one, or simply trust the process.
High altitude requires adjustments. At elevations above 3,000 feet, lower air pressure affects how dough rises. Reduce yeast by 1/8 to 1/4 teaspoon and increase liquid slightly. Your machine manual may have specific high altitude recommendations.
Your bread came out edible but resembles a brick more than a bakery loaf. Dense bread has several causes, most related to gluten development or ingredient ratios.
Use bread flour, not all-purpose. Bread flour has higher protein content, typically 12 to 14 percent, which develops stronger gluten. All-purpose flour, with 9 to 11 percent protein, often produces denser results in machines. The extra gluten structure from bread flour helps trap gas bubbles during rising.
Check for proper gluten development. During kneading, the dough should transform from a shaggy mess into a smooth, elastic ball. If it stays rough and chunky, gluten is not developing properly. This could be due to insufficient kneading time, wrong flour type, or liquid issues.
Too much flour is a common mistake. Many bakers scoop flour directly from the bag, packing it down and using too much. Spoon flour into your measuring cup, then level with a knife. Better yet, use a kitchen scale. Most recipes use 120 to 125 grams per cup of flour.
Add vital wheat gluten for whole grain loaves. Whole wheat and multigrain breads naturally produce denser results because the bran cuts through gluten strands. Adding 1 to 2 tablespoons of vital wheat gluten per loaf helps compensate and creates lighter texture.
The crust looks perfect. The house smells amazing. But when you slice into your loaf, the center is wet, gummy, and completely unappetizing. This happens when the baking cycle cannot properly penetrate the loaf.
Select the correct loaf size. Using a recipe sized for a 2-pound loaf in a 1.5-pound machine results in underbaked centers. Match your recipe to your machine’s capacity. The paddle size and heating element are calibrated for specific volumes.
Use the proper cycle for your recipe. Sweet breads, whole wheat breads, and white breads have different requirements. Sweet dough needs lower temperatures to prevent burning. Whole wheat needs longer kneading and rising. Choose the cycle that matches your recipe type.
Check your heating element. If the crust is pale while the center is gummy, the heating element may be failing. Elements can burn out partially, producing enough heat for the exterior but not the interior. Run a test cycle without ingredients and feel the pan after 10 minutes. It should be quite hot.
Remove the bread promptly after baking. Leaving bread in the machine on warm setting can create steam that makes the crust soggy and the interior gummy. Remove the loaf immediately after the cycle ends and cool on a wire rack.
The opposite problem is equally frustrating. You slice into a loaf with a crust so thick and hard you need a saw, or the crust is burned while the inside is fine.
Select a lighter crust setting. Most machines offer light, medium, and dark crust options. Start with light and adjust based on results. Your machine may run hotter than the recipe expects.
Too much sugar accelerates browning. Sugars caramelize during baking, creating darker crusts. If your recipe contains more than 2 tablespoons of sugar or honey, consider reducing the sugar or selecting a lighter crust setting.
Milk promotes faster browning than water. Recipes using milk powder or liquid milk will brown more quickly. Switch to water or select lighter settings when using milk-based recipes.
The heating element may be malfunctioning. If bread burns on one side or burns regardless of settings, the element may have hot spots or control issues. This typically requires professional repair or replacement.
What if the power goes out while your bread is baking? This happened to me during a thunderstorm last summer. Here is what you need to know.
If power returns within 10 minutes, the bread is usually fine. Leave the lid closed to retain heat. The retained warmth in the pan and dough may keep the yeast active enough to continue. When power returns, check if the machine resumes automatically. Some models have memory and pick up where they left off.
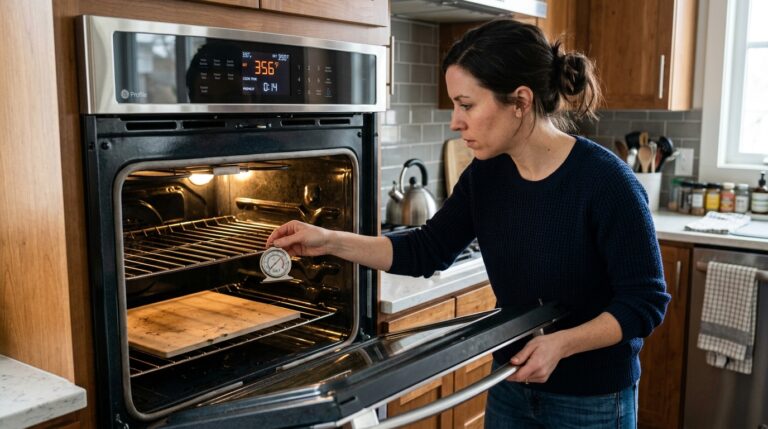
If the interruption lasts longer than 15 minutes, the results are questionable. The dough may have begun to deflate, and restarting may produce poor results. You can try removing the dough, reshaping it into a loaf pan, and baking in your conventional oven at 375 degrees Fahrenheit for 25 to 35 minutes.
Do not attempt to restart a cycle that was nearly complete. Bread that was in the final 20 minutes of baking will not benefit from restarting. Instead, check if it is done by inserting a toothpick into the center. If it comes out clean, the bread baked sufficiently. If wet, finish in a conventional oven.
Sometimes the problem is not user error or ingredients but actual component failure. Knowing when to repair versus replace can save you money and frustration.
Drive belt replacement is usually worth doing. Belts cost 10 to 20 dollars and take about 30 minutes to replace on most machines. If your machine is less than 5 years old and otherwise functions well, order the belt and fix it yourself. Many manufacturers provide replacement belt kits with instructions.
Heating element replacement depends on age. Elements can be replaced on some models but require significant disassembly. For machines over 3 years old, consider whether the repair cost approaches half the price of a new unit.
Control board failures often mean replacement. The electronic brain of your machine is expensive to replace and difficult to diagnose. If the machine behaves erratically, displays error codes constantly, or fails to respond to resets, the control board may be failing. Replacement boards often cost nearly as much as new machines.
Consider the brand and availability of parts. Panasonic and Zojirushi machines have longer lifespans and parts availability than budget brands. A 200 dollar machine that lasts 10 years with one belt replacement is cheaper than replacing a 60 dollar machine every 2 years.
Different manufacturers have different common failure modes. Understanding your brand helps with diagnosis.
Hamilton Beach machines commonly experience paddle shaft issues. The seal around the shaft can leak, causing bearing corrosion. If your paddle becomes difficult to turn by hand, this seal may be failing. Regular cleaning and drying after use extends seal life.
Panasonic machines are generally reliable but can develop lid latch problems. If your machine starts then stops unexpectedly, check that the lid is clicking firmly into place. The safety switch can become finicky over time.
Cuisinart machines sometimes have heating element control issues. If your crust color seems random regardless of settings, the thermostat may need calibration or replacement.
Breadman machines often suffer from drive belt stretching. The belts loosen over time, causing slipping rather than breaking. If kneading seems weak but the belt looks intact, try a new belt before assuming motor failure.
Environmental factors affect bread machine performance significantly. Here is how to adjust for your conditions.
High altitude requires yeast reduction. Above 3,000 feet, reduce yeast by 1/4 teaspoon per teaspoon called for. Above 5,000 feet, reduce by 1/3. Dough rises faster at altitude and can collapse if overproofed.
Humidity affects flour hydration. On humid days, flour absorbs moisture from the air, effectively making it wetter. Reduce liquid by 1 to 2 tablespoons during summer or rainy weather. On dry winter days, you may need to add a tablespoon of liquid.
Temperature affects rising speed. Yeast works faster in warm kitchens and slower in cold ones. If your kitchen is below 65 degrees Fahrenheit, the dough may need more time. Consider using the rapid cycle in cold weather or placing the machine in a warmer location.
Unplug the machine from the power outlet and wait at least 10 minutes before plugging it back in. This power cycle clears the control board memory and resolves most electronic glitches. Some models have a dedicated reset button, usually located on the back or bottom of the unit. Check your manual for model-specific reset procedures.
The most common problems include the bread pan not seating properly, kneading paddle not turning due to stuck dough or broken belt, old or expired yeast causing flat bread, too much liquid creating collapsed loaves, and heating element failure resulting in underbaked centers. About 80% of issues stem from user error rather than mechanical failure.
If your bread maker shows no signs of life, first verify the outlet works by plugging in another device. Check that the bread pan is locked firmly into place to engage the safety switch. Inspect the power cord for damage. Try unplugging for 10 minutes to reset the control board. If none of these steps work, the safety switch or control board may have failed.
If power returns within 10 minutes, leave the lid closed and let the machine resume if it has memory function. For longer outages, remove the dough and bake in a conventional oven at 375 degrees Fahrenheit for 25 to 35 minutes. Do not restart the machine if the cycle was nearly complete, as double baking ruins the texture.
A clicking sound during the kneading cycle usually indicates a broken drive belt or stripped motor coupling. The motor runs but cannot transfer power to the paddle shaft, creating a clicking noise as components slip. Unplug the machine and inspect the belt through the bottom panel. Replace if cracked, stretched, or broken.
Signs of motor failure include a humming sound without movement, burning smell during operation, or the machine overheating and shutting off. Test by starting a cycle with an empty pan. If you hear the motor but the paddle does not turn with no dough present, and the belt is intact, the motor likely needs replacement.
After working through dozens of bread machine problems over the past year, I have learned that patience and systematic diagnosis solve most issues. Your bread machine not working is rarely a catastrophic failure. More often, it is a simple fix like reseating the pan, replacing a 15-dollar belt, or switching to fresh yeast.
Start with the basics. Check power, pan seating, and paddle movement before assuming your machine is broken. Document what works and what does not for your specific model and environment. High altitude, humidity, and kitchen temperature all affect results, so do not blame the machine for environmental factors.
If you have tried everything in this guide and your machine still refuses to cooperate, it may be time for replacement. But try the troubleshooting steps first. The satisfaction of fixing a problem yourself, combined with the smell of fresh bread filling your kitchen again, makes the effort worthwhile.