Physical Address
304 North Cardinal St.
Dorchester Center, MA 02124
Physical Address
304 North Cardinal St.
Dorchester Center, MA 02124

When your oven wont turn on, it can derail dinner plans and create immediate stress for any household. This is one of the most common appliance problems homeowners face, yet many issues have surprisingly simple solutions that do not require a service call. Our team has compiled this comprehensive troubleshooting guide based on real repair experiences and manufacturer service data to help you diagnose and fix your oven quickly.
Whether you have an electric range, gas oven, or wall unit, the diagnostic process follows similar principles. You will learn to identify the root cause, test components safely, and decide when professional help is necessary. Most importantly, we will help you avoid spending money on unnecessary repairs for problems you can solve yourself in minutes.
Before diving into detailed troubleshooting, run through this quick checklist to identify the most common causes. These seven issues account for over 80 percent of oven failures according to appliance repair statistics.
1. Check Your Circuit Breaker – The most common cause is a tripped breaker. Look for a switch in the “off” position or between on and off in your electrical panel.
2. Verify Power Supply – Electric ovens need 240 volts. If the display is completely dark, you likely have a power supply issue rather than a component failure.
3. Inspect Heating Elements – For electric ovens, look for visible damage, blistering, or breaks in the bake or broil elements.
4. Test the Gas Igniter – In gas ovens, a faulty igniter prevents the gas from lighting. Listen for clicking sounds when you start the oven.
5. Check for Blown Thermal Fuse – Self-clean cycles often trip thermal fuses. Look for a small device near the control board with a reset button.
6. Examine the Control Board – Error codes, dim displays, or unresponsive buttons indicate control board problems.
7. Ensure Door Fully Closes – Safety switches prevent oven operation if the door does not seal properly.
This is perhaps the most confusing scenario for homeowners. You turn the burners on and they heat perfectly, but the oven remains cold and unresponsive. Understanding why this happens requires knowing how your range is wired.
Most electric ranges use a split power system. The stovetop burners typically operate on 120 volts and may be on a separate circuit from the oven. The oven requires 240 volts to generate enough heat for baking. This means your stovetop can work fine even when the oven has no power at all.
Gas ranges present a different situation. The cooktop burners may light with a match or have independent igniters, while the oven uses a separate ignition system. If the oven igniter fails but the cooktop still works, you will have flame on top but no heat inside the oven cavity.
Wall ovens face similar wiring logic. They often connect to dedicated 240-volt circuits separate from other kitchen appliances. A tripped breaker affecting only that circuit leaves everything else working while the oven stays dark.
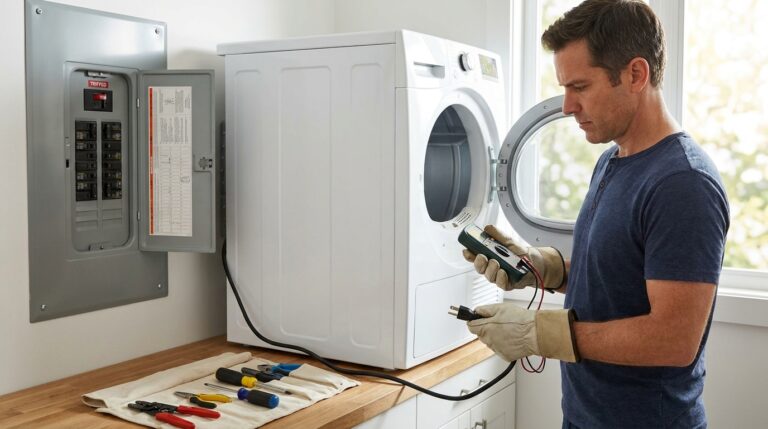
Electrical problems represent the largest category of oven failures. Before suspecting expensive component replacements, rule out these power-related issues that cost nothing to fix.
Your electrical panel is the first place to check when an oven wont turn on. Ovens draw significant power, and electrical surges or overloads can trip the breaker. Locate your home’s electrical panel and identify the breaker labeled for the kitchen or oven.
Breakers can trip partially, appearing on while actually being off. Firmly switch the breaker completely to the off position, wait ten seconds, then switch it back to on. You should feel or hear a definite click when it engages properly.
If the breaker trips again immediately after resetting, stop and call an electrician. This indicates a short circuit or wiring problem that requires professional diagnosis. Continuing to reset a tripping breaker creates fire hazards and can damage your oven further.
Thermal fuses protect your oven from overheating by cutting power when temperatures exceed safe limits. These small safety devices commonly trip during self-cleaning cycles when temperatures reach 900 degrees or higher. Once blown, the oven will not turn on at all.
Locating the thermal fuse requires removing the oven’s back panel or accessing it from the front behind the control panel. The fuse is typically a small cylindrical or rectangular component with two wires attached. Some models have a reset button you can press to restore operation.
If your thermal fuse has no reset button, you will need to replace it. These parts cost between 15 and 40 dollars and are available from appliance parts suppliers. Always disconnect power before attempting any fuse replacement.
Electric ovens require a 240-volt power supply delivered through a special outlet or hardwired connection. Problems with this supply prevent any oven function. Start by checking that the oven is properly plugged in if it uses a corded connection.
For hardwired ovens, loose connections in the junction box can interrupt power. These connections may work loose over years of use due to vibration and temperature cycling. Only qualified electricians should examine hardwired connections due to shock hazards.
Wall ovens and ranges may have power cords that degrade over time. Inspect the cord for visible damage, melting, or burning smells near the outlet. Replace damaged cords immediately to prevent fire risks.
When power reaches the oven but it still won’t heat, the problem likely involves heating components. These parts work hard and eventually wear out, requiring replacement to restore function.
Electric ovens use metal heating elements that glow red when operating. These elements can burn out after years of use, developing breaks or blisters that prevent proper heating. A visual inspection often reveals obvious damage like burn marks or separated sections.
The bake element sits at the bottom of the oven cavity while the broil element mounts at the top. Either can fail independently, causing uneven heating or complete heat loss. Turn the oven on and look for glowing elements through the oven window.
Testing elements with a multimeter provides definitive diagnosis. Disconnect power, remove the element, and test for continuity. A good element shows resistance between 10 and 40 ohms depending on wattage. No continuity means the element is broken internally and needs replacement.
Gas ovens use an igniter to light the gas burner. This component must glow white-hot to open the gas valve and ignite the fuel. Igniters weaken over time, glowing orange instead of white or failing to reach proper temperature entirely.
Listen for clicking sounds when you start a gas oven. Normal operation includes clicking followed by ignition within 60 seconds. If clicking continues without lighting, or no sound occurs at all, the igniter is likely bad.
Igniter replacement is one of the most common gas oven repairs. New igniters cost 40 to 80 dollars and typically require removing the oven bottom panel to access. Always shut off the gas supply at the wall valve before working on gas oven components.
Thermal switches monitor oven temperature and cut power if limits are exceeded. Unlike thermal fuses which permanently blow, some thermal switches can be reset. These switches often trip during self-clean cycles or when food spills cause localized overheating.
Resetting a thermal switch usually requires accessing the oven’s internal components. Look for a small button on the switch body, typically located near the control board or on the oven cavity exterior. Pressing this button restores the circuit.
If thermal switches trip repeatedly, investigate the underlying cause. Blocked vents, failing cooling fans, or control board issues may cause overheating that triggers the switch. Simply resetting without fixing the root problem wastes time and risks component damage.
Modern ovens rely on electronic control boards to manage all functions. These sophisticated components can fail in ways that prevent the oven from turning on entirely or cause erratic behavior.
The control board serves as the oven’s brain, processing button inputs and controlling heating cycles. Power surges, age, and moisture can damage these boards. Signs of control board failure include unresponsive buttons, error codes, or dim display screens.
Some control board issues are temporary and resolve with a reset. Disconnecting power for five minutes allows capacitors to discharge and can clear software glitches. Restore power and test the oven before assuming the board needs replacement.
Control board replacement is one of the more expensive repairs, typically costing 200 to 400 dollars for parts plus labor. For ovens over ten years old, compare repair costs against replacement. A new oven may be more economical than investing in an aging unit.
The temperature sensor tells the control board how hot the oven is. A failed sensor can prevent the oven from starting as a safety measure, or cause the control board to think the oven is already overheating. This results in immediate shutdown or refusal to turn on.
Sensors are typically located inside the oven cavity, protruding from the back wall. They appear as thin metal tubes about three inches long. Testing requires a multimeter set to measure resistance. At room temperature, a good sensor reads approximately 1,080 ohms.
Sensor replacement is straightforward and inexpensive. New sensors cost 15 to 35 dollars and usually attach with two screws. Always use manufacturer-recommended replacement parts to ensure accurate temperature readings.
Safety switches prevent oven operation when the door is open. These switches can stick, break, or become misaligned over time. A door that does not fully close or a faulty switch can prevent the oven from turning on entirely.
Check that the oven door closes completely and seals against the frame. Inspect the door gasket for damage that might prevent proper closure. The door latch mechanism should move freely without binding.
Door switches are usually located where the door meets the oven frame. Testing with a multimeter confirms switch operation. If the switch does not change state when the door opens and closes, replace it to restore normal function.
Now that you understand common causes, here is the systematic approach to diagnosing and fixing your oven. Follow these steps in order for the most efficient troubleshooting process.
Start with the simplest solution. Locate your electrical panel and find the breaker for the oven or kitchen. Turn it completely off, wait thirty seconds, then turn it back on firmly. Test the oven immediately after resetting the breaker.
If the breaker trips again, leave it off and call a professional. This indicates an electrical short or ground fault that requires expert diagnosis. Never tape breakers in the on position or bypass safety devices.
For corded ovens, verify the outlet provides proper voltage. You can use a multimeter or voltage tester, but if you are not comfortable working with electricity, skip to visual inspections. Check that the oven is firmly plugged in and the outlet shows no burn marks or damage.
Hardwired ovens require checking the junction box connection. This involves removing the back panel and testing with a multimeter. Due to shock hazards, consider calling an electrician if you suspect hardwiring problems.
For electric ovens, remove any racks blocking view of the bottom element. Turn the oven to bake mode and look for the element to glow red within two minutes. If it stays dark, the element likely needs replacement.
Gas oven owners should listen for clicking when starting the oven. Remove the bottom panel to view the igniter if needed. A healthy igniter glows bright white within 45 seconds. Orange or weak glowing indicates replacement is needed.
A multimeter is the most valuable diagnostic tool for oven repair. Set it to continuity or resistance mode to test elements, fuses, and sensors. Always unplug the oven or turn off the breaker before testing to avoid shock or false readings.
Test heating elements by removing the wires and touching probes to the element terminals. Good elements show low resistance, typically under 50 ohms. Infinite resistance means the element is broken inside.
Test thermal fuses for continuity. A good fuse conducts electricity with near-zero resistance. No continuity means the fuse has blown and needs replacement. Never bypass a thermal fuse as this creates fire hazards.
Many control board issues resolve with a power cycle. Turn off the breaker or unplug the oven for at least five minutes. This allows capacitors to fully discharge and clears temporary memory errors.
Restore power and observe the display. Some ovens show error codes that indicate specific problems. Consult your owner’s manual for code meanings and recommended actions. If the display returns to normal, test all oven functions before considering the issue resolved.
Understanding repair costs helps you make informed decisions about fixing versus replacing your oven. Here are typical costs for common repairs based on 2026 service call data and parts pricing.
DIY Repair Costs (Parts Only):
Heating element replacement: 25 to 60 dollars
Gas igniter replacement: 40 to 80 dollars
Thermal fuse replacement: 15 to 40 dollars
Temperature sensor replacement: 15 to 35 dollars
Door switch replacement: 15 to 30 dollars
Professional Service Costs (Parts and Labor):
Service call and diagnosis: 75 to 150 dollars
Heating element installed: 150 to 250 dollars
Gas igniter installed: 200 to 350 dollars
Control board replacement: 400 to 700 dollars
Thermal fuse installed: 150 to 200 dollars
Factor in your oven’s age when deciding. Units under five years old are usually worth repairing. Ovens between five and ten years old need case-by-case evaluation. Appliances over ten years old with major failures often justify replacement rather than expensive repairs.
Consider warranty coverage before paying for repairs. Many ovens include one-year full warranties and extended coverage on specific components like control boards or heating elements. Check your documentation or contact the manufacturer with your serial number.
While many oven problems have DIY solutions, certain situations require professional expertise. Knowing when to call for help protects your safety and prevents making problems worse.
Gas Leak Concerns – If you smell gas when the oven is off or hear hissing sounds, evacuate immediately and call your gas company from outside. Do not attempt to light the oven or operate electrical switches. Gas leaks are emergencies requiring immediate professional response.
Electrical Hazards – Sparks, burning smells, or shocked breakers indicate dangerous electrical problems. These issues can cause fires or electrocution. Leave the breaker off and contact a licensed electrician or appliance technician immediately.
Control Board Replacement – While testing control boards is straightforward, replacement often involves programming and calibration. Many modern ovens require specialized procedures to initialize new boards. Unless you are confident in your technical skills, let professionals handle control board swaps.
Warranty Considerations – DIY repairs on newer ovens may void warranties. Check your coverage before opening panels or replacing parts. Professional service using authorized parts preserves warranty protection and provides recourse if problems continue.
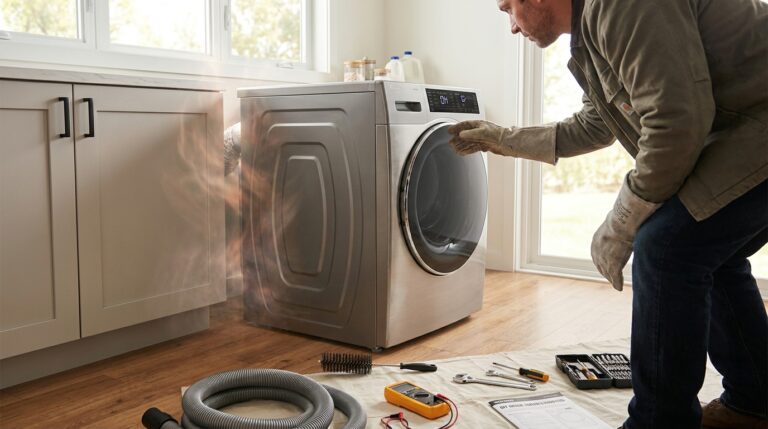
Regular maintenance prevents many common oven failures and extends appliance lifespan. Implement these simple practices to keep your oven working reliably for years.
Monthly Inspections: Check door gaskets for tears or gaps that let heat escape. Wipe down control panels to prevent buildup that can affect button response. Look for food spills on elements that might cause smoke or damage.
Quarterly Deep Cleaning: Remove and clean oven racks, door glass, and interior surfaces. Avoid harsh chemicals that damage finishes or leave residues. Clean the oven bottom to prevent debris from igniting or blocking elements.
Annual Maintenance: Inspect power cords and outlets for damage. Check that oven vents remain clear of grease and dust buildup. Consider professional inspection every two to three years for gas ovens to verify safe operation.
Smart Usage Practices: Avoid using the self-clean cycle before important cooking events. Self-clean trips thermal fuses and stresses components. Allow the oven to cool completely between heavy-use sessions. Use appropriate cookware that does not block vents or touch elements.
Start by checking your circuit breaker and resetting it if tripped. Verify the oven is receiving power by checking for display lights. For electric ovens, inspect heating elements for visible damage. For gas ovens, listen for clicking sounds indicating igniter operation. If basic checks do not resolve the issue, test components with a multimeter or call a professional technician.
Electric ranges often use separate circuits for the stovetop (120V) and oven (240V). Your stovetop can work while the oven lacks power due to a tripped breaker or wiring issue. Gas ovens use separate ignition systems for the cooktop and oven, so one can function while the other fails.
Sudden oven failure typically indicates electrical problems like a tripped breaker, blown thermal fuse, or power surge damage. Recent self-clean cycles often trip thermal protection devices. Power outages or surges can damage control boards. Check your electrical panel first, then inspect for blown fuses or loose connections.
Turn off the circuit breaker supplying the oven for five minutes minimum. This allows the control board capacitors to discharge completely. Restore power and check if the display shows normal operation. Some ovens have reset buttons on the control panel or thermal switches. Consult your owner’s manual for model-specific reset procedures.
Common causes include tripped circuit breakers, blown thermal fuses from recent high-heat cooking or self-cleaning, failed heating elements in electric ovens, bad igniters in gas ovens, and control board malfunctions. Start with power supply checks before testing individual components.
DIY igniter replacement costs 40 to 80 dollars for the part. Professional installation including the service call typically runs 200 to 350 dollars total. Igniters are one of the most common gas oven failures and generally worth repairing on ovens under ten years old.
Warning signs include unresponsive buttons, error codes on the display, dim or flickering screens, ovens that start then shut off randomly, temperature inaccuracies, and complete power loss. Control boards can fail gradually with intermittent symptoms before total failure occurs.
Unplug the oven or turn off its circuit breaker for at least five minutes. This power cycle clears temporary memory errors and allows the control system to restart fresh. After restoring power, wait for the display to initialize fully before testing any functions.
An oven that wont turn on creates immediate stress, but systematic troubleshooting resolves most issues without professional help. Start with the simplest checks like circuit breakers and power supply before testing components. Document your findings as you work through the diagnostic process.
Remember that safety comes first. Gas leaks, electrical sparks, and burning smells require immediate professional attention. Do not attempt repairs beyond your comfort level. The money saved on DIY fixes is not worth risking personal injury or property damage.
With proper maintenance and prompt attention to minor issues, your oven should provide reliable service for many years. Keep this guide handy for future reference, and share it with anyone facing the frustrating experience of an oven that won’t turn on.