Physical Address
304 North Cardinal St.
Dorchester Center, MA 02124
Physical Address
304 North Cardinal St.
Dorchester Center, MA 02124

When your water heater keeps tripping the circuit breaker, it is trying to tell you something important. I have spent years troubleshooting electrical issues in homes, and a tripping breaker is never random. It is a safety mechanism protecting you from potential fire or electrocution hazards. Understanding how water heaters work helps explain why these failures happen.
Electric water heaters draw significant power on a 240-volt circuit. When something goes wrong internally, the breaker detects abnormal current flow and shuts everything down. This is actually good news. The alternative could be melted wires, electrical fires, or worse. The challenge is figuring out what specific problem is causing the trip.
In this guide, I will walk you through the six most common reasons your water heater trips the breaker. You will learn how to identify each problem, what you can safely check yourself, and when to call a professional. I will also explain the crucial difference between a breaker that trips immediately versus one that trips after running for a few minutes. This distinction alone can save hours of diagnostic time.
If your water heater is tripping the circuit breaker repeatedly, one of these six issues is almost certainly the culprit. Based on my experience and data from hundreds of service calls, these causes account for over 95% of breaker trips.
Here are the six most common causes, listed from most to least frequent:
Each of these problems creates a different pattern of behavior. Understanding which issue you are dealing with helps determine whether you need a $30 part, a service call, or a complete water heater replacement.
One of the most useful diagnostic clues is when the breaker trips. This timing pattern points directly to the cause and can save you from replacing parts unnecessarily.
Water heater breaker trips fall into two distinct patterns, each indicating different underlying problems:
| Tripping Pattern | What It Indicates | Most Likely Causes |
|---|---|---|
| Immediate trip – Breaker trips instantly when reset | Direct short circuit exists | Shorted heating element, water intrusion, severe wiring fault |
| Delayed trip – Breaker trips after 5-15 minutes | Overload or overheating issue | Stuck thermostat, sediment buildup, weak breaker, undersized circuit |
If your breaker trips immediately when you reset it, you likely have a shorted heating element or water in contact with electrical components. This requires immediate attention and often means the water heater cannot be used until repaired.
Delayed tripping usually indicates an overheating or overload condition. The water heater runs normally for a while, draws more current than the breaker can handle continuously, and eventually trips. This pattern often points to thermostat issues or sediment buildup causing the elements to work harder.
Heating element failure accounts for roughly 40% of water heater breaker trips I have encountered. These elements are essentially metal rods that heat up when electricity passes through them. Over time, they can crack, corrode, or burn out entirely.
Inside each heating element is a resistance wire surrounded by insulation and enclosed in a metal sheath. When that sheath cracks or the seals fail, water contacts the live electrical components. This creates a direct path for electricity to flow to ground, causing an immediate short circuit that trips your breaker.
Several symptoms indicate a failing or failed heating element:
If you have replaced elements recently and the breaker still trips, double-check that the new element was installed correctly. I have seen cases where the element gasket failed or the element was cross-threaded, allowing water to seep inside.
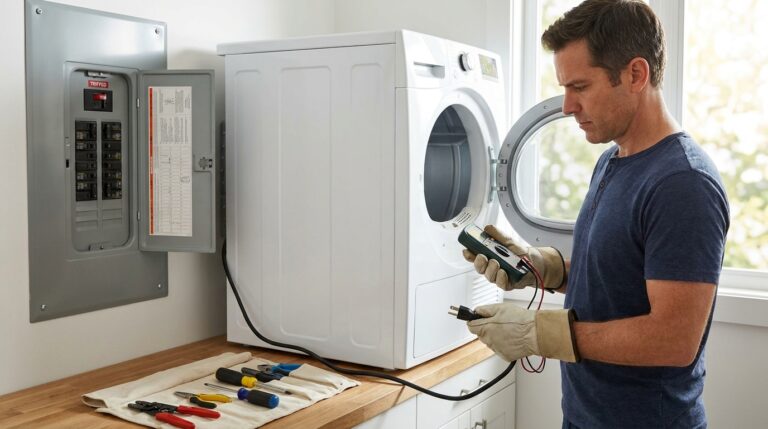
You can test heating elements yourself if you are comfortable working with electrical components and have a multimeter. Always turn off power at the breaker panel and verify with a non-contact voltage tester before touching any wires.
Remove the access panel and insulation to expose the element terminals. Set your multimeter to measure resistance (ohms). A good element should read between 10 and 16 ohms for a standard 4500-watt element. If you get zero ohms, the element is shorted. Infinite resistance means the element is burnt out and open.
Also test for continuity between the element terminals and the metal tank. Any continuity here means the element is grounded and must be replaced. This is the test that confirms a shorted element causing your breaker trips.
Heating elements cost between $20 and $50 depending on wattage and brand. Replacement is a moderate DIY job if you are handy and comfortable with electrical work. However, working inside a 240-volt electrical panel carries real risks. If you are not completely confident, call a professional. Labor costs typically run $150 to $300 for element replacement.
The thermostat controls when your heating elements turn on and off. When it fails, the element can stay on continuously, drawing high amperage that eventually overheats and trips the breaker.
Electric water heaters typically have two thermostats, one for the upper element and one for the lower. These devices sense water temperature and cut power to the elements when the set temperature is reached. A stuck or malfunctioning thermostat fails to open the circuit, creating a constant load.
Thermostat issues produce distinct symptoms:
A thermostat stuck in the “on” position is particularly dangerous because it can overheat the tank to dangerous levels. Modern water heaters have emergency cutoff switches, but these can also fail. If your water is coming out dangerously hot, treat this as an urgent safety issue.
Testing a thermostat requires a multimeter and some electrical knowledge. You are checking that the thermostat opens and closes the circuit properly at the correct temperature. Many homeowners find it easier to replace both thermostats at once since they are inexpensive and often fail around the same age.
Thermostat replacement parts cost $15 to $40. The job involves disconnecting wires, removing the old unit, and installing the new one with proper connections. Always photograph the wiring before disassembly to ensure correct reconnection.
Loose, corroded, or damaged wiring creates resistance that generates heat and can trip breakers. This category includes problems at wire nuts, connections in the junction box, and the wiring run between your electrical panel and the water heater.
I have seen numerous cases where the problem was not the water heater at all, but the connections feeding it. Aluminum wiring in older homes is particularly prone to this issue. Correct wire size for water heater installations matters because undersized wire overheats under load.
Look for these specific issues when inspecting your water heater wiring:
Aluminum wiring deserves special mention. Common in homes built between 1965 and 1973, aluminum expands and contracts more than copper with temperature changes. This movement loosens connections over time, creating fire hazards. If your home has aluminum wiring and your water heater is tripping breakers, call an electrician immediately.
With power off at the breaker, remove the junction box cover on top of your water heater. Look for discolored wires, melted insulation, or loose connections. Check that wire nuts are tight and show no signs of overheating. Any burnt smell or visible damage means you need professional help before restoring power.
Sometimes the breaker itself is the problem. Breakers can weaken with age, trip at lower amperages than rated, or be incorrectly sized for your water heater from the start.
A standard electric water heater needs a dedicated 240-volt circuit with proper amperage rating. Most residential units require a 30-amp double-pole breaker, though larger tanks may need 40 or 50 amps. Using our proper breaker size for your water heater guide ensures you have the right protection.
Breakers can fail in ways that cause nuisance tripping:
Before assuming the breaker is bad, verify your water heater is not actually drawing excessive current. You can check this with a clamp meter on the circuit wires. If the amperage is within normal range but the breaker still trips, the breaker itself is likely worn out.
Breaker sizing must match both the water heater requirements and the wire gauge in your walls. You cannot simply install a larger breaker if the wiring cannot handle the increased load. Our circuit breaker size calculator helps determine the correct rating for your specific installation.
If your water heater was recently replaced and now trips the breaker, the new unit may draw more power than the old one. Always verify the wattage rating on the data plate and ensure your electrical service can support it.
Water and electricity do not mix. Any leak that allows water to contact electrical components can cause immediate breaker trips and serious safety hazards.
Water intrusion typically happens in specific locations on electric water heaters. The most common entry points are the element access panels, the junction box on top, and around the temperature and pressure relief valve. Tank leaks that run down the sides can also reach electrical components.
Look for these indicators that water is contacting electrical parts:
If you find water in the electrical compartments, do not attempt to restore power until the source is identified and repaired. This is a situation where professional help is strongly advised. The combination of water and 240-volt electricity is extremely dangerous.
Tank leaks are particularly concerning because they indicate the water heater may need replacement. Once the tank itself is compromised, repairs are temporary at best. If your water heater is over 10 years old and showing signs of tank failure, replacement is usually the most cost-effective solution.
Over time, minerals in your water settle at the bottom of the tank, forming a layer of sediment. This buildup forces heating elements to work harder and longer, eventually drawing enough extra current to trip the breaker.
Hard water accelerates this problem significantly. In areas with high mineral content, sediment can accumulate several inches thick in just a few years. The elements become buried in this insulating layer, unable to efficiently transfer heat to the water.
Sediment buildup produces characteristic signs:
These noises occur when water trapped under the sediment layer boils and bubbles up through the deposit. The sound is your water heater struggling to work efficiently.
Regular flushing removes sediment before it causes problems. Most manufacturers recommend draining and flushing the tank annually, or more frequently in hard water areas. This simple maintenance task can extend water heater life by years and prevent the breaker trips caused by overheating.
To flush your water heater, attach a garden hose to the drain valve at the bottom and run it to a floor drain or outside. Open the valve and let water flow until it runs clear. This process takes 15-30 minutes for heavily sedimented tanks.
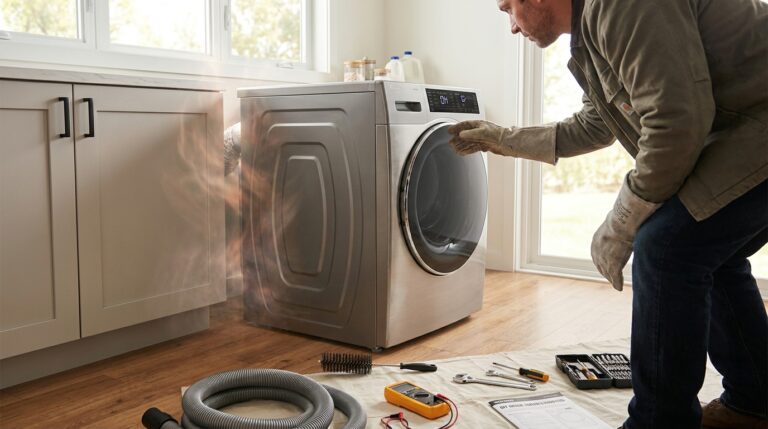
Before calling a professional, there are safe diagnostic steps you can take to narrow down the cause. Working with 240-volt electricity requires caution, but visual inspection and basic testing are within most homeowners’ capabilities.
Follow these steps in order, stopping immediately if you encounter anything you are not comfortable handling:
Turn off the breaker at your main electrical panel. Never rely on just the water heater’s disconnect switch. Use a non-contact voltage tester to verify power is actually off before touching any wires. This step is not optional. Working on live 240-volt circuits can kill you.
Inspect the area around and under your water heater. Look for water pooling, damp spots, or rust stains. Check the temperature and pressure relief valve discharge tube for signs of leaking. Any moisture indicates a leak that may be affecting electrical components.
Remove the upper and lower access panels on your water heater. Look for burn marks, melted insulation, loose wires, or corrosion on wire nuts. Smell for any burning odor. Take photos of the wiring before touching anything so you can restore proper connections.
Verify that all wire nuts are tight and show no signs of overheating. In homes with aluminum wiring, look for white powdery corrosion at connections. If you find any questionable connections, tighten or replace them as needed.
If you have a multimeter and are comfortable using it, test the heating elements as described earlier. Check resistance between the terminals and between each terminal and the tank shell. Record your readings for reference.
After completing your inspection and any repairs, restore power and observe. If the breaker trips immediately again, you have a serious electrical fault that requires professional diagnosis. Do not continue resetting the breaker repeatedly. This creates fire risks and can damage your electrical panel.
There are clear boundaries between DIY-friendly troubleshooting and situations requiring professional help. Knowing when to stop can prevent injuries, code violations, and more expensive repairs down the line.
Call a licensed electrician or plumber immediately if you encounter any of these situations:
The cost of a service call is trivial compared to the risks of electrical shock, fire, or code violations that could affect your home insurance. Professional diagnosis typically costs $100-$200 and provides peace of mind that the problem is correctly identified.
Remember that water heaters combine two hazardous elements: water and high-voltage electricity. This is not the place to push your DIY limits if you have any doubts about your skills or the problem’s severity.
When your water heater keeps tripping the breaker, you face a decision: repair the existing unit or replace it entirely. The right choice depends on the specific problem, the age of your water heater, and the costs involved.
Here is a decision matrix to help you evaluate your options:
| Problem | DIY Part Cost | Professional Repair Cost | Replace If Unit Is… |
|---|---|---|---|
| Heating element failure | $20-$50 | $150-$300 | Over 12 years old |
| Thermostat failure | $15-$40 | $150-$250 | Over 10 years old |
| Wiring issues | $10-$30 | $200-$400 | Over 8 years old with other issues |
| Breaker replacement | $15-$50 | $150-$300 | Not applicable |
| Tank leak | Not repairable | Not repairable | Any age – replace immediately |
| Multiple element/thermostat failures | $50-$100 | $300-$500 | Over 8 years old |
A new electric water heater costs $500-$1,500 installed depending on capacity and features. If your current unit is approaching or exceeding its 10-12 year expected lifespan, replacement often makes more financial sense than pouring money into repairs.
Consider a gas vs electric water heater comparison if you are facing replacement. Gas units have higher upfront costs but lower operating expenses in many areas. Our guide to the best water heaters can help you choose a reliable replacement unit.
Most water heater breaker trips can be prevented with simple annual maintenance. A few hours of attention each year can extend your water heater’s life and avoid the inconvenience of cold showers and electrical problems.
Here are the maintenance tasks that prevent the issues described in this guide:
Drain and flush your water heater annually to remove sediment buildup. In hard water areas, do this twice yearly. The process takes about 30 minutes and prevents the overheating that strains heating elements and trips breakers.
The anode rod sacrifices itself to protect your tank from corrosion. Check it every 2-3 years and replace when it is significantly depleted. A healthy anode rod prevents tank leaks that cause water intrusion and electrical shorts.
Annually inspect the wiring compartment for signs of overheating, corrosion, or loose connections. Tighten wire nuts and look for any developing problems before they cause breaker trips.
Lift the T&P valve lever briefly each year to verify it operates freely. This valve prevents dangerous pressure buildup that can damage your tank and plumbing. Replace the valve if it leaks or does not reseal properly.
Include your water heater breaker in your annual electrical panel checkup. Look for loose connections, corrosion, or signs of overheating at the breaker terminals. A loose connection here causes heat buildup and nuisance tripping.
The most common reasons are a burnt out or shorted heating element, faulty thermostat, loose wiring connections, circuit breaker failure, water intrusion into electrical components, or sediment buildup causing overheating. A shorted heating element is the most frequent culprit, occurring when the metal sheath cracks and allows water to contact internal electrical components.
First turn off power at the breaker panel. Check for visible leaks and inspect wire connections for looseness or corrosion. Test heating elements with a multimeter for shorts or open circuits. If the element is bad, replace it. If wiring is damaged, repair connections. If you are not comfortable working with 240-volt electricity, call a licensed electrician or plumber for safe diagnosis and repair.
Yes, a repeatedly tripping breaker indicates a serious electrical fault that poses fire and shock hazards. The breaker is doing its job by cutting power when it detects abnormal current flow. Continuing to reset the breaker without fixing the underlying problem risks electrical fire, equipment damage, or electrocution. Stop resetting the breaker and have the problem diagnosed by a professional.
Delayed tripping usually indicates an overload or overheating problem rather than a direct short. Common causes include a stuck thermostat that keeps the heating element on continuously, sediment buildup forcing the element to work harder, a weak breaker that trips under sustained load, or an undersized circuit that cannot handle normal operating current. The delay happens because the problem develops as the water heater runs.
Immediate tripping indicates a direct short circuit. The most common cause is a shorted heating element where water has contacted internal electrical components. Other causes include water intrusion into electrical compartments, severely damaged wiring with bare conductors touching metal, or a failed internal component creating a ground fault. Immediate trips require immediate professional attention before the breaker is reset again.
Signs of a bad heating element include lukewarm water, the breaker tripping immediately when reset, sizzling or popping sounds from the tank, rusty hot water, or a burning smell. You can test elements with a multimeter set to ohms. A good element reads 10-16 ohms. Zero ohms indicates a short. Infinite resistance means the element is burnt out. Any continuity between element terminals and the tank metal indicates a dangerous ground fault requiring immediate replacement.
A water heater tripping the circuit breaker is a protective response, not a random annoyance. The six most common causes are burnt out heating elements, faulty thermostats, wiring problems, breaker failure, water intrusion, and sediment buildup.
The pattern of tripping provides valuable diagnostic information. Immediate trips suggest short circuits requiring urgent attention. Delayed trips indicate overload conditions that develop as the water heater operates.
While some diagnostic steps are safe for homeowners, working with 240-volt electricity has serious risks. Know your limits and call a professional when you encounter burned wiring, aluminum connections, immediate recurring trips, or any situation where you feel uncertain.
Regular maintenance including annual flushing, anode rod checks, and electrical inspections prevents most breaker trips before they happen. A few hours of prevention each year protects against cold showers, emergency repairs, and potential safety hazards in your home.