Physical Address
304 North Cardinal St.
Dorchester Center, MA 02124
Physical Address
304 North Cardinal St.
Dorchester Center, MA 02124

Discovering your fridge temperature dial stuck is one of those small problems that quickly becomes a big headache. You reach to adjust the temperature, but the knob refuses to budge. Meanwhile, your milk is warming up, your vegetables are wilting, and you are wondering if you need to call an expensive repair technician.
I have fixed stuck refrigerator dials dozens of times over the years, and here is the good news: most stuck dials are caused by simple ice buildup or minor mechanical issues you can resolve yourself. This guide walks you through every solution I have tested, from quick five-minute fixes to more involved troubleshooting steps. By the end, you will know exactly how to unstick that dial and when it is time to call a professional.
Food safety is the main reason to address a stuck temperature dial immediately. When your refrigerator cannot maintain proper temperatures, bacteria multiply rapidly in what food safety experts call the “danger zone” between 40°F and 140°F.
Your refrigerator should stay at 37°F (3°C) and your freezer at 0°F (-18°C). A stuck dial can leave your fridge too warm, causing spoilage and potential foodborne illness, or too cold, wasting energy and freezing items that should stay chilled. I have seen families lose hundreds of dollars in groceries because they waited too long to fix a stuck dial they assumed was a major repair job.
Before you grab tools or start disassembling anything, try these simple methods that solve about 70% of stuck dial cases. These techniques work because most stuck dials are caused by ice formation around the thermostat mechanism or minor debris in the control assembly.
Unplug your refrigerator from the power outlet and remove all food items. This is the safest approach because it removes the root cause—ice buildup—without forcing anything mechanical.
Leave the refrigerator unplugged for 24 hours with the doors open. Place towels around the base to catch melting water. After a full day, the ice around the temperature control mechanism should have melted completely.
Plug the refrigerator back in and wait two hours for it to reach operating temperature. Try turning the dial. It should move freely now. This method has worked for me on everything from full-size KitchenAid units to compact dorm fridges.
If you cannot unplug for a full day, try this faster approach. Soak a thick hand towel in hot water and wring it out until damp but not dripping. Wrap the towel around the temperature control knob and surrounding panel.
Leave the towel in place for 15-20 minutes. The heat transfers through the plastic and melts ice around the thermostat shaft. Remove the towel and try gently turning the knob. If it still sticks, repeat the process with fresh hot water. I have used this method successfully on a Samsung freezer dial that was frozen solid after a power outage caused excess humidity.
Sometimes a stuck dial is actually an electronic glitch rather than a physical problem. Unplugging your refrigerator for 2-5 minutes resets the control board and can resolve stuck digital controls or electronically linked dials. Understanding your refrigerator power requirements helps you know it is safe to unplug briefly without concern.
After plugging back in, wait for the control panel to fully initialize before testing the dial. This simple reset fixes more issues than most people expect, especially on newer models with electronic temperature controls.
If the dial is physically seized, you can try gentle assistance. Cover the knob with a soft cloth to protect the plastic, then grip lightly with needle-nose pliers. Turn slowly in the direction you need—do not force it if you meet resistance.
Apply steady, gentle pressure for 10-15 seconds. If the dial does not move, stop immediately. Forcing it can break the internal mechanism and turn a simple fix into an expensive repair. I only recommend this method when you can see visible ice and other methods have failed.
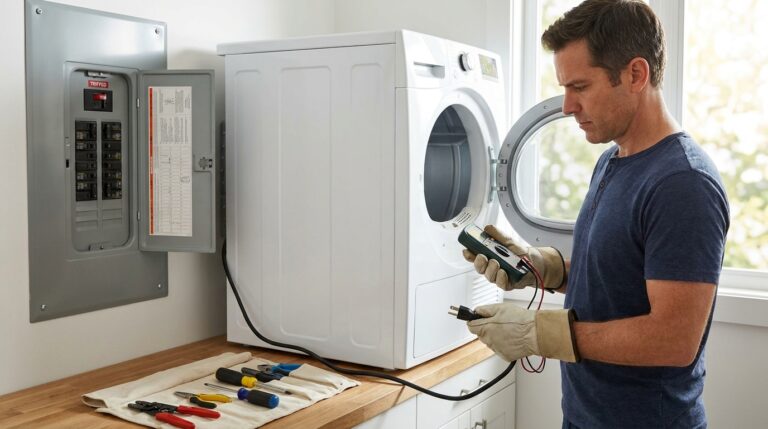
When the simple fixes do not work, it is time to inspect the control knob itself. This process takes about 10 minutes and requires no special tools beyond a flathead screwdriver and possibly a flashlight.
Safety comes first. Always unplug your refrigerator before working on any internal components. This prevents electric shock and protects the control board from damage during inspection.
Most refrigerator control knobs pull straight off with gentle, steady pressure. Grip the knob firmly with both hands and pull directly away from the panel. Do not twist or rock the knob—this can break the shaft.
If the knob resists removal, look for a small set screw on the side of the knob. Some GE and Frigidaire models use a tiny hex screw that must be loosened before the knob releases. Check your owner manual if you are unsure about your specific model.
Once removed, examine both the knob and the metal shaft it attaches to. Look for these common issues:
Cracks in the plastic knob can prevent it from gripping the shaft properly. A cracked knob needs replacement—you can order one from the manufacturer or find universal knobs at hardware stores.
Ice or frost on the metal shaft indicates condensation problems. Wipe the shaft completely dry with a cloth and let it air out for 10 minutes before reattaching the knob.
Corrosion or rust suggests moisture has been entering the control area repeatedly. This indicates a larger humidity issue that needs addressing to prevent future sticking.
Try turning the exposed metal shaft with your fingers or a small flathead screwdriver (used gently). If the shaft turns easily without the knob attached, your problem is the knob itself—either cracked or with stripped interior grips. If the shaft still refuses to turn, the thermostat mechanism itself is likely faulty.
One of the most common questions I hear is whether the stuck dial means you need a whole new thermostat. Here is how to diagnose the real problem without guesswork.
The refrigerator maintains proper temperatures despite the stuck dial. You can hear the compressor cycling on and off normally. The dial feels physically stuck but you can see no damage to the knob itself. When you remove the knob, the metal shaft turns freely. A replacement knob costs $5-15 and takes two minutes to install.
The refrigerator runs constantly or not at all regardless of dial position. You hear clicking sounds from the compressor area as it tries to start. Food spoils even when the dial shows the coldest setting. The freezer builds up excessive frost while the fridge stays warm. Temperature fluctuates wildly between too cold and too warm.
If these symptoms match your situation, the thermostat itself is likely faulty. A replacement thermostat costs $30-60 for the part, or $125-190 installed by a professional.
While the basic fixes work for most refrigerators, certain brands have quirks worth knowing. Here is what I have learned from repairing specific models.
Whirlpool units often have a locking mechanism on the control dial. Try pushing the knob inward slightly while turning—it may need to be depressed to unlock. Many Whirlpool models also have a control lock feature; hold the lock button for 3 seconds to release the dial.
Samsung fridges frequently use digital controls with a physical dial backup. If your Samsung dial is stuck, try the digital buttons first—they often override the physical dial. Check for a “Control Lock” icon on the display; press and hold for 5 seconds to unlock.
These brands commonly use set screws on their control knobs. Look for a small screw on the side or bottom of the knob that must be loosened before removal. The thermostat shaft on these models also tends to accumulate gummy residue from temperature fluctuations—clean it with rubbing alcohol if you find sticky buildup.
GE upright freezers are notorious for dials that freeze in place during humid weather. The hot water towel method works especially well here. GE dials also tend to crack after years of use; if yours is more than 10 years old, order a replacement knob before attempting removal—the old one may break apart.
Mini fridges, especially Danby models, have the highest rate of stuck dial complaints. These compact units lack proper insulation around the control area, making ice buildup a constant issue. The defrost method works best here, but be prepared to repeat it seasonally. I recommend running a mini fridge on a slightly warmer setting (4 instead of 5) to reduce condensation around the controls.
Once you have fixed your stuck dial, take these steps to prevent the problem from returning. A few minutes of maintenance saves hours of frustration later.
Manual-defrost refrigerators need complete defrosting every 6-12 months. Even frost-free units benefit from an annual deep clean where you unplug and let any hidden ice melt away. Mark your calendar for a spring defrost session.
Wipe down the temperature control knob and surrounding panel monthly with a dry cloth. Remove the knob every 3 months and clean the shaft with rubbing alcohol to prevent gummy buildup. If you notice condensation around the controls, address the humidity source immediately.
Dirty condenser coils force your refrigerator to work harder, creating excess frost that can freeze controls. Clean the coils every 6 months using a vacuum with a brush attachment or a coil cleaning brush. This simple task extends your refrigerator’s life and prevents many temperature control issues. For related appliance care tips, see our guide on fixing ice buildup issues in other household equipment.
High kitchen humidity causes condensation that freezes around controls. Use your range hood when cooking, fix any kitchen plumbing leaks promptly, and consider a small dehumidifier if your kitchen stays humid. Keep the refrigerator away from heat sources like ovens and dishwashers that create temperature fluctuations.
Sometimes a stuck dial signals a deeper problem that requires professional repair. Knowing when to call saves you from wasting time on DIY fixes that will not work.
The thermostat shaft will not turn even after complete defrosting. You hear buzzing or clicking from the compressor that was not there before. The refrigerator fails to maintain temperature even when the dial moves freely. You see refrigerant leaks (oily residue) around the control area. The control board shows error codes you cannot clear.
DIY knob replacement costs $5-15 for the part and takes 5 minutes. DIY thermostat replacement costs $30-60 for parts and requires 30-60 minutes of work plus basic tools. Professional thermostat repair costs $125-190 including parts and labor. Control board replacement costs $200-600 depending on your refrigerator model.
For units under 10 years old, professional repair usually makes sense. The average refrigerator lifespan is 14-17 years, so a 7-year-old fridge has plenty of life left after a repair. For units over 15 years, consider whether upgrading to a new refrigerator might be smarter than investing in repairs. Our guide to counter-depth refrigerator models can help you explore modern options if replacement makes more sense.
Refrigerator thermostat repair typically costs $125-$190 including parts and labor. DIY thermostat replacement costs $30-$60 for the part alone. If only the control knob needs replacement, expect to pay $5-$15 for the part.
Control board replacement costs $200-$600. It is worth repairing if your refrigerator is under 10 years old and otherwise functional. For units over 15 years, replacement is usually more economical since the average refrigerator lifespan is 14-17 years.
Yes, unplugging a refrigerator for 2-5 minutes resets the control board and can resolve minor electronic glitches. This also initiates a defrost cycle that may unfreeze a stuck dial. Wait 24 hours after plugging back in for full temperature stabilization.
Signs of a broken thermostat include: freezer building up frost while fridge stays warm, food spoiling despite correct dial setting, fridge running constantly or not at all, clicking sounds from the compressor, and temperature fluctuating wildly even when the dial is set correctly.
1) Unplug the refrigerator from the power outlet. 2) Wait 5 minutes for capacitors to discharge completely. 3) Plug the refrigerator back in. 4) Wait 24 hours for full temperature stabilization before evaluating if the reset solved your problem.
Fix temperature control issues by: checking that settings are not locked, unplugging for 2-5 minutes to reset the control board, cleaning condenser coils, ensuring proper ventilation around the unit, and replacing the thermostat if the dial is physically broken or the temperature remains unstable.
Test with a multimeter set to continuity. Remove the thermostat, place probes on the terminals, and test at different temperature settings. No continuity reading when the dial is turned means the thermostat is faulty and needs replacement. Clicking sounds without compressor startup also indicate a bad thermostat.
Pressing the defrost button activates a manual defrost cycle. The compressor stops, and built-in heaters melt frost from the evaporator coils. Water drains to a collection pan beneath the fridge. The cycle lasts 20-45 minutes depending on your model, then cooling resumes automatically.
A fridge temperature dial stuck does not have to mean an expensive repair bill or spoiled groceries. In most cases, simple defrosting or a quick reset solves the problem completely. I have personally resolved stuck dials on everything from vintage refrigerators to modern smart units using the methods in this guide.
Start with the safest approach—unplugging for a complete defrost—and work your way through the techniques until you find what works for your situation. Remember that food safety is the priority: if your fridge cannot maintain safe temperatures while you troubleshoot, transfer perishables to a cooler with ice or a neighbor’s refrigerator temporarily.
With a little patience and the right approach, that stubborn dial will turn freely again. And once you have solved the immediate problem, follow the prevention tips to keep it from happening in 2026. Your refrigerator will thank you with years of reliable service.