Physical Address
304 North Cardinal St.
Dorchester Center, MA 02124
Physical Address
304 North Cardinal St.
Dorchester Center, MA 02124

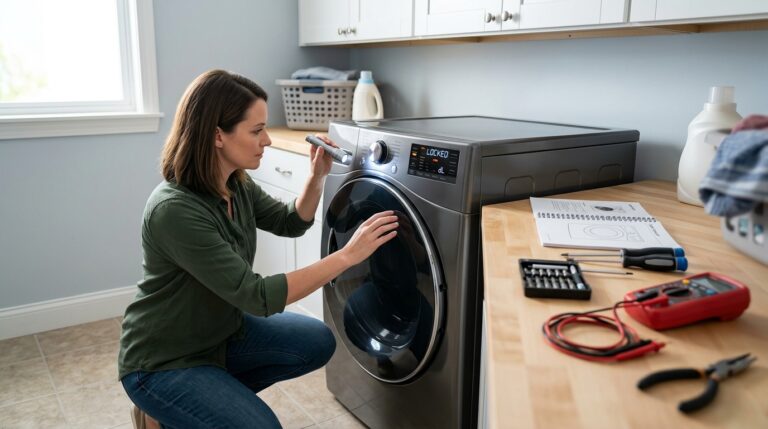
Nothing is more frustrating than pulling out a load of laundry only to find your clothes are still soaking wet. You check the dryer and realize it has been tumbling for an hour, but the clothes are cold and damp. Your dryer is running, but it is not heating up at all.
I have been troubleshooting appliances for over a decade, and a dryer that runs but produces no heat is one of the most common issues homeowners face. The good news is that many causes have simple fixes you can handle yourself in under 30 minutes. Some problems, however, require professional attention or replacement parts.
In this guide, I will walk you through everything you need to know about a Dryer Not Heating Up. We will cover quick checks you can do right now, the six most common causes of heating failures, the differences between electric and gas dryer problems, and when it makes sense to repair versus replace your appliance. Whether you have a 2-year-old Samsung or a 15-year-old Whirlpool, this troubleshooting guide will help you get your dryer back to producing hot air.
Before you grab tools or start disassembling anything, run through these quick checks. About 40% of dryer heating issues can be solved with these simple fixes.
If you have gone through this checklist and your dryer still is not heating, it is time to dig deeper into the six common causes below.
When your dryer runs but blows cold air, one of these six issues is almost certainly to blame. I have ordered them from easiest to most complex, so start at the top and work your way down.
The lint screen is your dryer’s first line of defense, and when it gets clogged, airflow drops dramatically. Without proper airflow, the heating system cannot function safely, and modern dryers will shut down the heat to prevent fires.
Most people know to clean the lint screen after every load, but few realize it needs a deep clean monthly. Fabric softener and dryer sheet residue can build up an invisible film that blocks airflow even when the screen looks clean.
To properly clean your lint screen, remove it from the dryer and scrape off loose lint with your fingers. Then wash it under warm running water with a drop of dish soap and a soft brush. Rinse until water flows freely through the mesh, then dry completely before reinstalling. I recommend doing this deep clean once a month for optimal performance.
A blocked vent is the number one cause of dryer heating problems, according to appliance repair forums I monitor. When the vent hose gets clogged with lint, the dryer overheats and safety systems shut down the heating element or gas burner.
Signs of a blocked vent include clothes taking much longer to dry, the dryer feeling unusually hot on the outside, and a burning smell during operation. You might also notice lint accumulating around the dryer door seal or on the floor behind the machine.
To check your vent, pull the dryer away from the wall and disconnect the vent hose from the back. Look inside both the hose and the wall connection. If you see lint buildup, that is your problem. Use a vent brush or vacuum attachment to clean the hose thoroughly.
For the exhaust duct running through your wall, I recommend using a dryer vent cleaning kit with flexible rods that reach deep into the ductwork. Clean the entire run at least once a year, or more often if you do heavy laundry loads.
Also check that the vent hose is not crushed or kinked behind the dryer. The transition hose should be as short and straight as possible. Flexible foil or plastic hoses are prone to crushing and should be replaced with semi-rigid aluminum ducting.
Power problems are tricky because the dryer can appear to work normally while getting no heat. Understanding how your dryer gets its power is essential for proper troubleshooting.
Electric dryers require 240 volts to operate. This comes from two 120-volt circuits in your electrical panel. One circuit powers the motor and controls, the other powers the heating element. If the motor circuit breaker trips, the dryer will not run at all. But if only the heating circuit breaker trips, the dryer will tumble happily while blowing completely cold air.
Go to your electrical panel and locate the dryer breaker. It should be a double breaker, meaning two switches connected together. Flip both switches fully off, then back on. Even if they look like they are on, resetting them can restore power to the heating element.
If the breaker trips again immediately, stop and call an electrician. This indicates a serious electrical fault that could be a fire hazard.
For gas dryers, power issues are different. Gas dryers only need 120 volts to run the motor and controls. The heat comes from natural gas or propane. If your gas dryer is not heating, check that the gas valve behind the dryer is fully open. You should also verify that your home has gas service. A simple way to check is to see if your gas stove or furnace is working.
From my experience monitoring repair forums, Samsung dryers seem particularly prone to power-related heating issues, especially when one leg of the 240-volt supply fails. If you have a Samsung dryer that runs but does not heat, check the outlet voltage with a multimeter before replacing any parts.
The thermal fuse is a safety device that cuts power to the heating system when the dryer overheats. Unlike a circuit breaker, a thermal fuse is a one-time-use component. Once it blows, it must be replaced.
Thermal fuses blow for a reason. Usually, the root cause is restricted airflow from a clogged vent or lint screen. Simply replacing the fuse without fixing the underlying airflow problem is a recipe for repeated failures. I have seen homeowners replace the same thermal fuse three times in six months because they never addressed the vent blockage.
Locating the thermal fuse depends on your dryer model. On most dryers, it is on the blower housing or near the heating element. You will need to remove the back panel or front lower panel to access it. The fuse is typically white, about an inch long, and has two wires connected to it.
To test the fuse, use a multimeter set to continuity mode. Touch one probe to each terminal. If the meter beeps or shows zero resistance, the fuse is good. If it shows infinite resistance or no reading, the fuse is blown and needs replacement.
Replacement fuses cost between $10 and $30, making this one of the more affordable repairs. However, if you are not comfortable working with electrical components, call a technician. The labor charge typically adds $100 to $150 to the repair.
The heating element is the heart of an electric dryer’s heat production. It is essentially a large wire coil that gets hot when electricity passes through it. Over time, these coils can break or burn out, stopping heat production completely.
Signs of a bad heating element include the dryer running but producing no heat at all, or producing some heat but not enough to dry clothes. You might also notice a burnt smell right before the element fails completely.
Testing a heating element requires a multimeter. First, unplug the dryer and locate the element, usually at the back behind a panel. Remove the wires from the element terminals and set your multimeter to measure resistance (ohms). Touch one probe to each terminal. A good element typically shows resistance between 5 and 50 ohms, depending on the model. Infinite resistance means the element is broken internally.
Visually inspecting the element can also reveal problems. Look for breaks in the coil wire or blistering on the metal housing. Sometimes you can spot a broken coil without testing at all.
Heating elements cost between $30 and $150, depending on your dryer brand and model. Installation is moderately complex and requires disconnecting wires and mounting screws. If you are handy with tools, this is a reasonable DIY repair. Otherwise, expect to pay $200 to $300 total for professional replacement.
Gas dryers use a completely different heating system than electric models. Instead of a heating element, they have a gas burner assembly with an igniter, gas valve, and flame sensor. Problems with any of these components can stop heat production.
The igniter is the most common failure point in gas dryers. It glows red hot to ignite the gas when the dryer calls for heat. Over time, igniters can crack or burn out. You can often see a broken igniter by removing the front panel and watching during a cycle. A good igniter will glow brightly for about 15 seconds before the gas ignites. If it glows weakly or not at all, it needs replacement.
The flame sensor detects when the burner is lit and keeps the gas valve open. If the sensor fails, the gas valve closes immediately, and you get no heat. Testing the flame sensor requires a multimeter set to continuity mode. It should show continuity at room temperature.
Gas valve failures are less common but more serious. If the valve is not opening to release gas, you will get no heat. However, testing and replacing gas valves involves working with gas lines, which creates safety risks. I strongly recommend calling a professional for any suspected gas valve problems.
One important note: if you smell gas around your dryer at any time, stop immediately. Do not operate the dryer. Turn off the gas valve behind the appliance and call your gas company or a qualified technician. Gas leaks are serious fire and explosion hazards.
Understanding which type of dryer you own is crucial for effective troubleshooting. Electric and gas dryers share some common problems like vent blockages and thermal fuses, but their heating systems are fundamentally different.
Electric dryers use a heating element that works like a giant toaster coil. Electricity passes through resistant wire, generating heat that a blower pushes into the drum. These dryers need a 240-volt outlet and typically cost less upfront than gas models. However, electricity is usually more expensive than natural gas, making operating costs higher over time.
Gas dryers use a burner assembly that ignites natural gas or propane to create heat. They only need a standard 120-volt outlet for the motor and controls. Gas dryers cost more to purchase but are cheaper to operate, especially if you do heavy laundry loads. They also tend to dry clothes slightly faster due to higher heat output.
When troubleshooting an electric dryer not heating up, focus on the heating element, high-limit thermostat, and 240-volt power supply. These are the unique failure points for electric models. The heating element is a wear item that typically lasts 8 to 12 years with normal use.
For gas dryers, pay attention to the igniter, flame sensor, and gas valve. Igniters are the weak point in most gas dryer designs, usually failing every 5 to 7 years. You might also encounter gas supply issues that have nothing to do with the dryer itself, such as utility outages or shutoff valves being accidentally turned off.
Safety considerations differ significantly between the two types. Electric dryers present standard electrical shock hazards when disassembled. Gas dryers add the risk of gas leaks and carbon monoxide if not properly vented. Always ensure gas dryers have adequate ventilation to the outside, and never operate a gas dryer with a damaged or disconnected vent hose.
From a repair cost perspective, electric dryer heating elements are usually cheaper and easier to replace than gas dryer burner assemblies. A typical heating element costs $40 to $80 and takes 30 minutes to install. Gas dryer igniters cost $20 to $50, but accessing the burner assembly can be more complex depending on the model.
Standing in front of a broken dryer, every homeowner faces the same dilemma. Do I fix this thing or buy a new one? The answer depends on several factors including age, repair cost, and the specific problem causing your dryer not heating up.
Age is the first consideration. Dryers under 5 years old are almost always worth repairing. Major components should still be under warranty, and even out-of-warranty repairs are cost-effective. For dryers between 5 and 10 years old, repair makes sense if the fix costs less than half the price of a new dryer. Once a dryer passes 10 years, replacement becomes more attractive, especially if multiple problems are developing.
The type of repair matters too. Simple fixes like replacing a thermal fuse ($10 to $30 part, minimal labor) or cleaning a vent (free if DIY) are no-brainers on any age dryer. Heating element replacement ($200 to $300 total cost) is reasonable on dryers up to 8 years old. Control board failures ($300 to $500 repairs) rarely make sense on dryers over 7 years.
Consider efficiency when making your decision. A 2026 Energy Star certified dryer uses about 20% less energy than older models. If your current dryer is from 2015 or earlier, upgrading could save $30 to $50 annually on utility bills. Over a 10-year lifespan, those savings add up.
Brand also plays a role in the repair decision. Whirlpool, Maytag, and Kenmore dryers have widely available parts and reasonable repair costs. Some high-end brands like Miele or certain Samsung models have expensive proprietary parts that make repairs costly. Check parts availability and pricing before committing to a major repair.
Finally, think about your dryer’s overall condition. If it has been reliable until now and this is the first major problem, repair is probably wise. But if you have already fixed three other issues in the past two years, those repair costs are adding up. At some point, you are throwing good money after bad.
Working on appliances involves risks, and dryers are no exception. Before you start troubleshooting or attempting any repairs, understand these safety essentials.
Always unplug electric dryers before removing panels or touching internal components. The 240-volt power inside can deliver a lethal shock. Even when unplugged, capacitors in some models can hold a charge. Wait a few minutes after unplugging before working on the dryer.
Gas dryers require extra caution. Never work on gas components with the gas supply turned on. Locate the shutoff valve behind the dryer and turn it perpendicular to the pipe to stop gas flow. If you smell gas at any point, stop immediately, evacuate the area, and call your gas company from outside the home.
Ventilation safety is critical for gas dryers. These appliances produce carbon monoxide during combustion, which must be vented outside. Never operate a gas dryer with a disconnected or damaged vent hose. Ensure the vent hood outside opens freely when the dryer runs. A stuck vent hood can force dangerous gases back into your home.
Know your limits. If you are not comfortable working with electrical components or gas lines, call a professional. Appliance repair technicians are trained and insured for this work. The cost of professional service is far less than the cost of a mistake that damages your home or injures someone.
Fire safety is another concern. Lint buildup is highly flammable, and a blocked vent combined with a overheating element creates serious fire risk. Clean your lint screen after every load and inspect your vent system monthly. If you ever see smoke or smell burning, stop the dryer immediately and unplug it.
The best way to deal with a dryer not heating up is to prevent the problem from happening in the first place. A simple maintenance routine takes just minutes each month but can add years to your dryer’s life.
Clean the lint screen after every single load. Not most loads, not when you remember. Every single load. This takes 10 seconds and is the most important thing you can do for dryer health. Once a month, wash the screen with soap and water to remove fabric softener buildup.
Inspect your vent hose every three months. Pull the dryer out and check that the hose is not crushed, kinked, or disconnected. Look for lint accumulation at connection points. If you see buildup, clean it immediately. Replace foil or plastic vent hoses with semi-rigid aluminum ducting, which is safer and more durable.
Deep clean the entire vent system annually. This means disconnecting the hose from both the dryer and wall, cleaning the ductwork with a vent brush kit, and checking the exterior vent hood for obstructions. If your vent run is long or has multiple bends, consider professional cleaning every two years.
Do not overload your dryer. Heavy loads strain the motor and heating system. They also create more lint and reduce airflow. Follow your dryer’s capacity guidelines, usually found in the manual or on a sticker inside the door. When in doubt, split large loads in half.
Keep the area around your dryer clean. Lint and dust accumulate behind and beneath the appliance, creating a fire hazard. Vacuum this area every few months. Also ensure the dryer has adequate clearance from walls for proper airflow. Check your manual for minimum clearance requirements.
Consider scheduling professional maintenance every few years, especially for gas dryers. A technician can test gas pressure, check electrical connections, inspect the drum seals, and identify developing problems before they cause a breakdown. This preventative service typically costs $100 to $150 but can prevent much more expensive repairs later.
The most common causes are a tripped circuit breaker (for electric dryers), clogged lint screen, blocked vent hose, or blown thermal fuse. The dryer motor runs on a separate circuit from the heating element, so it can tumble without producing heat. Check your circuit breaker first, then clean the lint screen and inspect the vent for blockages.
First, check and reset the circuit breaker by turning both switches off and back on. For electric dryers, both 120-volt breakers must be on to provide 240 volts for heat. Clean the lint screen completely and check that the vent hose is not crushed. Some dryers have a reset button on the thermal fuse or control board, but most require fixing the underlying problem before heat returns.
For dryers under 5 years old, repair is almost always worthwhile. For 5 to 10-year-old dryers, repair makes sense if the cost is under half the price of a new unit. Dryers over 10 years old should be evaluated based on overall condition and repair history. Simple fixes like thermal fuses or cleaning are worth doing on any age dryer. Major repairs like control boards rarely make sense on older units.
Heating element replacement costs $200 to $300 including parts and labor. This makes sense for dryers under 8 years old that have been otherwise reliable. The element itself costs $40 to $150 depending on the model. If you can DIY the repair, it is definitely worth doing on any dryer under 10 years old. Consider the dryer’s overall condition and whether other problems are developing before making your decision.
This pattern usually indicates an overheating safety shutdown. The thermal fuse or high-limit thermostat is cutting power to the heating element when temperatures get too high. The root cause is almost always restricted airflow from a clogged lint screen or blocked vent. Clean both thoroughly before replacing any parts, or the problem will repeat immediately.
A dryer not heating up is frustrating, but it is rarely a mystery. In most cases, the problem comes down to one of six common causes: a clogged lint screen, blocked vent, power issue, blown thermal fuse, failed heating element, or gas system problem. Start with the simple checks and work your way toward more complex diagnostics.
Remember that safety comes first. Unplug electric dryers before servicing, turn off gas supplies when working on gas models, and know when to call a professional. Some repairs are simple DIY projects, while others require specialized knowledge and tools.
Preventive maintenance is your best defense against future heating problems. Clean the lint screen every load, inspect the vent quarterly, and schedule deep cleaning annually. These simple habits can extend your dryer’s life by years and prevent the inconvenience of unexpected breakdowns.
If you have worked through this guide and your dryer still is not heating up, it may be time to call a qualified appliance repair technician. They have the tools and expertise to diagnose complex control board issues, wiring problems, and other advanced failures. Whether you repair or replace, understanding what caused your dryer not heating up helps you make an informed decision and prevent the problem from happening again.