Physical Address
304 North Cardinal St.
Dorchester Center, MA 02124
Physical Address
304 North Cardinal St.
Dorchester Center, MA 02124

Your generator sits quietly in the garage for months, a reliable backup you rarely think about until the lights go out. When you finally need it during a storm or power outage, you pull the cord or hit the electric start button and hear nothing but silence. I have been there myself during a winter ice storm when my 7-year-old generator refused to start with a freezer full of food at risk.
Generator not working? Check fuel levels and freshness, verify oil level, inspect the battery and connections, reset the circuit breaker, and ensure proper choke position. These five steps fix 80% of generator failures.
In this comprehensive troubleshooting guide, I will walk you through diagnosing and fixing a generator not working, from simple 5-minute fixes to more involved repairs. You will learn the most common problems, when you can handle repairs yourself, and when to call a professional.
Before tearing into your generator, run through this checklist. Most generator failures stem from these eight issues:
1. Check fuel level and valve position. Ensure the tank has fresh gasoline and the fuel valve is turned to the ON position. Stale fuel over 6 months old causes starting problems.
2. Verify oil level. Remove the dipstick and check oil level. Most generators have a low-oil shutdown feature that prevents starting when oil is low.
3. Inspect battery connections. For electric start models, check that battery terminals are clean and tight. A dead or weak battery is the most common electric start failure.
4. Reset circuit breakers. Look for a reset button or toggle switch on the generator panel or outlets. Overloaded generators trip breakers to protect the system.
5. Set choke properly. Cold engines need the choke closed or partially closed. After starting, gradually open the choke as the engine warms.
6. Check the air filter. Remove the air filter cover and inspect for dirt or damage. A clogged filter chokes the engine of air.
7. Test the spark plug. Remove the spark plug and check for carbon buildup or wet fouling. A worn plug should be replaced.
8. Verify the kill switch. Make sure the engine stop switch is in the RUN position, not STOP or OFF.
If these quick checks do not solve your problem, continue reading for detailed troubleshooting of each system.
Battery failure accounts for more generator starting problems than any other single issue. Electric start generators rely on a 12-volt battery similar to your car, and these batteries degrade over time especially when left unused.
Sulfation buildup is the primary culprit. When a battery sits discharged for extended periods, lead sulfate crystals form on the plates and harden. This process reduces the battery’s ability to hold a charge. Even with a trickle charger, batteries older than 3 years often fail to provide enough cranking amps.
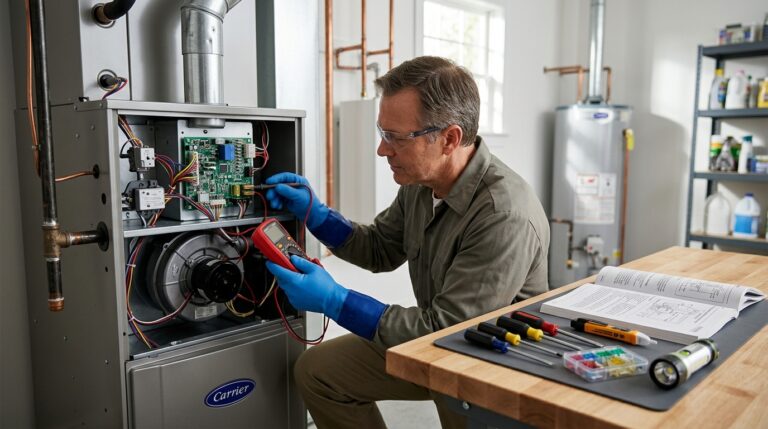
To test your generator battery, use a multimeter set to DC voltage. Touch the red probe to the positive terminal and black to negative. A fully charged battery reads 12.6 volts or higher. Anything below 12.4 volts indicates a partially discharged battery. Below 12.0 volts means the battery needs charging or replacement.
Clean corroded terminals with a wire brush and baking soda solution. Disconnect the negative terminal first, then positive. Scrub until you see shiny metal, then reconnect positive first followed by negative. Apply dielectric grease to prevent future corrosion.
If your battery keeps dying between uses, check for parasitic drain. Some generators have clocks, displays, or alarm systems that slowly drain the battery. Disconnect the battery negative cable when storing the generator for more than 2 weeks. A battery maintainer or tender prevents discharge during storage.
Replace the battery if it fails to hold a charge above 12.4 volts after charging, shows physical swelling or damage, or is more than 4 years old. Most generator batteries cost $40 to $80 and are available at auto parts stores.
Fuel-related problems rank second in generator failure causes. Gasoline begins degrading within 30 days and becomes problematic after 6 months of storage.
Fuel oxidation creates varnish that coats carburetor jets and internal passages. Ethanol-blended fuels absorb moisture from the air, leading to phase separation where water settles in the tank bottom. This contaminated fuel prevents proper combustion or damages the engine.
Check your fuel freshness by smelling the gasoline. Fresh fuel smells like petroleum. Stale fuel smells sour or like varnish. Drain old fuel completely using the fuel shutoff valve or a siphon pump. Dispose of stale fuel properly at a hazardous waste facility.
The fuel valve position catches many owners off guard. Most portable generators have a fuel valve with three positions: ON, OFF, and sometimes RESERVE. Ensure the valve points to ON for operation. Some valves use icons instead of words; the line or arrow indicates fuel flow direction.
Clogged fuel lines restrict fuel flow to the carburetor. Disconnect the fuel line at the carburetor inlet and place the end in a container. Open the fuel valve and check for steady fuel flow. A trickle or no flow indicates a blockage in the line or fuel filter. Blow compressed air through the line in reverse direction or replace the fuel filter.
Carburetor cleaning solves many fuel-related starting issues. Remove the carburetor bowl nut and drain any stale fuel. Spray carburetor cleaner into all jets and passages. Use a thin wire to clear stubborn clogs in the emulsion tube and main jet. Reassemble with a new bowl gasket if the old one is brittle.
For generators stored over winter, drain the fuel system completely or add fuel stabilizer to fresh gas before storage. Run the generator for 10 minutes after adding stabilizer to circulate treated fuel through the carburetor. This simple step prevents 90% of spring starting problems.
If you frequently experience fuel issues, consider dual-fuel generators that can run on propane or gasoline. Propane does not degrade in storage and burns cleaner than gasoline.
Modern generators include a low-oil shutdown system that protects the engine from damage. When oil drops below minimum levels, the sensor kills the engine or prevents starting entirely.
Check oil level on level ground with the engine cool. Remove the dipstick, wipe it clean, reinsert fully, then remove again to read. The oil should reach the full mark or fall within the cross-hatched area. Add oil if below minimum, but do not overfill.
Use the oil type specified in your manual. Most generators use 10W-30 conventional oil for general use. For cold climates below 40 degrees Fahrenheit, 5W-30 synthetic oil improves cold-weather starting. For hot climates above 80 degrees, 15W-40 provides better high-temperature protection.
The low-oil sensor itself can malfunction. If oil level is correct but the generator still will not start, temporarily disconnect the low-oil sensor wire to test. If the generator starts with the sensor bypassed, replace the sensor. Never operate a generator long-term without a functioning low-oil sensor.
Change generator oil every 50 to 100 hours of operation or annually, whichever comes first. For standby generators that rarely run, change oil every 6 months regardless of hours. Dirty oil triggers false low-oil shutdowns and damages internal components.
The spark plug ignites the fuel-air mixture in the combustion chamber. A fouled or worn spark plug prevents ignition entirely.
Remove the spark plug using a socket wrench and inspect the electrode. A healthy plug has a tan or light brown color on the insulator tip. Black carbon deposits indicate a rich fuel mixture or clogged air filter. Wet fuel on the plug suggests flooding or no spark.
Test for spark by reconnecting the spark plug wire and grounding the plug threads against the engine block. Pull the recoil starter while watching the gap. A bright blue spark should jump across the electrode. No spark or weak orange spark indicates ignition system problems.
Set the spark plug gap using a feeler gauge according to manufacturer specifications, typically 0.024 to 0.030 inches for most generators. Incorrect gaps cause hard starting and poor performance.
Replace spark plugs annually or every 100 hours. NGK and Champion are reliable brands that match most generator specifications. A new spark plug costs $5 to $10 and takes 5 minutes to install.
If you have no spark with a new plug, test the ignition coil. Remove the kill wire from the coil and test for spark again. If spark returns, the problem lies in the kill switch circuit. If still no spark, replace the ignition coil. Coils typically cost $30 to $60.
Engines need clean air to mix with fuel. A clogged air filter restricts airflow and causes hard starting or stalling under load.
Remove the air filter cover and inspect the element. Foam filters can be washed in soapy water, dried completely, and re-oiled with filter oil. Paper filters should be tapped clean or replaced if heavily soiled. Never run a generator without an air filter.
The spark arrestor screen at the muffler exit also clogs over time, especially with two-stroke engines or carbon-heavy four-strokes. Remove the muffler cover and clean the screen with a wire brush. A clogged arrestor causes power loss and overheating.
Choke settings confuse many generator owners. For a cold start, close the choke completely or set to the START position. As the engine warms over 2 to 3 minutes, gradually open the choke to the RUN position. Leaving the choke closed after warmup causes black smoke, fouled plugs, and poor performance.
If the choke lever feels stuck, the choke plate inside the carburetor may be gummed up. Spray carburetor cleaner into the throat while working the choke lever to free it. A stuck open choke causes hard cold starting. A stuck closed choke causes flooding and black smoke.
One of the most frustrating generator problems occurs when the engine runs perfectly but produces no electricity at the outlets. This indicates an alternator or voltage regulation problem, not an engine problem.
Residual magnetism loss is a common cause. Generators create electricity through electromagnetic induction, which requires a small magnetic field in the rotor to start the process. If the generator sits unused for months, this residual magnetism fades. Without it, the alternator cannot generate voltage.
Field flashing restores residual magnetism using an external power source. Follow this procedure carefully:
Step 1: Start the generator and let it run at normal speed.
Step 2: Obtain a 12-volt battery and two insulated jumper wires with alligator clips.
Step 3: Connect one wire to the positive battery terminal and touch the other end briefly to the positive brush terminal on the alternator.
Step 4: Connect the second wire to the negative battery terminal and touch the other end briefly to the negative brush or frame ground.
Step 5: Remove both connections after 1 to 2 seconds. Check for voltage at the outlets.
Never hold the connections for more than a few seconds as this can damage the windings. If flashing restores power, the generator should maintain residual magnetism with regular use. Flash again if the problem recurs after long storage.
The Automatic Voltage Regulator (AVR) maintains steady output voltage. A failed AVR produces no power, low voltage, or fluctuating voltage. AVR failure symptoms include voltage dropping under load or output showing zero on a voltmeter despite the engine running.
Test AVR by checking voltage at the outlet with a multimeter set to AC volts. Normal output ranges from 110 to 125 volts depending on your region. Zero volts or wildly fluctuating readings suggest AVR problems.
AVR replacement requires disconnecting wires and removing mounting screws. Take a photo before disconnecting to ensure proper reassembly. Generic AVRs cost $30 to $80 while OEM parts run $100 to $300. Match the part number exactly for compatibility.
Circuit breaker problems also prevent power output. Generators have two types: main breakers protecting the entire unit and individual outlet breakers. Reset all breakers by firmly switching to OFF then back to ON. A breaker that trips immediately indicates an overload or short circuit.
Loose or corroded connections between the alternator and outlets interrupt power flow. Inspect wiring harnesses for damage, especially where wires exit the frame. Rodents sometimes chew wiring on stored generators.
Batteries lose capacity in cold temperatures. At zero degrees Fahrenheit, a battery produces only 40% of its normal power. Combined with thickened oil, cold weather creates significant starting challenges.
Store batteries indoors during winter or use a battery maintainer in an unheated garage. A battery blanket or heater wrap improves starting in extreme cold below 20 degrees Fahrenheit. Keep the battery fully charged; a partially discharged battery freezes at higher temperatures.
Oil viscosity increases in cold weather, making the engine harder to turn over. Synthetic 5W-30 oil flows better at low temperatures than conventional 10W-30. For extreme cold below zero, consider a block heater or magnetic oil pan heater to warm the engine before starting.
Starting procedure for cold weather differs from warm conditions. Close the choke fully before pulling or using electric start. Choke may need to stay partially closed for 5 to 10 minutes in extreme cold. Run the generator under light load initially to warm up before applying heavy loads.
Store generators in a protected area if possible. A garage or shed keeps the unit warmer than outdoor exposure. Never run a generator inside enclosed spaces due to carbon monoxide poisoning risk, but storing indoors between uses is safe and recommended.
Every generator has built-in circuit protection to prevent damage from overloads. Understanding how these systems work helps you reset properly and avoid future trips.
The main circuit breaker controls total generator output. Individual outlet breakers protect specific receptacles. Some generators also have a ground fault circuit interrupter (GFCI) that trips from current leakage.
Reset any tripped breaker by pushing firmly to OFF then back to ON. A gentle toggle may not fully reset the mechanism. If the breaker trips immediately upon starting, disconnect all loads and try again. A breaker that holds without load but trips when connecting devices indicates an overload condition.
Calculate your load before connecting devices. Add the running watts of all connected appliances. Ensure the total stays below the generator’s rated continuous wattage, not the maximum surge rating. Motors like refrigerators and air conditioners draw 2 to 3 times their running watts during startup.
Spread heavy loads across multiple circuits if your generator has several outlets. Avoid connecting everything to one receptacle. Use a power distribution box for construction or RV setups to balance loads properly.
If you frequently trip breakers, your generator may be undersized for your needs. Use our generator sizing calculator to determine the correct wattage for your specific requirements.
Basic generator maintenance and troubleshooting requires minimal investment in tools. Here is what you need for most common repairs:
Hand Tools: Socket set with spark plug socket, combination wrench set, screwdrivers (flat and Phillips), pliers, and wire cutters. A magnetic pickup tool helps retrieve dropped fasteners.
Testing Equipment: Digital multimeter for voltage and continuity testing, spark plug tester, and compression tester for advanced diagnosis. A $20 multimeter handles 90% of electrical testing needs.
Cleaning Supplies: Carburetor cleaner spray, compressed air, shop rags, wire brush for terminal cleaning, and baking soda for neutralizing battery acid.
Safety Equipment: Safety glasses, nitrile gloves for fuel handling, and hearing protection for testing running generators. Work in a well-ventilated area when using cleaning solvents.
Consumables: Keep spark plugs, air filters, oil filters if applicable, and fuel stabilizer on hand. Having these items ready prevents delays when problems occur.
Total investment for a basic generator tool kit runs $100 to $150. Professional diagnosis and repair typically costs $75 to $150 per hour plus parts, making DIY repairs cost-effective for most common problems.
Knowing when to stop troubleshooting and call a professional saves time, money, and prevents further damage. Some repairs require specialized tools or expertise beyond typical homeowner capability.
DIY-Appropriate Repairs: Battery replacement, spark plug changes, air filter cleaning, carburetor cleaning, oil changes, fuel system draining, basic electrical testing, and circuit breaker resets. These repairs require basic hand tools and cost $5 to $50 in parts.
Professional Repairs: Internal engine problems like low compression, valve issues, or piston damage. Alternator rewinding or rotor replacement. Complex electrical diagnosis involving control boards or sensors. Major fuel system rebuilds requiring special tools.
Consider the 50% rule for repair decisions. If repair costs exceed 50% of a new generator’s price, replacement makes more sense. A $400 generator needing $250 in repairs should be replaced. A $1500 standby generator justifies $500 in professional service.
Professional service costs vary by region and generator type. Portable generator diagnosis runs $75 to $125. Standby generator service calls cost $150 to $300 plus parts. Hourly shop rates range from $80 to $150.
If your generator suffers repeated failures despite proper maintenance, consider upgrading to a more reliable unit. Browse our recommendations for portable generators for home backup or explore whole-house standby generators for permanent automatic backup power.
Regular maintenance prevents 95% of generator failures. Follow this schedule to keep your generator ready when needed.
Every 50 Hours or Annually: Change engine oil and inspect oil filter if equipped. Check spark plug condition and clean or replace. Clean or replace air filter. Inspect fuel lines for cracks or leaks. Test battery voltage and clean terminals.
Every 100 Hours or Bi-Annually: Replace spark plug. Clean spark arrestor screen. Inspect and adjust valve clearance on some models. Check alternator brushes if accessible. Test output voltage under load.
Annual or Pre-Season: For standby generators, schedule professional service annually. Change oil regardless of hours. Replace fuel filter. Inspect belts and hoses. Test automatic transfer switch operation. Run full load test for 30 minutes.
Storage Preparation: For seasonal storage over 30 days, add fuel stabilizer and run 10 minutes to circulate. Change oil to remove contaminants before storage. Clean exterior and remove debris. Store in dry location with battery disconnected or on maintainer. Cover to protect from dust.
Keep a maintenance log recording dates, hours, and services performed. This helps identify patterns and proves maintenance history if warranty claims arise. Understanding generator operating costs including maintenance helps budget for ownership.
Test run your generator monthly for 15 to 20 minutes under light load. This exercise keeps components lubricated, charges the battery, and verifies operation before an emergency occurs.
A generator stops working due to fuel problems (old gas or clogs), battery failure, low oil levels triggering safety shutdowns, spark plug fouling, or air filter blockage. Electrical issues like tripped circuit breakers, failed AVR, or lost residual magnetism also prevent operation. Check fuel freshness, oil level, and battery condition first as these account for 80% of failures.
Battery failure is the most common problem with electric start generators, especially after storage periods. For recoil start models, stale fuel and carburetor clogs are the leading causes. Both issues are preventable with proper maintenance including battery charging and fuel stabilization before storage.
Yes, most generators have reset buttons or circuit breakers. Portable generators typically have toggle-style breakers on the outlet panel or control panel that trip when overloaded. Push firmly to OFF then ON to reset. Standby generators may have electronic reset procedures through the control panel display.
If your generator runs but produces no power, try field flashing to restore residual magnetism. With the generator running, briefly connect a 12V battery to the brush terminals for 1-2 seconds. Check and reset all circuit breakers. If problems persist, the AVR (Automatic Voltage Regulator) may need replacement.
A generator that starts then stalls typically has a fuel delivery problem such as a clogged carburetor jet, restricted fuel line, or failing fuel pump. It may also indicate an overload condition tripping the breaker, low oil shutdown activating, or a partially blocked air filter choking the engine under load.
Change portable generator oil every 50 to 100 hours of operation or annually, whichever comes first. For standby generators, change oil every 100 to 200 hours or annually during professional service. Always check oil level before each use and top off as needed.
Fixing a generator not working requires systematic diagnosis starting with the most common causes. Check fuel, oil, battery, and breakers first before moving to deeper troubleshooting. The eight-step diagnostic checklist at the beginning of this guide solves most problems in under 10 minutes.
Regular maintenance prevents the frustration of a failed generator during emergencies. Follow the 50-hour maintenance schedule, use fuel stabilizer, and exercise your generator monthly. These simple habits keep your backup power ready when storms, outages, or emergencies strike.
If repairs exceed your comfort level or the 50% replacement threshold, consult a professional technician or consider upgrading to a more reliable unit. The peace of mind knowing your generator will start when needed is worth the investment in proper care or quality replacement.