Physical Address
304 North Cardinal St.
Dorchester Center, MA 02124
Physical Address
304 North Cardinal St.
Dorchester Center, MA 02124

Choosing between a 110V vs 220V mini split can make or break your HVAC project. I have helped dozens of homeowners navigate this decision, and the wrong voltage choice often leads to expensive rewiring or inadequate climate control.
The voltage you select determines your unit’s BTU capacity, installation complexity, and long-term operating costs. Most people do not realize that 110V mini splits are limited to smaller spaces, while 220V systems open up options for whole-home comfort but require professional electrical work.
In this guide, I will explain the real differences between these voltage options. You will learn which spaces suit each type, what installation actually involves, and how to assess your existing electrical setup before you buy.
For those ready to explore specific models, our team has tested and reviewed the best mini split heat pump systems available in 2026.
A 110V mini split operates on standard household electricity found in every North American home. These units plug into regular outlets and typically handle cooling and heating loads up to 12,000 BTU.
A 220V mini split requires a dedicated circuit with double-pole breakers and heavier gauge wiring. These systems can power units ranging from 9,000 BTU up to 48,000 BTU or higher for multi-zone configurations.
You might see 115V, 120V, or 110V used interchangeably. Manufacturers and electricians often refer to the same voltage level using different nominal values. The same applies to 220V, 230V, and 240V systems.
The fundamental difference lies in how electricity flows. A 110V circuit uses one hot wire, one neutral wire, and a ground. A 220V circuit uses two hot wires that each carry 110V but are out of phase, combining to deliver higher power capacity.
BTU capacity represents the maximum heating or cooling output your mini split can deliver. Higher BTU ratings mean the unit can condition larger spaces or handle extreme temperature swings.
110V mini splits top out at approximately 12,000 BTU in most residential applications. You will find 9,000 BTU and 12,000 BTU as the standard offerings for this voltage class.
220V mini splits start at 9,000 BTU and extend well beyond 36,000 BTU for residential units. Commercial-grade 220V systems can reach 60,000 BTU or more when configured as multi-zone setups.
The physics behind this limitation is straightforward. Higher BTU output requires more power, measured in watts. Power equals voltage multiplied by amperage (P = V x I). A standard 110V circuit with 15-amp capacity can only deliver about 1,650 watts safely. A 220V circuit on a 30-amp breaker can deliver 6,600 watts.
An 18,000 BTU mini split requires 220V power in nearly all cases. The amperage draw for 18,000 BTU at 110V would exceed safe residential circuit limits.
At 110V, an 18,000 BTU unit would pull approximately 18-20 amps continuously. This exceeds the 80% safety rule for 15-amp and 20-amp circuits, making installation unsafe and likely violating local electrical codes.
Manufacturers design 18,000 BTU units exclusively for 220V circuits. You will not find legitimate 110V mini splits rated at this capacity from reputable HVAC brands.
| Voltage | Typical BTU Range | Max Room Size | Amperage Draw |
|---|---|---|---|
| 110V / 115V | 9,000 – 12,000 BTU | Up to 400 sq ft | 8-12 amps |
| 220V / 240V | 9,000 – 48,000+ BTU | 400 – 2,000+ sq ft | 5-25 amps |
Efficiency ratings for mini splits use SEER (Seasonal Energy Efficiency Ratio) for cooling and HSPF (Heating Seasonal Performance Factor) for heating. Higher numbers indicate better efficiency and lower operating costs.
220V mini splits typically achieve higher SEER ratings than 110V equivalents. The larger compressors in 220V units often feature more advanced inverter technology and variable-speed motors that optimize energy consumption.
However, the actual efficiency difference per BTU of output is smaller than many people assume. A well-designed 110V 12,000 BTU unit can approach the efficiency of a comparable 220V model, though the 220V version generally maintains a 5-10% advantage.
Amperage draw represents how much electrical current flows through your circuit. Voltage determines the pressure pushing that current. Together they calculate total power consumption in watts.
Ohm’s Law governs these relationships: Power (Watts) = Voltage (Volts) x Current (Amps). For the same BTU output, a 110V mini split pulls roughly twice the amperage of a 220V unit.
A 12,000 BTU mini split running on 110V typically draws 10-12 amps. The same capacity unit on 220V draws 5-6 amps. Both consume similar total wattage, but the 220V version distributes the load more evenly across your electrical panel.
Electricity bills measure consumption in kilowatt-hours (kWh), not voltage or amperage separately. For identical BTU ratings and usage patterns, both voltage types cost nearly the same to operate.
Where 220V units save money is in their ability to serve larger spaces with single systems. Running one efficient 24,000 BTU 220V unit costs less than operating two 12,000 BTU 110V units to condition the same area.
Our analysis of forum discussions and homeowner reports shows typical monthly operating costs of $30-60 for 110V units cooling 300-400 sq ft spaces. Comparable 220V units in 600-800 sq ft spaces run $50-90 monthly depending on climate and usage.
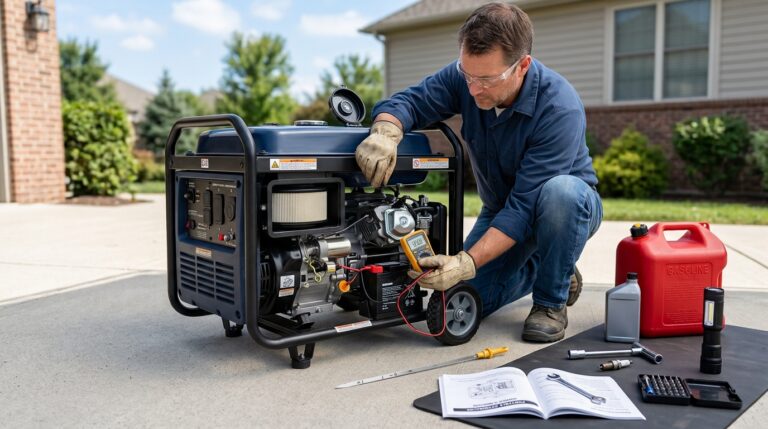
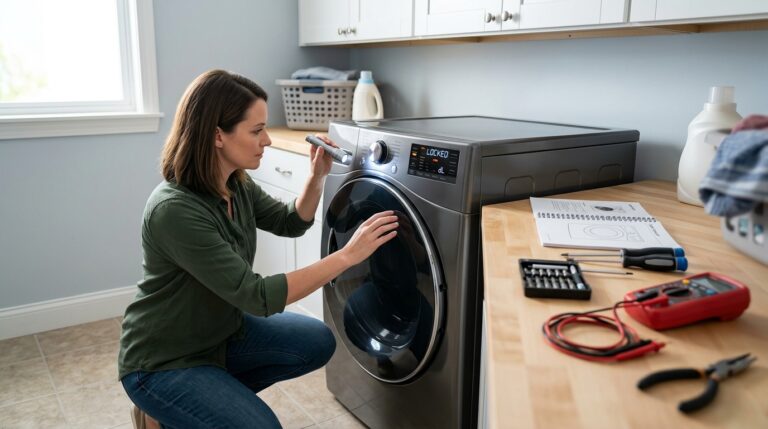
Installation complexity represents the most significant practical difference between voltage options. This factor alone drives many purchasing decisions more than efficiency or capacity considerations.
110V mini splits offer true plug-and-play installation in most cases. You connect the refrigerant lines, mount the indoor and outdoor units, then plug into a nearby outlet. Many homeowners complete this work as DIY projects over a weekend.
220V mini splits require electrical work that most jurisdictions restrict to licensed electricians. You need to run new wiring from your electrical panel, install a double-pole circuit breaker, and create a dedicated circuit with the correct wire gauge.
A 110V mini split needs a grounded three-prong outlet on a dedicated 15-amp or 20-amp circuit. The outlet should sit within reach of the unit’s power cord, typically 6-10 feet from the indoor unit mounting location.
Dedicated circuit means no other devices share that breaker. Running a microwave, space heater, or power tools on the same circuit while your mini split operates can trip the breaker and shut down your climate control.
Most garages, workshops, and spare bedrooms already have suitable outlets available. You simply verify the circuit capacity and ensure no other loads share the breaker.
220V installation requires a double-pole circuit breaker, typically 20-amp or 30-amp depending on unit size. The breaker occupies two slots in your electrical panel and connects to two hot bus bars rather than one.
Wire gauge must match the breaker rating and unit specifications. Common configurations include:
The outdoor unit needs a disconnect switch within sight of the unit for safety and code compliance. This adds $50-100 in materials and requires additional wiring runs.
Many 110V mini splits qualify for DIY installation, especially pre-charged systems that eliminate the need for professional refrigerant handling. Homeowners with basic electrical knowledge can safely complete these installations.
Our team has tested and reviewed DIY mini split units that simplify the installation process with quick-connect refrigerant lines and pre-charged systems.
220V installations almost always require professional electricians for the electrical portion. Permit requirements vary by jurisdiction, but most areas mandate licensed work for new 220V circuits. Expect to pay $500-1,500 for professional electrical installation depending on panel location and wiring distance.
Before choosing 220V, you must verify your electrical panel can accommodate the new circuit. This assessment prevents costly surprises after purchasing your mini split.
Check for available breaker slots first. Open your electrical panel and count empty spaces. A 220V breaker requires two adjacent slots. If your panel is full, you face either a subpanel installation or complete panel replacement.
Assess your panel’s total amperage capacity. Most modern homes have 200-amp service, which handles additional 220V circuits easily. Older homes with 100-amp service may struggle if you already run electric dryers, water heaters, or other heavy loads.
Calculate the total connected load by adding the amperage of all existing 220V appliances plus your proposed mini split. Electricians use demand factors since not everything runs simultaneously, but a rough calculation reveals potential issues.
Electrical panels distribute power across two 110V legs that combine to create 220V. Balanced loads prevent uneven stress on your electrical system.
110V mini splits draw entirely from one leg, potentially creating imbalance if multiple large loads share that side. 220V mini splits naturally balance across both legs, which electricians consider preferable for panel health.
If you already notice flickering lights when large appliances cycle, your panel may have existing balance issues. Adding a 220V mini split can actually help by distributing load more evenly than another 110V circuit would.
Selecting the right voltage starts with measuring your space accurately. Square footage provides the baseline, but ceiling height, insulation, and sun exposure affect your actual BTU needs.
110V mini splits suit spaces under 400 square feet in moderate climates. Typical applications include home offices, bedrooms, workshops, and small garages. These units handle well-insulated rooms up to 500 square feet in mild regions.
220V mini splits become necessary for spaces exceeding 400-500 square feet or areas with poor insulation. They also work better for open floor plans where air must travel between connected spaces.
| Room Size | Recommended BTU | Required Voltage | Typical Use Case |
|---|---|---|---|
| 150-250 sq ft | 6,000-9,000 BTU | 110V or 220V | Small bedroom, office |
| 250-400 sq ft | 9,000-12,000 BTU | 110V or 220V | Large bedroom, garage |
| 400-600 sq ft | 12,000-18,000 BTU | 220V only | Great room, large garage |
| 600-1,000 sq ft | 18,000-24,000 BTU | 220V only | Open concept living |
| 1,000+ sq ft | 24,000-36,000 BTU | 220V only | Whole floor, multi-room |
Standard BTU calculations assume 8-foot ceilings. Vaulted ceilings or rooms with loft spaces increase your BTU requirements by 10-20%.
Hot climates need roughly 20-30 BTU per square foot. Cold climates may require specialized cold-climate heat pumps regardless of voltage choice. Moderate climates can use 20 BTU per square foot as a baseline.
South-facing rooms with large windows absorb more heat and need additional capacity. Garages without insulation demand the most powerful units relative to their square footage. Our guide to the best mini split for garage cooling covers these special considerations in detail.
Cold climate performance separates adequate heat pumps from exceptional ones when temperatures drop below freezing. Voltage choice significantly affects this capability.
220V mini splits typically include cold-climate or hyper-heating technology that maintains output at temperatures as low as -22°F (-30°C). The larger compressors and more robust electrical systems handle the increased workload of extracting heat from extremely cold air.
110V mini splits generally lose heating capacity below 5°F (-15°C). Some units stop functioning entirely at 0°F or switch to inefficient auxiliary heating modes that drive up electricity consumption.
The difference matters most in northern climates where winter temperatures regularly drop below 20°F. Forum discussions reveal homeowners in Minnesota, Wisconsin, and Canada regretting 110V purchases after discovering heating inadequacy during January cold snaps.
If you live in USDA hardiness zones 6 or below, strongly consider 220V systems rated for low-temperature operation. The upfront investment prevents discomfort and emergency heating costs later.
Total cost of ownership includes purchase price, installation expenses, and ongoing operating costs. Each voltage option carries different trade-offs across these categories.
110V mini splits cost $800-1,500 for quality single-zone units. Installation adds $0-300 for DIY installations or $300-800 if you hire help for mounting and refrigerant connections.
220V mini splits start at $1,000 for basic 9,000 BTU models and reach $3,000+ for high-efficiency 24,000+ BTU systems. Installation costs $800-2,500 depending on electrical complexity and local labor rates.
Professional 220V installation typically runs $500-1,500 for the electrical work alone. Factors affecting price include:
Some homeowners save money by hiring separate HVAC and electrical contractors. The HVAC technician handles refrigerant and mounting while the electrician manages the 220V circuit. This approach can reduce total costs by 20-30% compared to full-service HVAC companies.
Operating costs depend on local electricity rates, climate severity, and usage patterns. At $0.13 per kWh national average, expect monthly costs of:
Efficiency advantages of 220V units typically save 5-10% on electricity compared to equivalent 110V capacity. However, the real savings come from right-sizing your system. An appropriately sized 220V unit costs less to operate than multiple 110V units covering the same space.
Break-even analysis shows that the higher installation cost of 220V systems typically pays back within 3-5 years through operational efficiency and avoiding the need for multiple units in larger spaces.
110V mini splits excel in specific scenarios where convenience and cost outweigh maximum efficiency needs.
Choose 110V when:
Garage workshops, home offices, spare bedrooms, and small guest cottages represent ideal 110V applications. These spaces benefit from targeted climate control without the infrastructure investment of 220V systems.
Budget-conscious homeowners also favor 110V for single-room projects. The lower upfront cost allows you to test mini split technology before committing to whole-home systems.
220V mini splits provide the power and efficiency needed for serious climate control in larger spaces or demanding conditions.
Choose 220V when:
Whole-home installations, large open-concept living areas, and primary heating applications demand 220V systems. The additional capacity and cold-weather performance justify the installation investment for these use cases.
Future expansion represents another key factor. Many 220V outdoor units support multiple indoor heads, allowing you to add zones later without replacing equipment. 110V systems rarely offer this expandability.
For spaces under 400 square feet with existing outlets, 110V offers easier installation and lower upfront cost. For larger spaces, cold climates, or maximum efficiency, 220V performs better despite higher installation costs. The best voltage depends on your specific space size, climate, and electrical infrastructure.
An 18,000 BTU mini split requires 220V power. The amperage draw at 110V would exceed safe circuit limits. All 18,000 BTU and larger mini splits operate on 220V circuits exclusively.
240V mini splits offer higher BTU capacity, better cold-climate performance, and slightly improved efficiency. 120V mini splits provide easier DIY installation and lower upfront costs for small spaces. Neither is universally better; the right choice depends on your room size and installation constraints.
110V mini splits plug into standard three-prong outlets on dedicated 15-amp or 20-amp circuits. 220V mini splits require special outlets and dedicated circuits with double-pole breakers. Never plug a 220V unit into a standard outlet.
The $5000 rule suggests multiplying your HVAC repair cost by the unit’s age. If the result exceeds $5000, replacement makes more financial sense than repair. For example, a $800 repair on a 7-year-old unit equals $5600, indicating replacement is preferable.
220V mini splits are 5-10% more efficient per BTU of output compared to 110V units. However, both voltage types cost similar amounts to operate for equivalent BTU ratings because electricity bills measure total wattage consumption, not voltage alone.
The 110V vs 220V mini split decision ultimately comes down to your space size, electrical infrastructure, and climate conditions. 110V units serve small spaces under 400 square feet with convenient plug-and-play installation. 220V systems handle larger areas, cold climates, and multi-zone configurations with superior long-term efficiency.
Assess your electrical panel capacity before committing to 220V. The additional installation cost of $500-1,500 often pays back within 3-5 years through operational efficiency and avoiding multiple unit purchases.
For most homeowners, the decision framework is simple: spaces under 400 sq ft suit 110V; larger spaces or cold climates demand 220V. Whatever voltage you choose, proper sizing ensures comfort and efficiency. Compare your needs against our mini split vs central air comparison if you are still deciding between HVAC system types for your home in 2026.